How to Automatically Render a Clipcat Video with Zapier (in 2025)
Contents
Automated video generation is a transformative approach to content creation. Rather than spending hours manually editing videos, adding text and animations, and iterating through countless versions, you can use a single versatile template that automatically renders videos on demand.
Zapier elevates this process by serving as a powerful workflow automation platform that seamlessly connects different apps. By enabling complex, code-free workflows, the tool allows you to trigger video renders based on schedules or events, dramatically reducing repetitive manual work and optimizing your resources.
Combining the functionalities of Clipcat and Zapier can be powerful for use cases like:
- Recent real estate listings
- Watermarked work samples
- Dynamic product or service reviews
- Latest brand deals
- Eye-catching product guides
Ready to streamline your video production? This tutorial will walk you through joining Zapier and Clipcat's capabilities to automatically render your first video—no coding required.
What You Will Create
Templates cut down on the manual work of repetitive video production, but workflow automation can take it to the next level by automatically rendering videos in response to a time or event. The tools you’ll need for this simple task are:
- Clipcat : To design templates and render animated videos in the cloud
- Zapier : To trigger actions in different programs based in pre-specified commands
By the end of the tutorial, you should be able to produce customized videos like this:
How to Autogenerate Clipcat Videos in a Zap
Workflow automation transforms complex, time-consuming processes into efficient, hands-off solutions. When it comes to video generation, a well-designed Zap can dramatically simplify your content creation workflow. While a basic two-step Zap can trigger video rendering, the true power lies in its flexibility—you can easily expand the workflow to include additional steps like automated data retrieval, video storage, data manipulation, or even immediate social media distribution.
Let's break down how to create a Zap that seamlessly triggers video generation in Clipcat, turning repetitive tasks into a smooth, automated workflow.
Step 1 - Design a Clipcat Video Template
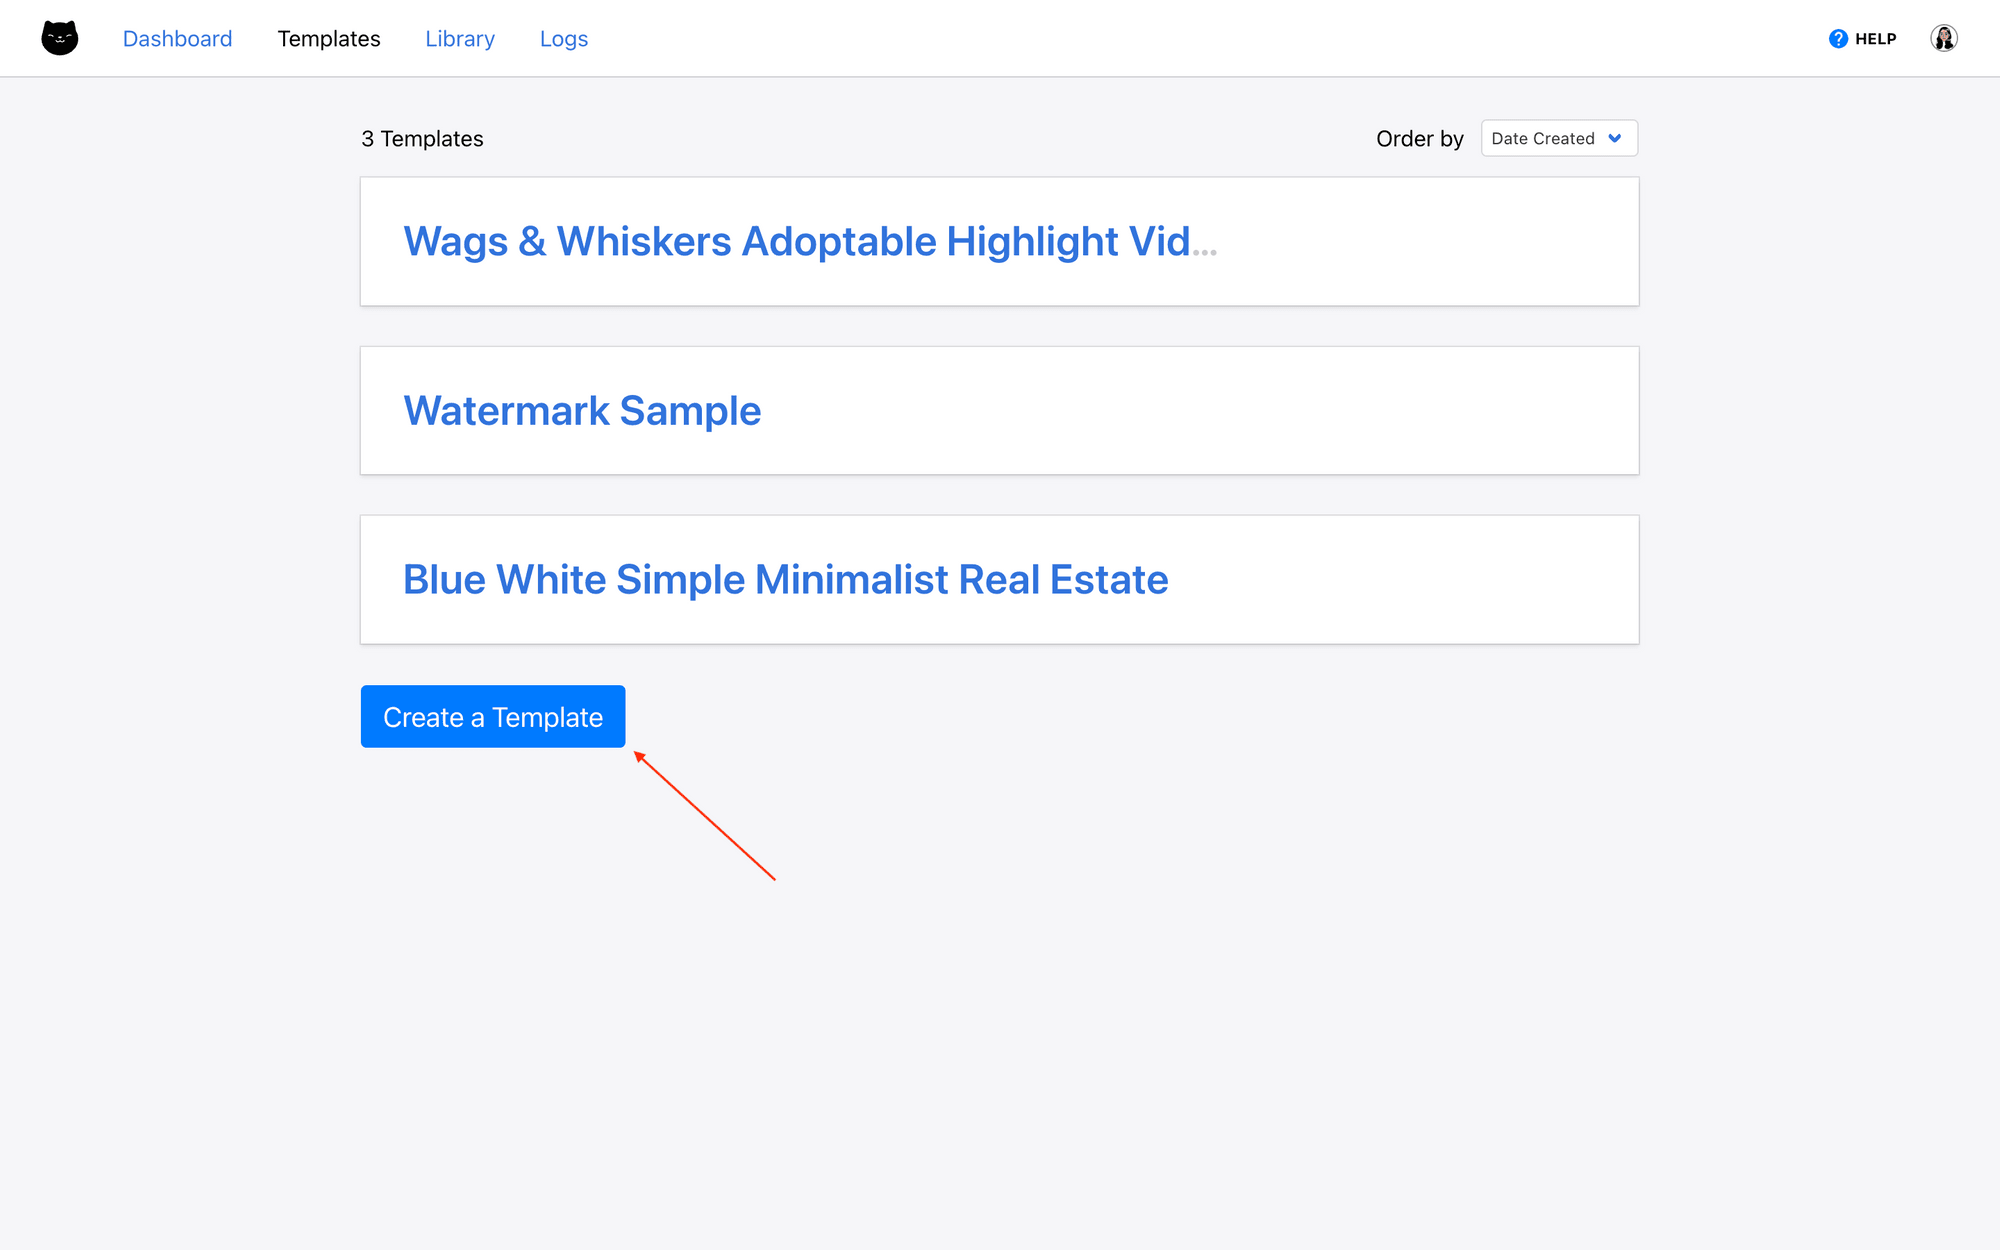
Log into your Clipcat account (or sign up for a free trial—no credit card required! 🎉) and navigate to the Templates tab. Click Create a Template.
You’ll now be on a template page, where you can access the editor, use the API console, and view rendered videos.
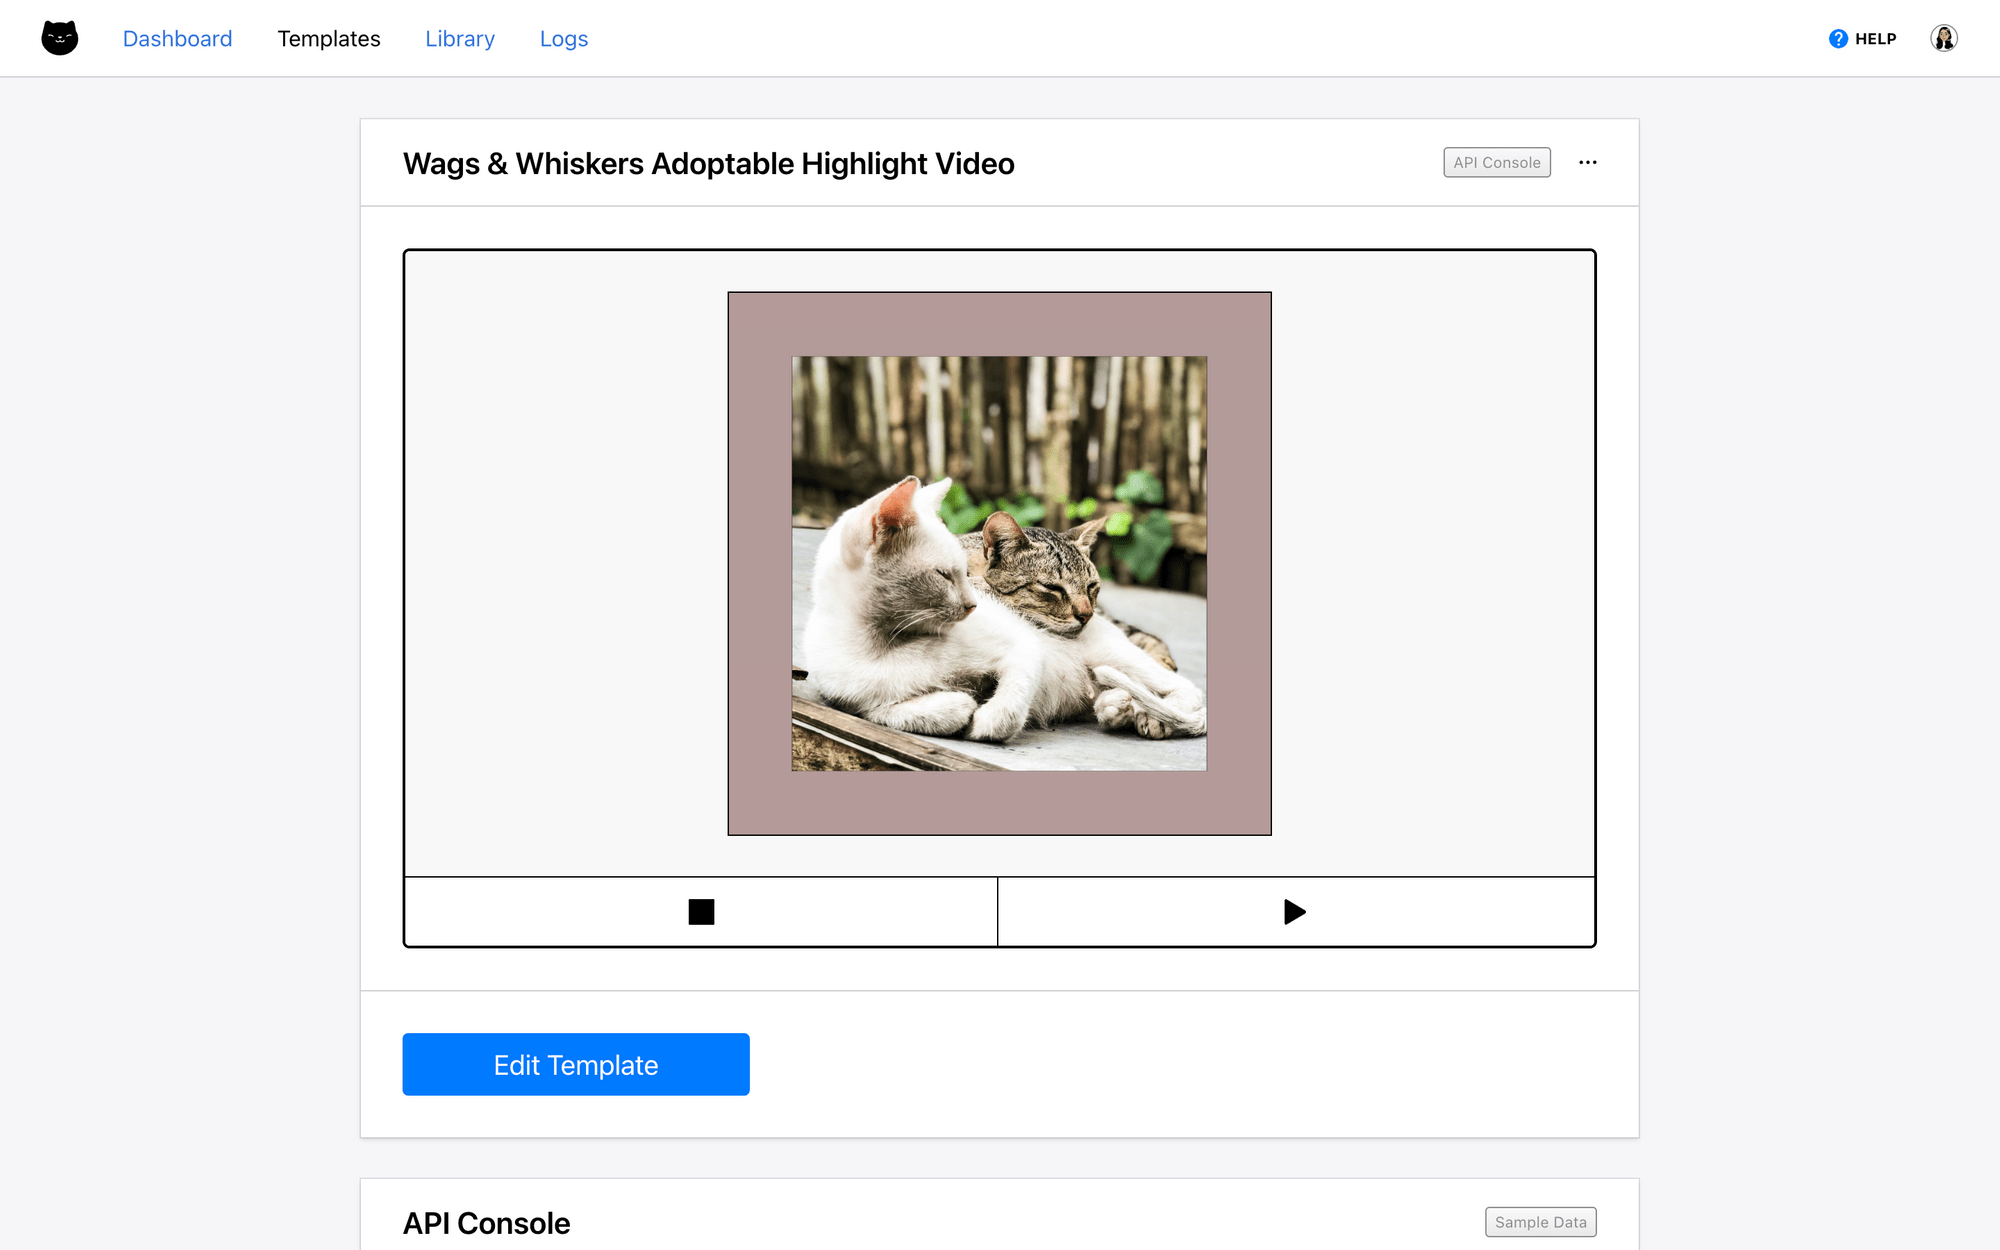
Click Edit Template to load the editor, where you can add scenes, objects, text, and animations to your video.

Meow Memo 🐱: Learn more about customizing your Clipcat templates in this easy guide!
When you’re done designing your template, exit the editor. Any changes will be auto-saved.
Step 2 - Create a Zap with a Trigger
Once your template is ready, the next step is to create a Zap that connects the template to a trigger and data source.
Log into your Zapier account, and create a new Zap. You should now be on the editor, where you can add events and set each action up.

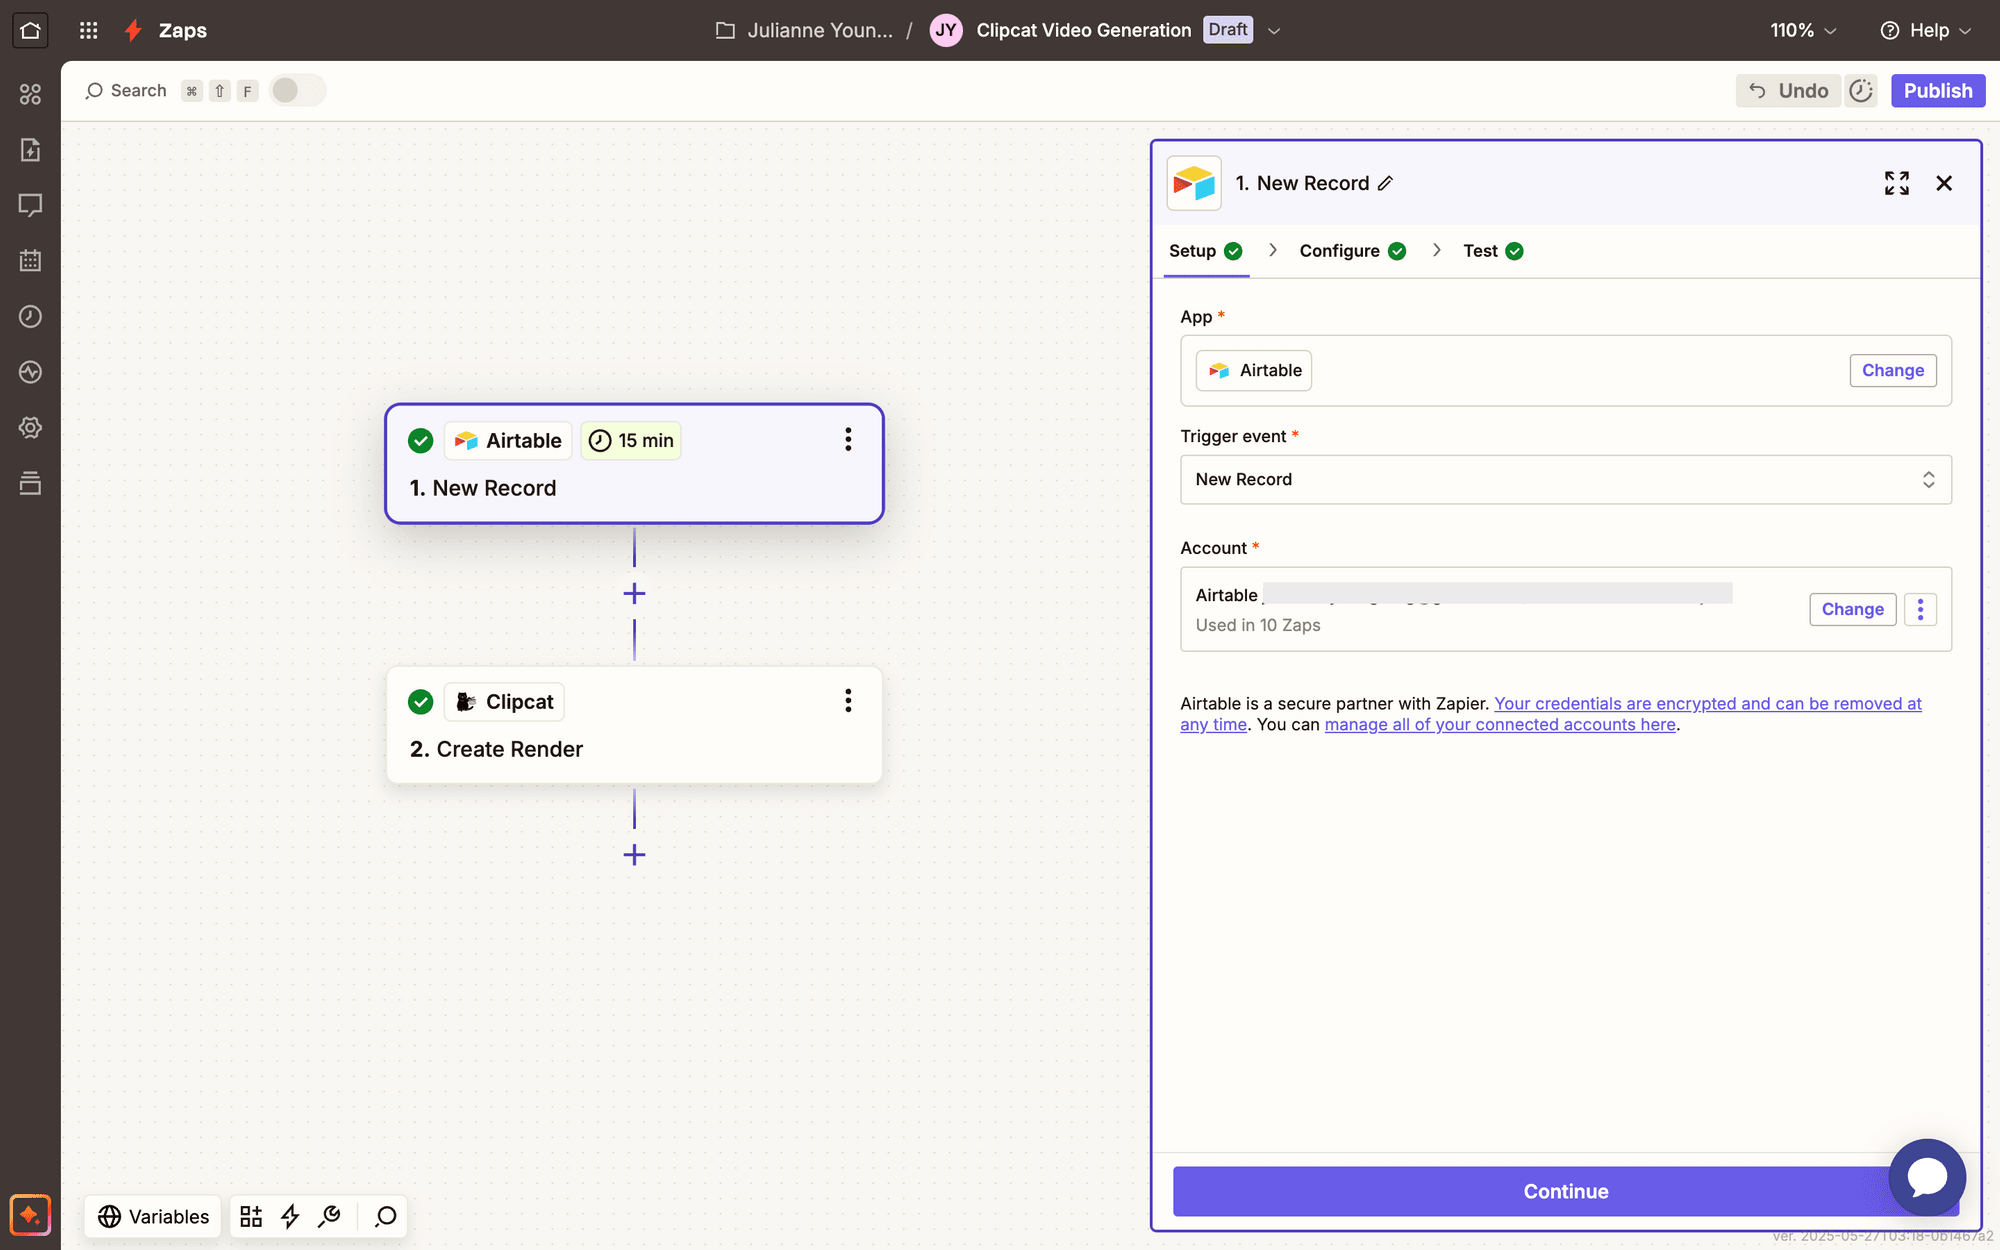
Add a trigger, which is the event that starts your Zap. This can be a scheduled time or a specific action.
When designing your Zap, consider the dynamic data you want in your video. In our example, we'll use Airtable as a data source, selecting New Record as the trigger. This pulls in the latest information whenever a new entry is added.
The magic happens when Zapier pulls fresh data and feeds it directly into your Clipcat template, creating videos that update themselves with minimal effort. By mapping your data fields carefully, you can transform static templates into dynamic, data-driven visual content.
Finish setting up your trigger, and test it to ensure you have any necessary data available.
Step 3 - Add a Create Render Step
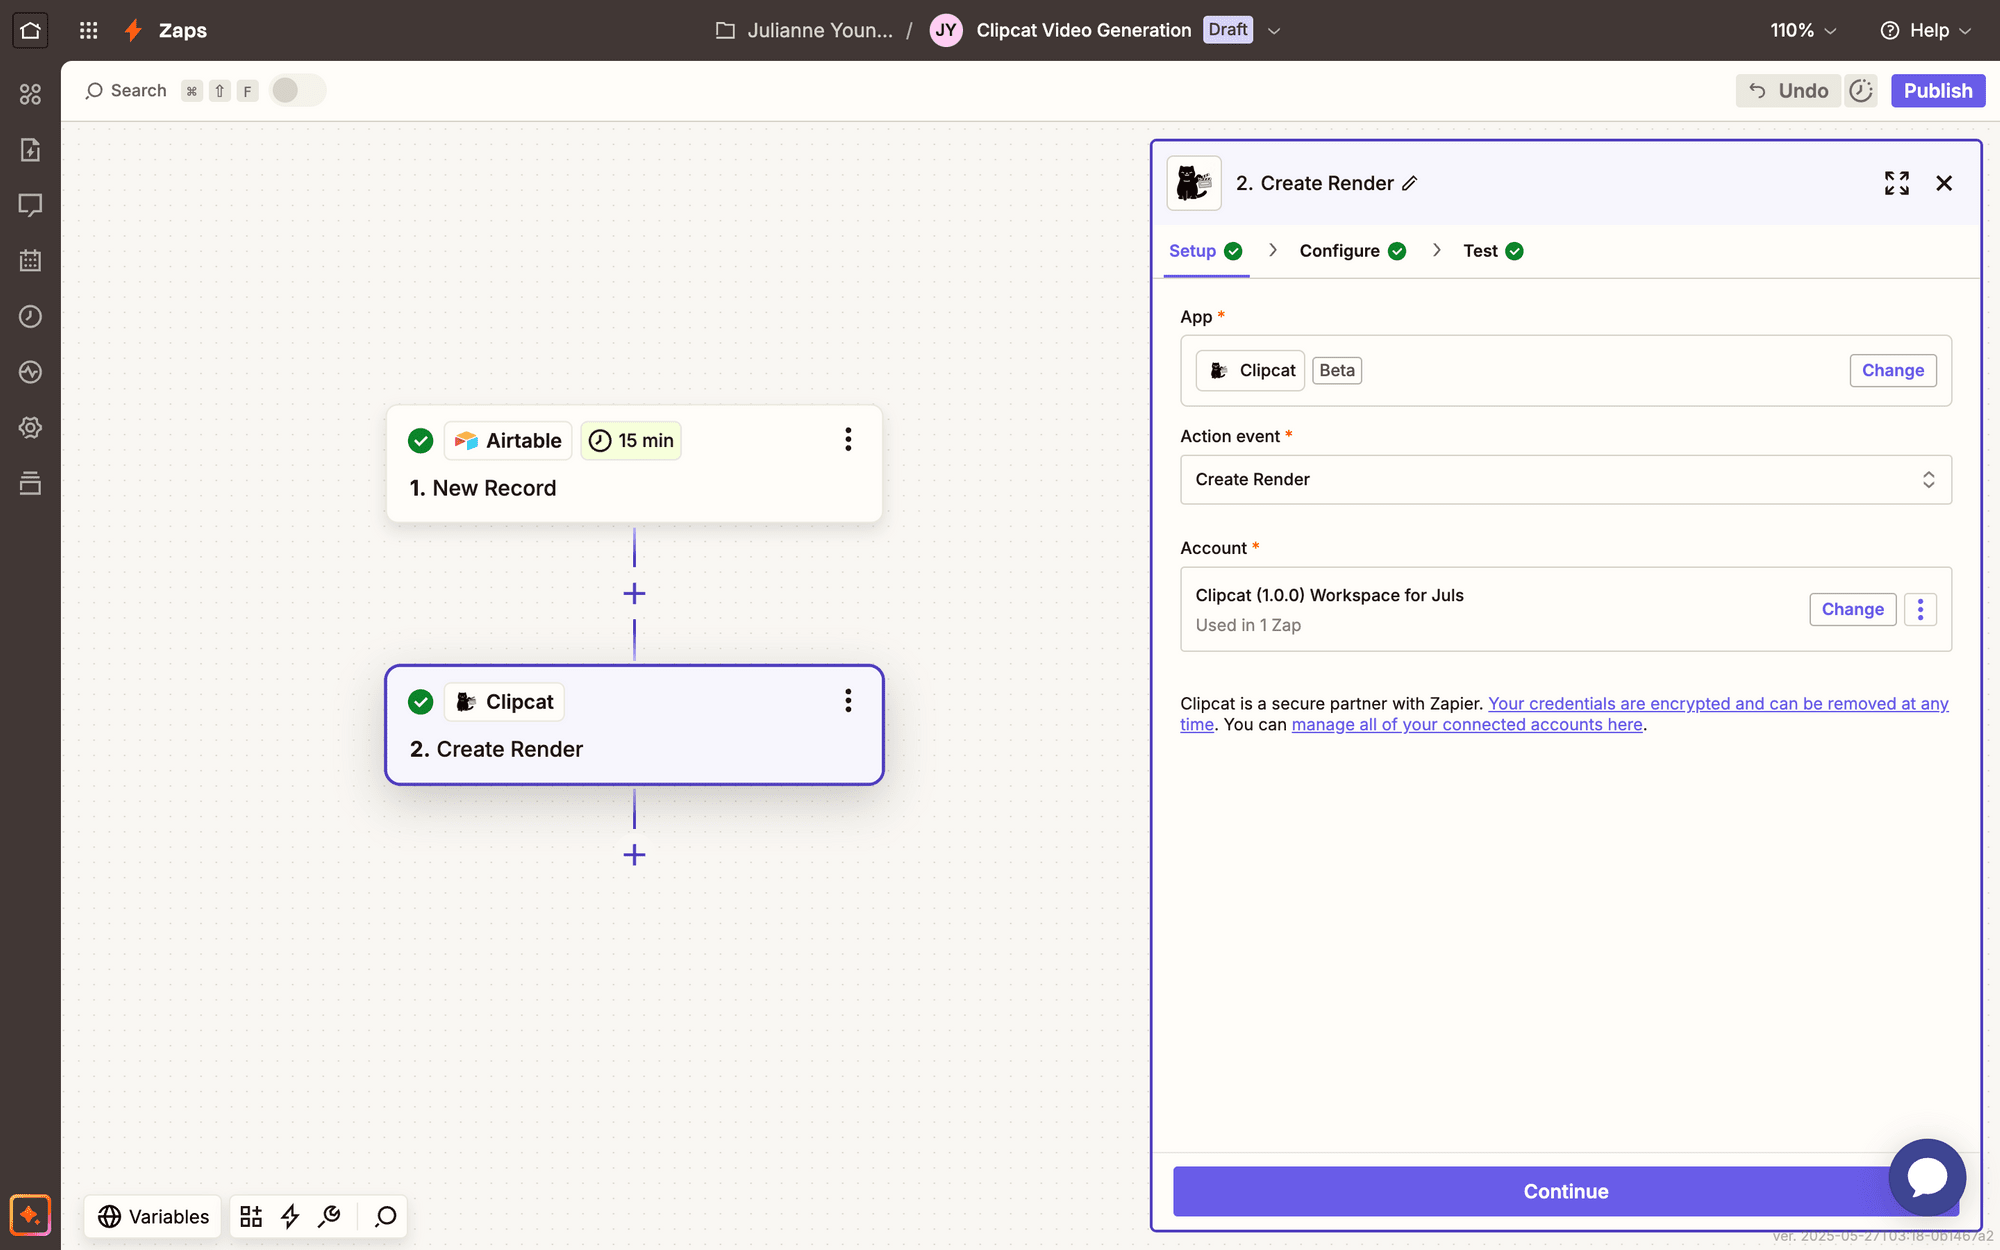
Add a new step to your Zap, choosing Clipcat as the app. You’ll be asked to connect your Clipcat account using an API key, which can be found in the API Keys page when clicking your profile button in the app.
Once your account is connected, select Create Render as the event
Move onto configuration. Select your template, then map any dynamic data fields to their corresponding template layers.
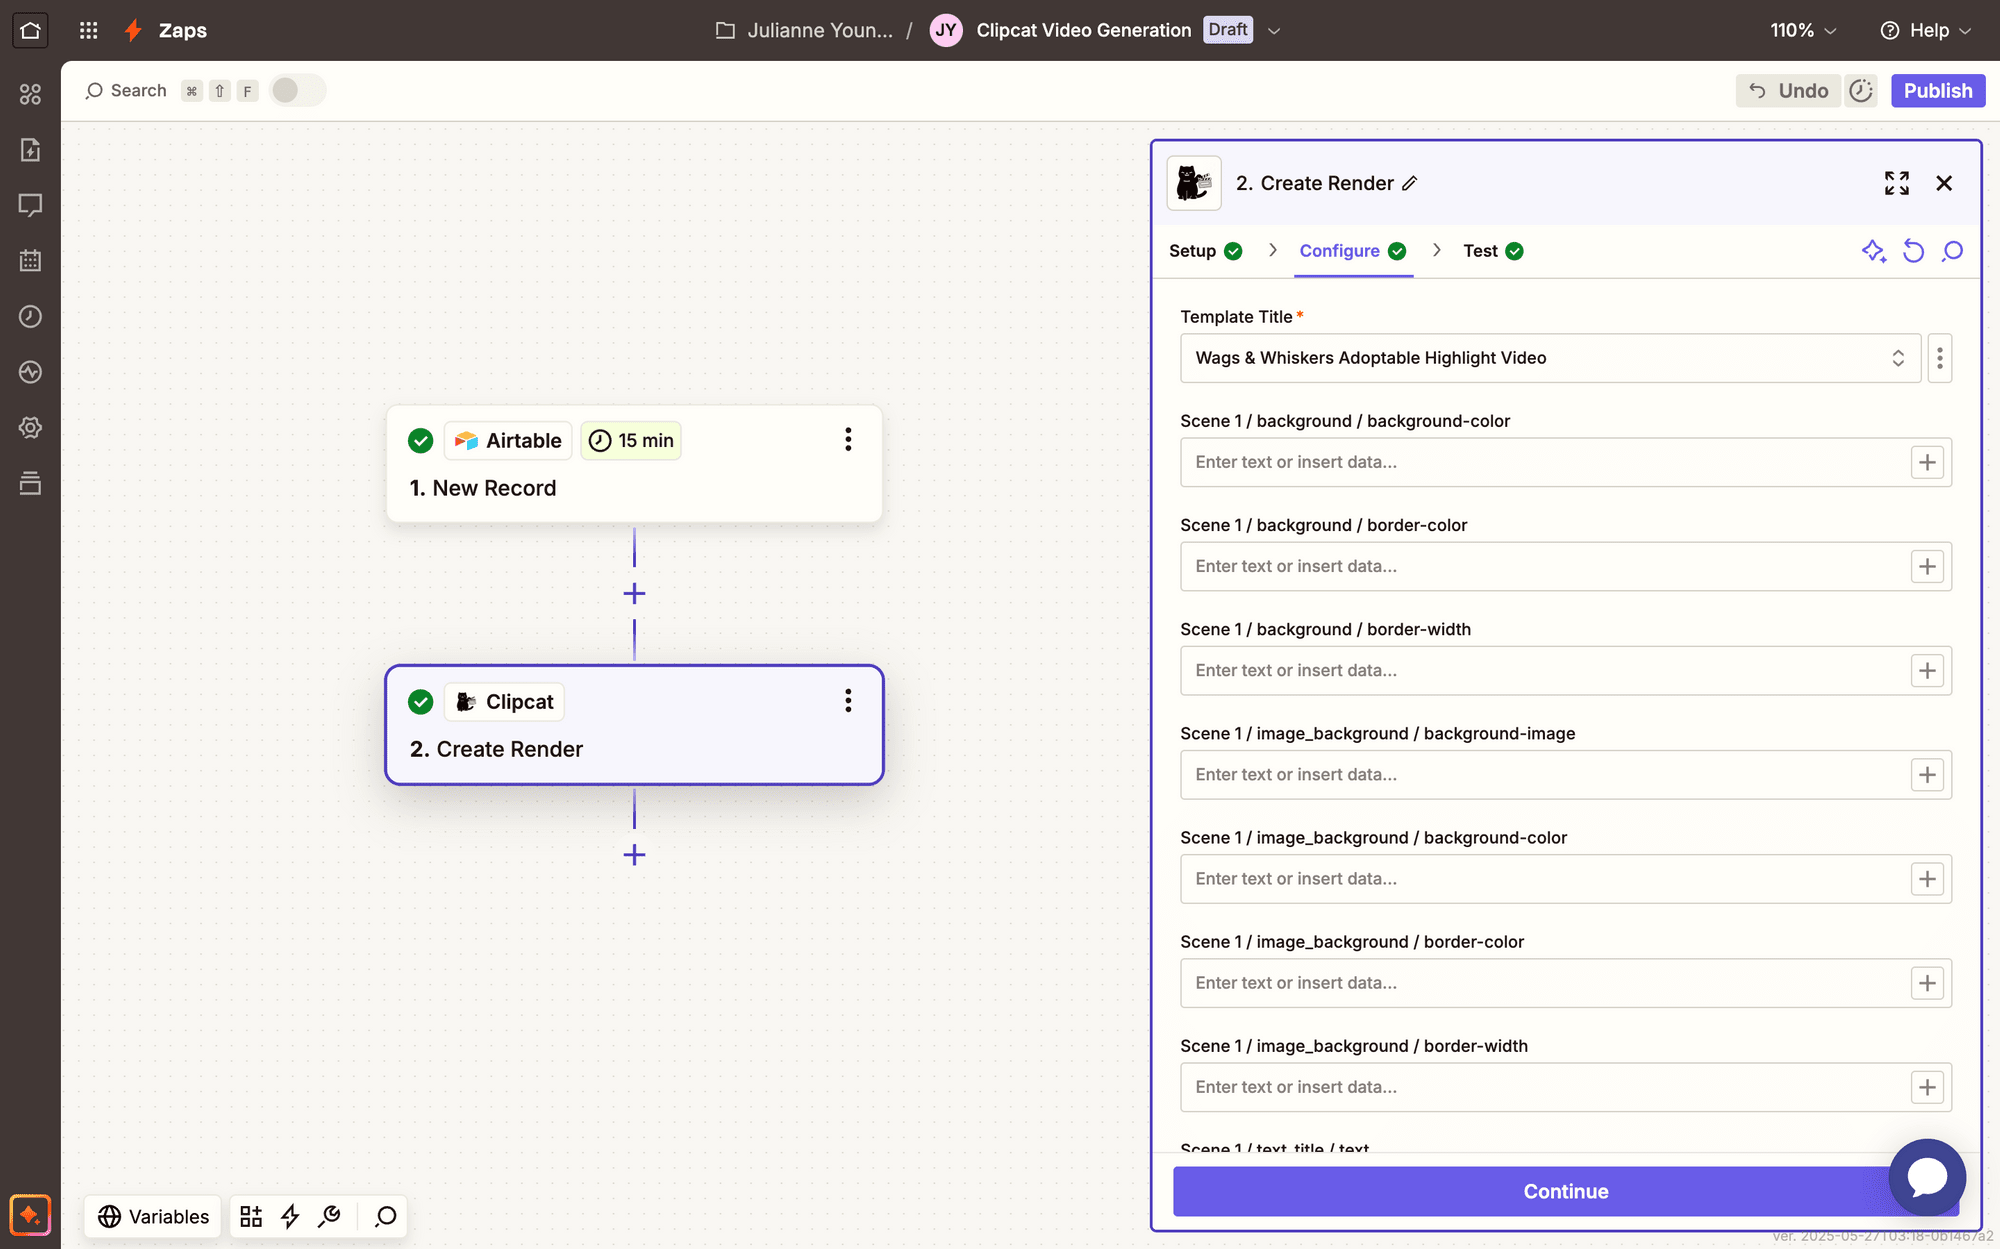
You can customize your template in a wide variety of ways beyond input text and images—colors, dimensions, fonts, and more.
When you’re done with your template configuration, click Continue.
Step 4 - Test and Publish
Now, all that’s left to do is to make sure your Zap works as intended. Test your render step, and check to see if the output is to your liking. You’ll be able to view it in the output section of the Zap as well as in your Clipcat Log.
If you’re happy with the results, click Publish! This will take the Zap live so your videos can start being automatically rendered whenever the trigger is activated.
Conclusion
Automating video generation with Clipcat and Zapier is just the beginning of your workflow optimization journey. By removing the manual work, you've already saved significant time and energy. But if you want to get even more out of your automation, consider expanding the process to include:
- Cloud Storage : Automatically save rendered videos to Google Drive, Dropbox, or your preferred cloud storage service
- Social Media Distribution : Publish videos directly to platforms like Facebook, Instagram, or LinkedIn as soon as they're created
- Notifications : Send Slack messages or emails when new videos are created, keeping any stakeholders informed
Clipcat's flexible API and Zapier's extensive app connections mean your video automation can be as simple or complex as your workflow demands. Start simple, experiment, and watch your content creation process transform!