How to Generate Clipcat Videos From Google Sheets Data (Using a Zapier Task)
Contents
Creating compelling video content doesn't always mean elaborate, costly productions. Instead, businesses can leverage simple, templated approaches that enable scalable content generation—with automated workflows streamlining the entire process.
Video generation APIs like Clipcat are created to transform your content creation processes by taking the repetitive work off of your plate. And when integrated with a data source like Google Sheets, unique videos can be automatically created as you need them. Given that short-form videos are among the marketing assets that deliver the highest ROI, a workflow that enables quicker production can give you a major edge.
Using Google Sheets to trigger video generation runs can offer several benefits, such as:
- Rendering videos as data is added
- Rendering many videos at once
- Making it easy to systematically store data and video output
This tutorial shows how to kick off Clipcat video generation from new Google Sheets data using Zapier. With a simple automated workflow, you’ll be able to switch out the repetitive work in favor of a streamlined, scalable alternative.
Why Google Sheets?
Google Sheets is a cloud-based spreadsheet app included in the Google Workspace product suite. It enables users to create, edit, and collaborate on spreadsheets for free, making it an affordable alternative to many other data storage options.
While this program may not be able to handle complex data manipulation or bulky datasets, it’s suitable for many simpler use cases. The Sheets API also allows you to seamlessly integrate and send data between programs for a hands-free workflow.
Some ideal scenarios for generating Clipcat videos with Google Sheets data are:
- Teams seeking seamless integration with existing database or social media management tools
- Product inventory updates for e-commerce businesses, automatically creating promotional videos as new items are added
- Customer testimonial or case study video generation, pulling data from ongoing feedback consolidation sheets
Google Sheets’ features make it easy and accessible for simple use cases, but workflows that require more database capabilities might benefit from a heavier duty option, such as Airtable.
If your use case is a good candidate for spreadsheet-triggered video generation, you’re in luck—this guide’s process is straightforward and can be set up in minutes!
3 Steps to Generating Clipcat Videos From Google Sheets
Even without a native integration, you can connect Clipcat to Google Sheets with a workflow automation platform like Zapier. In a simple two-step zap, you’ll retrieve data from Google Sheets and then trigger a video render in Clipcat. Here’s how to set it up:
Step 1 - Design a Clipcat Template
Starting with a Clipcat template ensures you know what information you’ll need from your spreadsheet. Log into your Clipcat account (or sign up for a free trial—no credit card required! 🥳), and create a template.
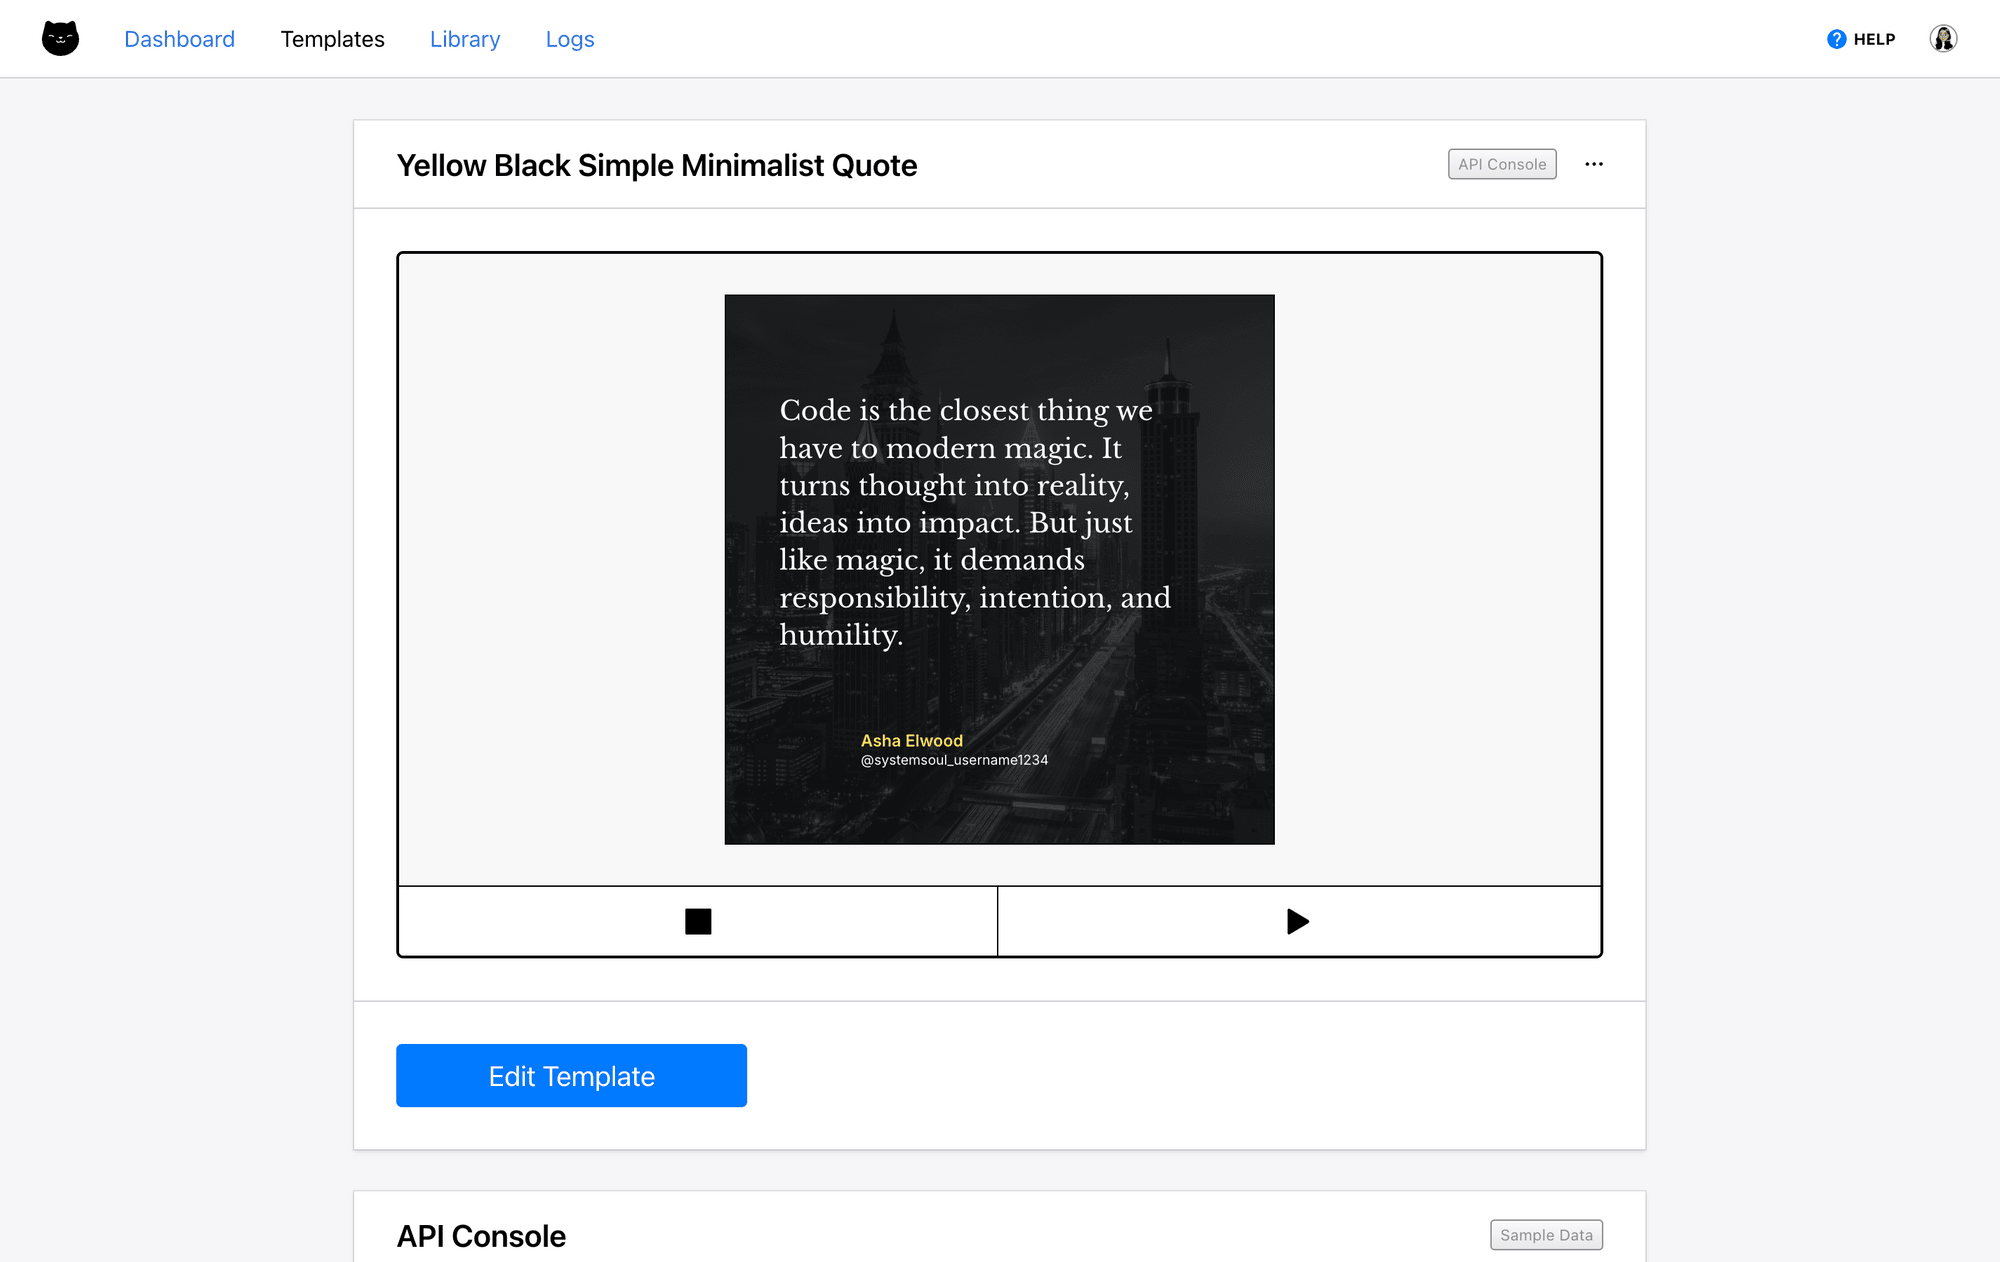
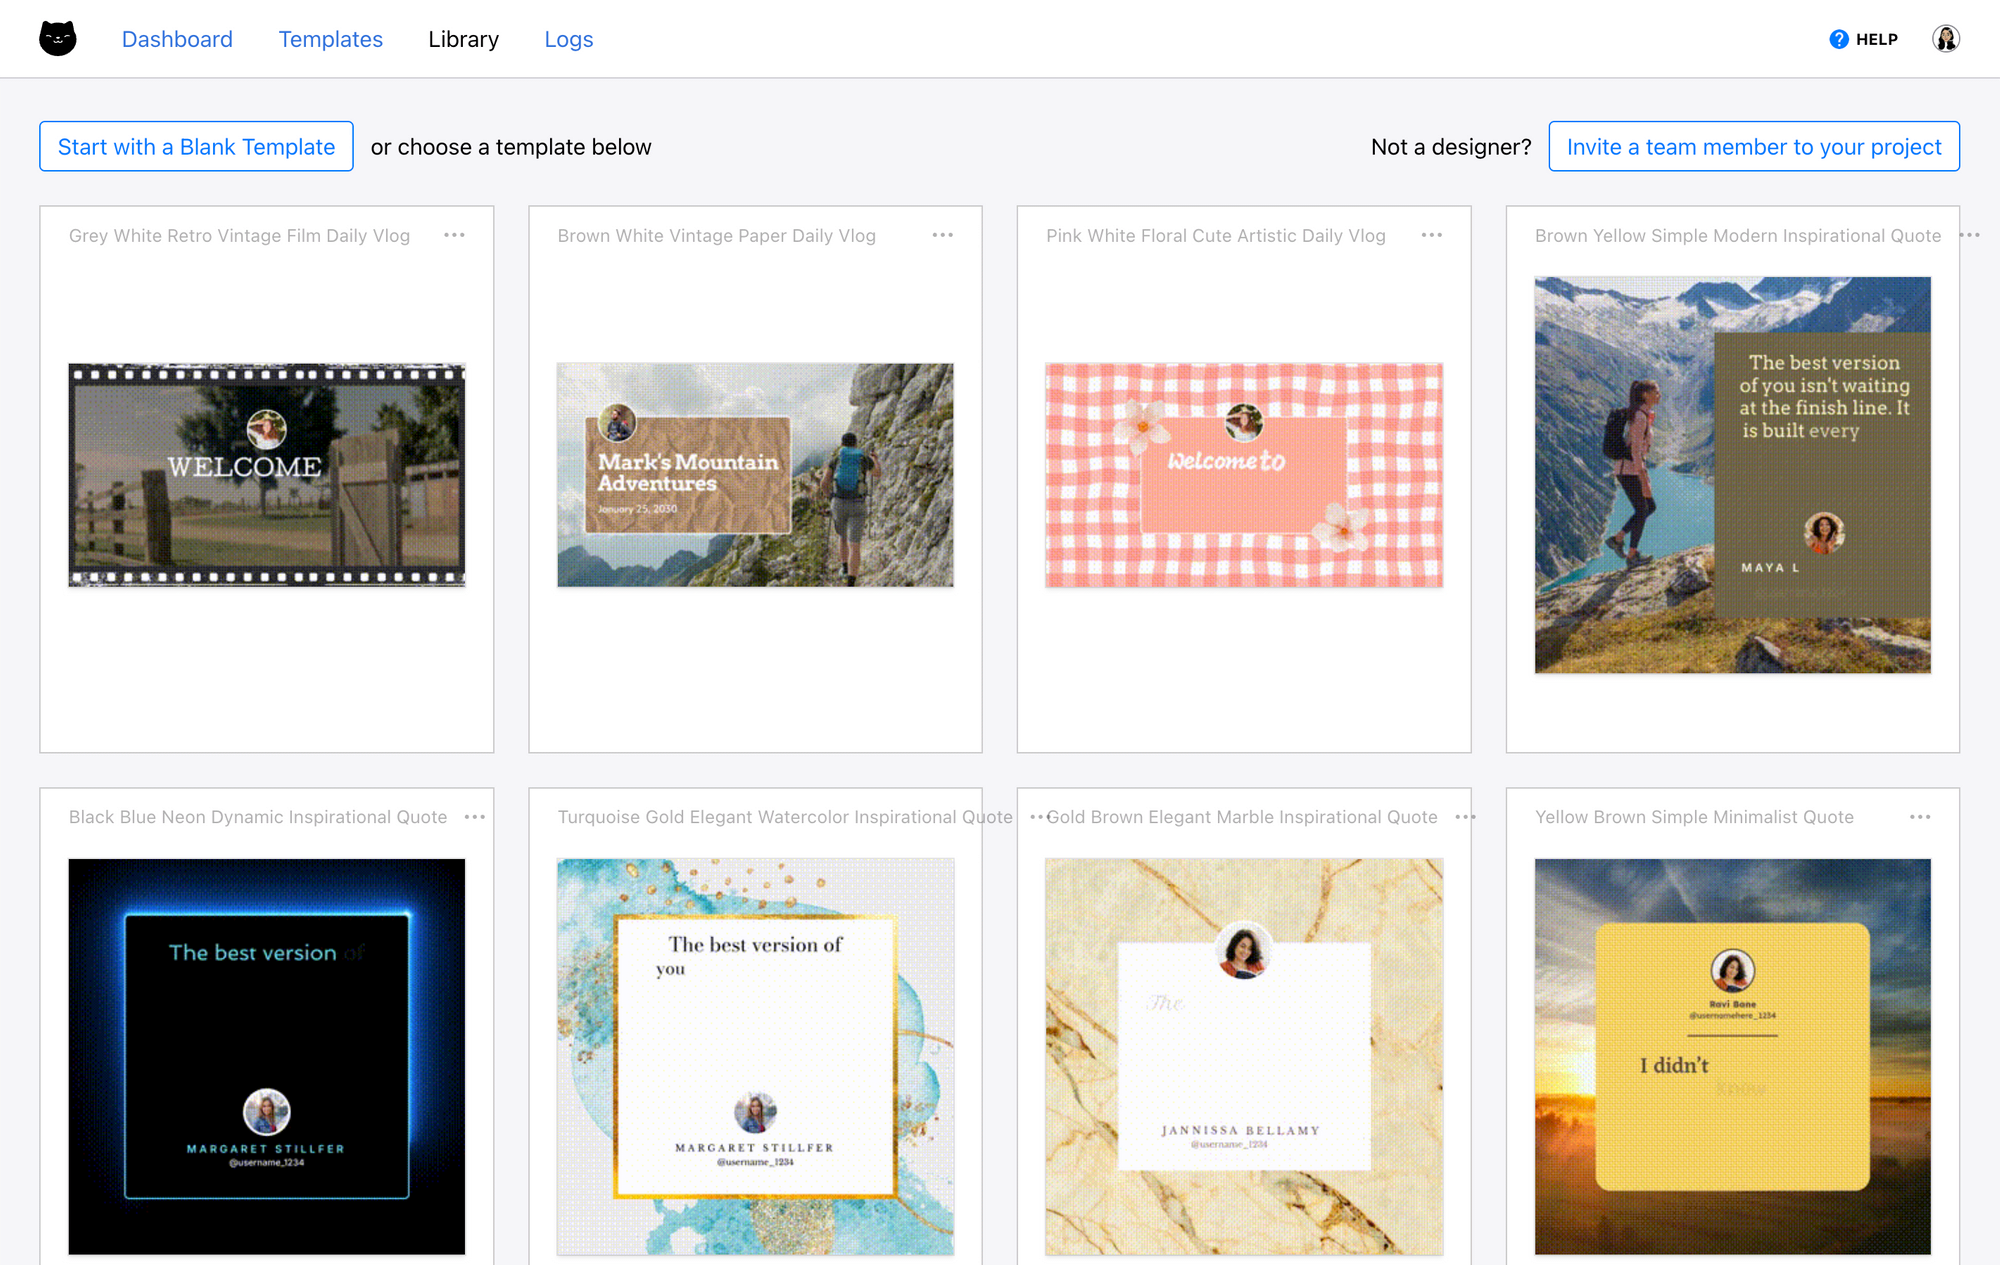
You can also visit the template library and add a pre-designed template to your account. We have a wide variety of options, from news summaries to product reviews!
Meow Memo 🐱: Psst! Want to try out the template we used in this article? Add it to your project here!
Once you’re on the template page, click Edit Template to enter the editor.
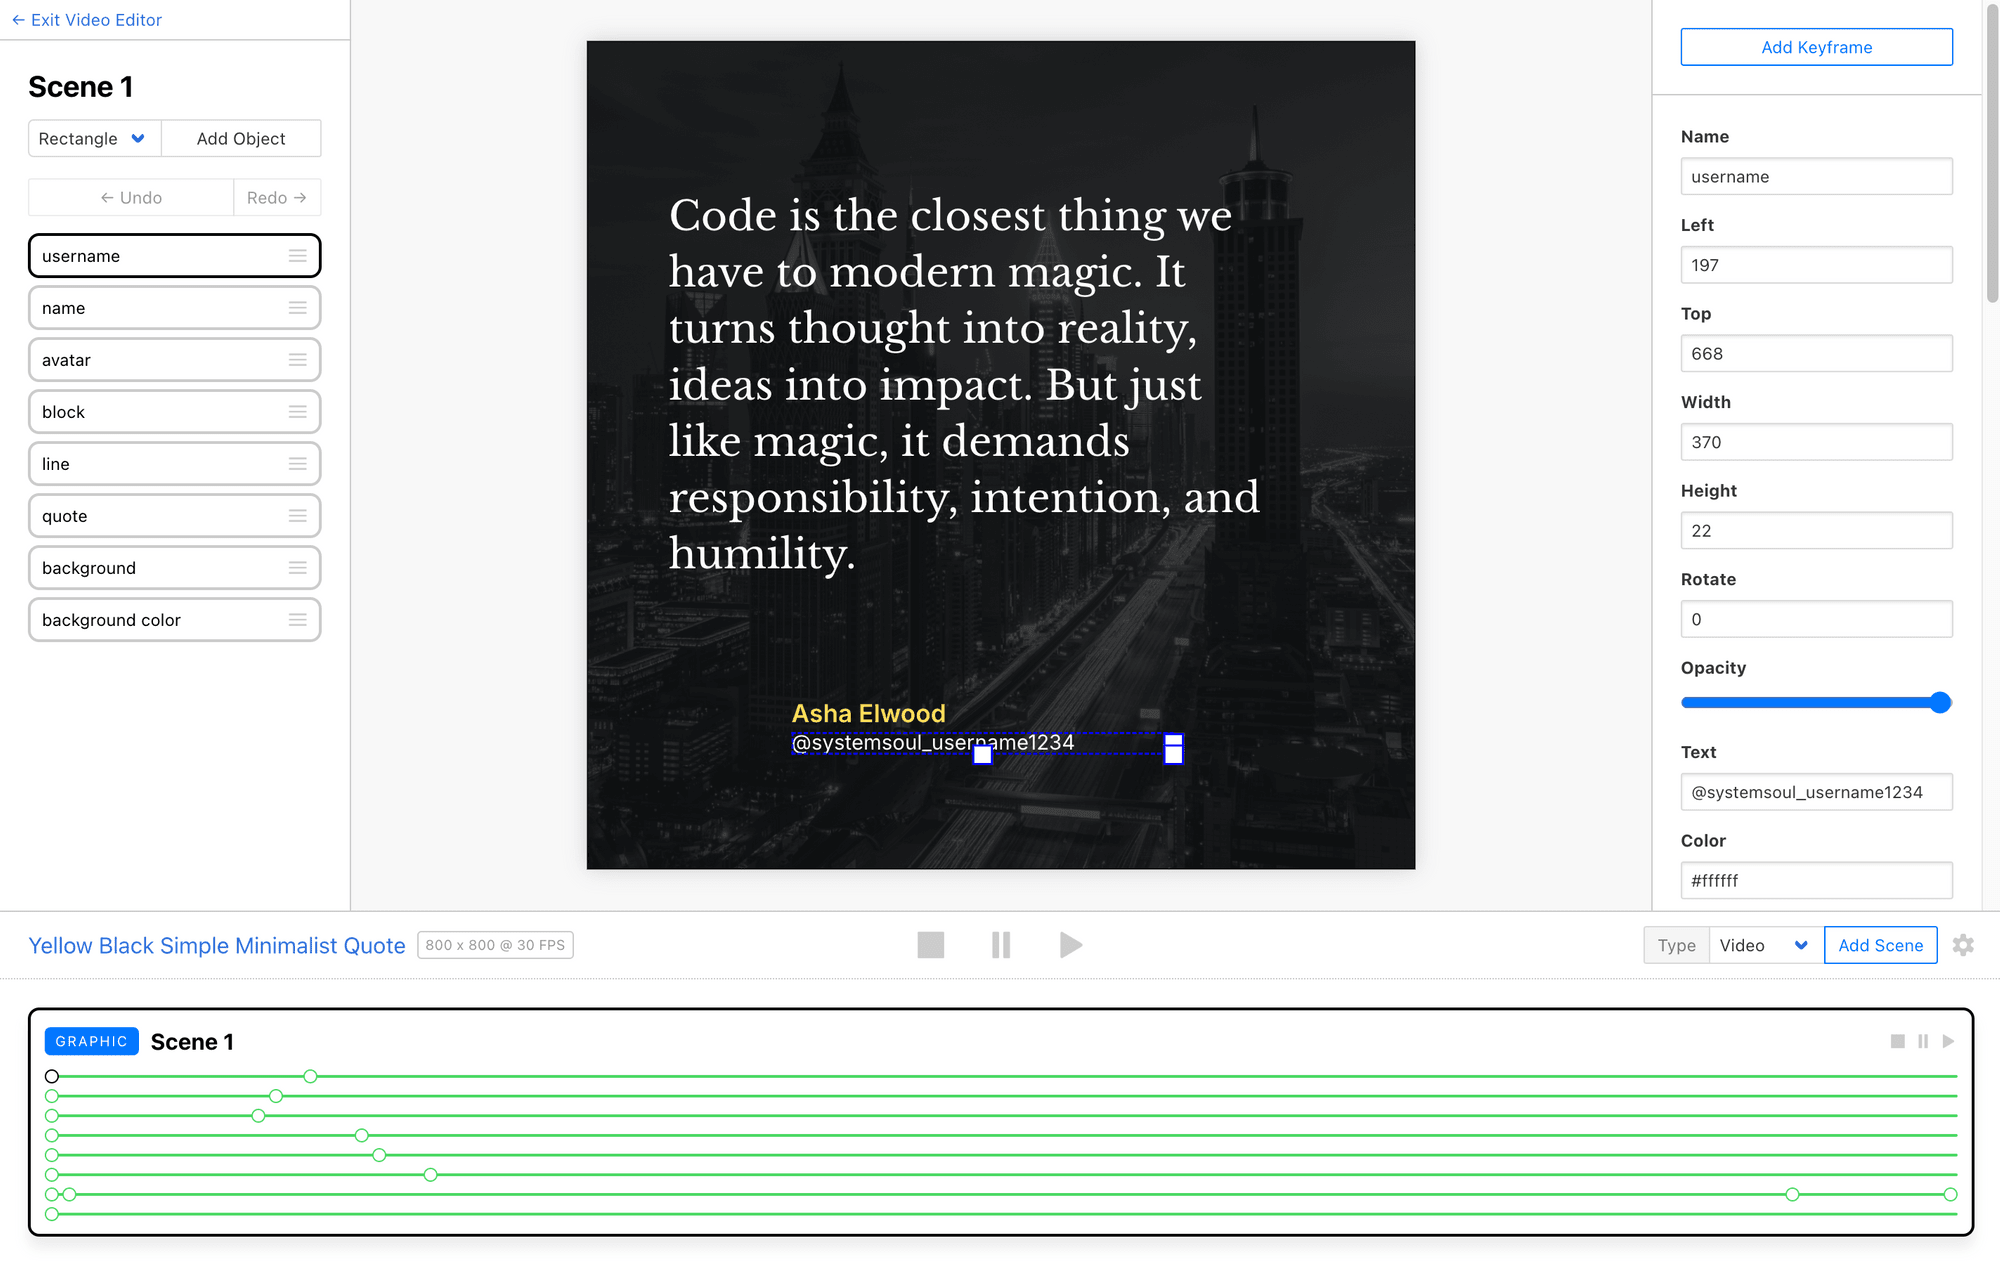
Customize it according to your needs, with as many scenes, objects, and keyframes as necessary.
Take note of the dynamic objects and modifications you want to have control over in different renders. These are data points you’ll have to store in your spreadsheet.
Meow Memo 🐱: New to Clipcat? Our guide to customizing a video template can help you get started.
Step 2 - Prepare Your Google Sheets Spreadsheet
Now, it’s time to set up your Google Sheets spreadsheet for generation. This means ensuring you have cells created for all necessary data points and the information is organized for generation.
Your spreadsheet can be as simple or complex as you want. In this tutorial, we’re using a single worksheet with a few columns of data—the project is not used for anything else.
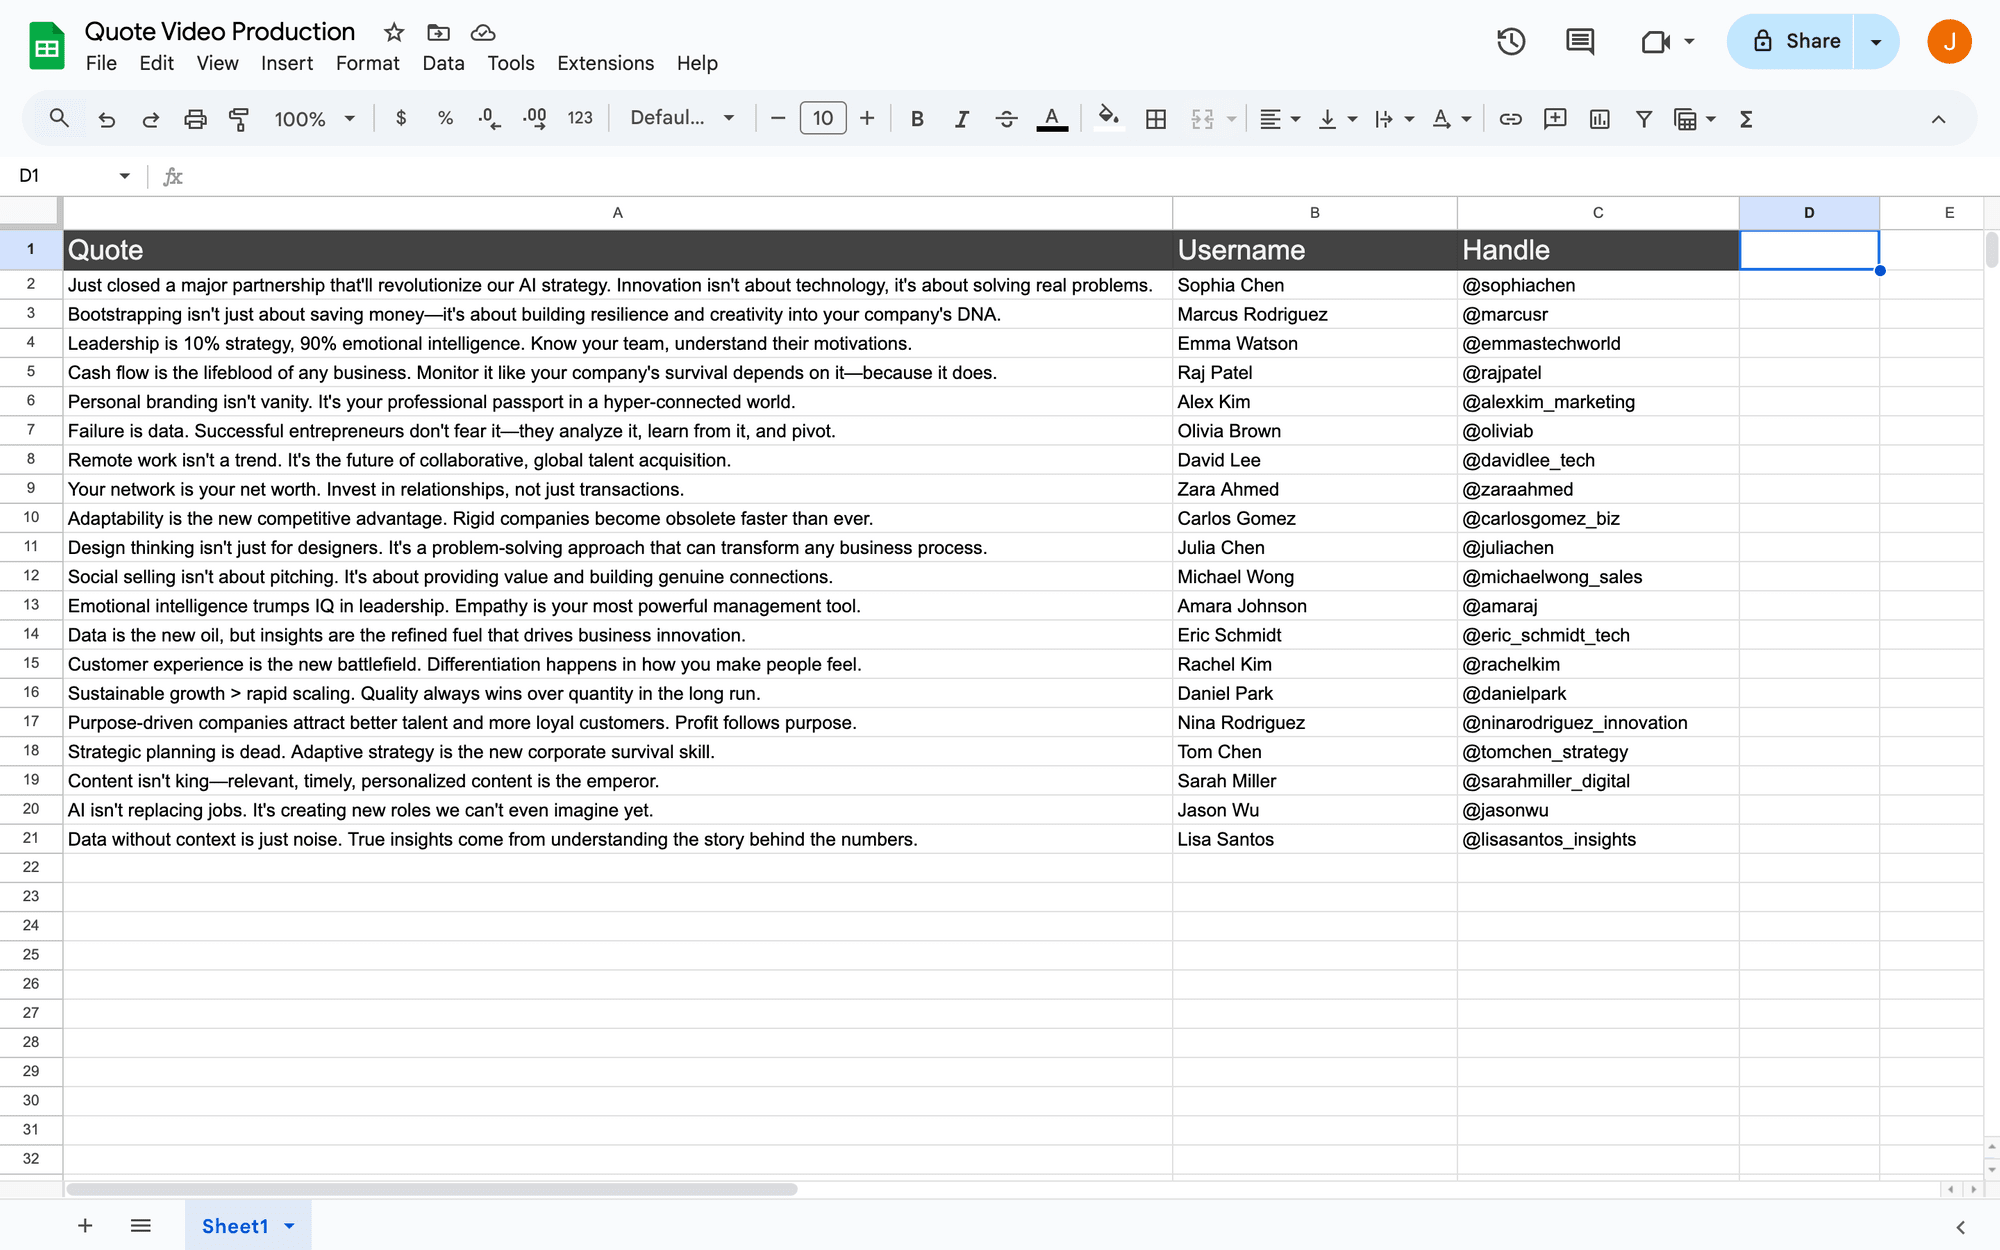
That said, you can certainly create a video production worksheet that consolidates data from others, creating a more complete workflow and making your data points easy to reference.
Meow Memo 🐱: The Sheets trigger we’ll be using to render videos in this tutorial is New Spreadsheet Row, which kicks off a generation run whenever a new row is added—even if the row is not complete. This means it’s most effective when paired with an automated data gathering or consolidation step that adds a complete row with very little margin for error every time.
Make sure you have at least one row of data ready for testing.
Step 3 - Set Up a Zap that Generates Videos
Now that your template and spreadsheet are ready, what’s left is to set up a zap that brings it all together. A simple two-step zap will retrieve new records from your Google Sheets spreadsheet, then create a render in Clipcat.
Log into Zapier dashboard, create a new zap, and set up the following events:
Trigger: New Spreadsheet Row in Google Sheets
Choose Google Sheets as the app and New Spreadsheet Row as the event. If your account isn’t connected yet, you will be prompted to do so.
Set up the action by choosing the correct spreadsheet and worksheet.
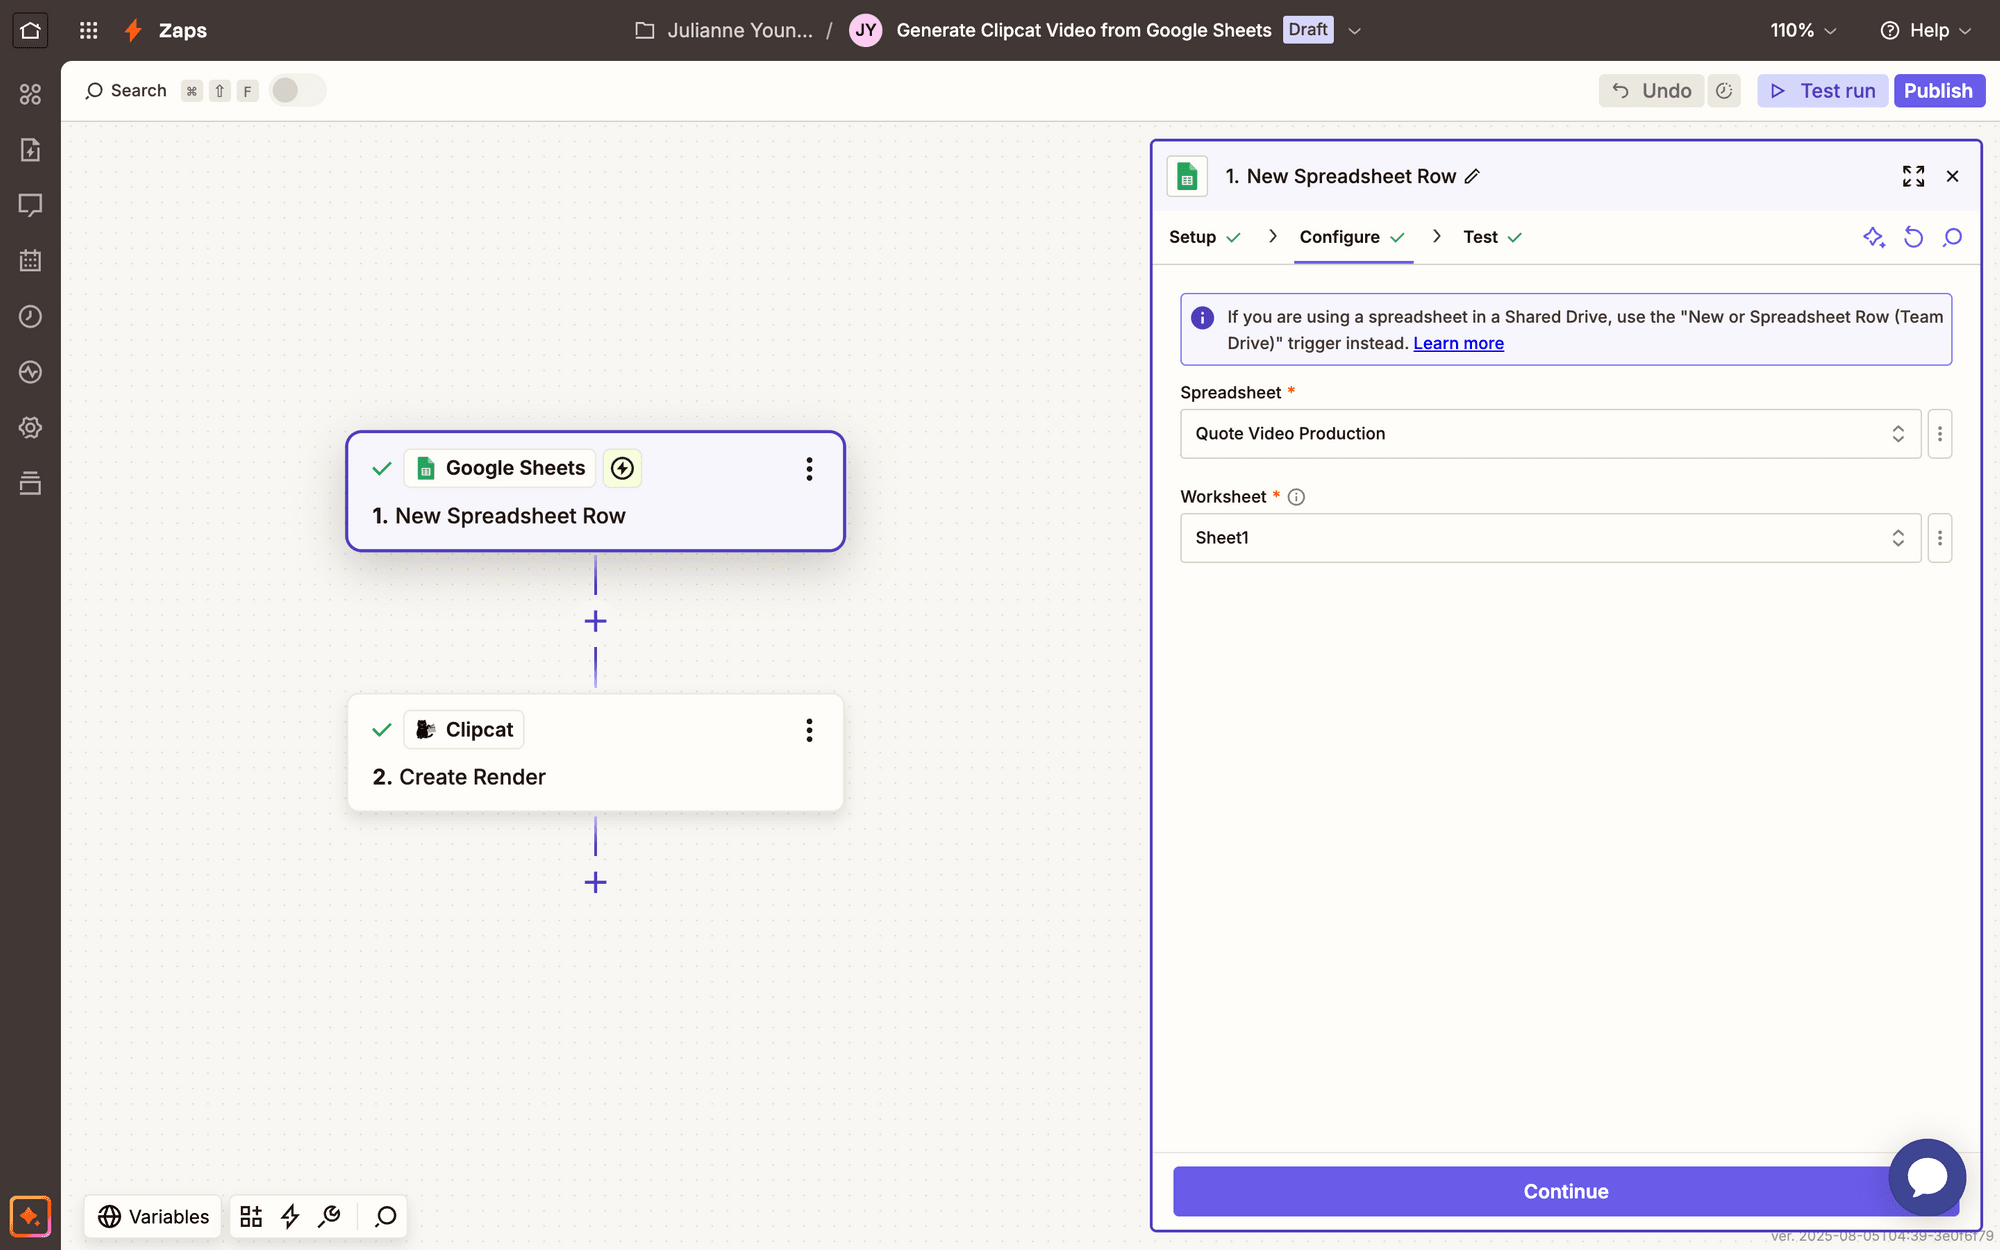
Then, test the action to ensure Zapier is able to find a spreadsheet row with data.
Action: Create Render in Clipcat
Choose Clipcat as the app and Create Render as the event. You’ll be asked to connect your Clipcat account using an API key, which can be found in the API Keys page when clicking your profile button in the app.
Configure the event by selecting your template, then mapping your Google Sheets data points to their corresponding Clipcat fields.
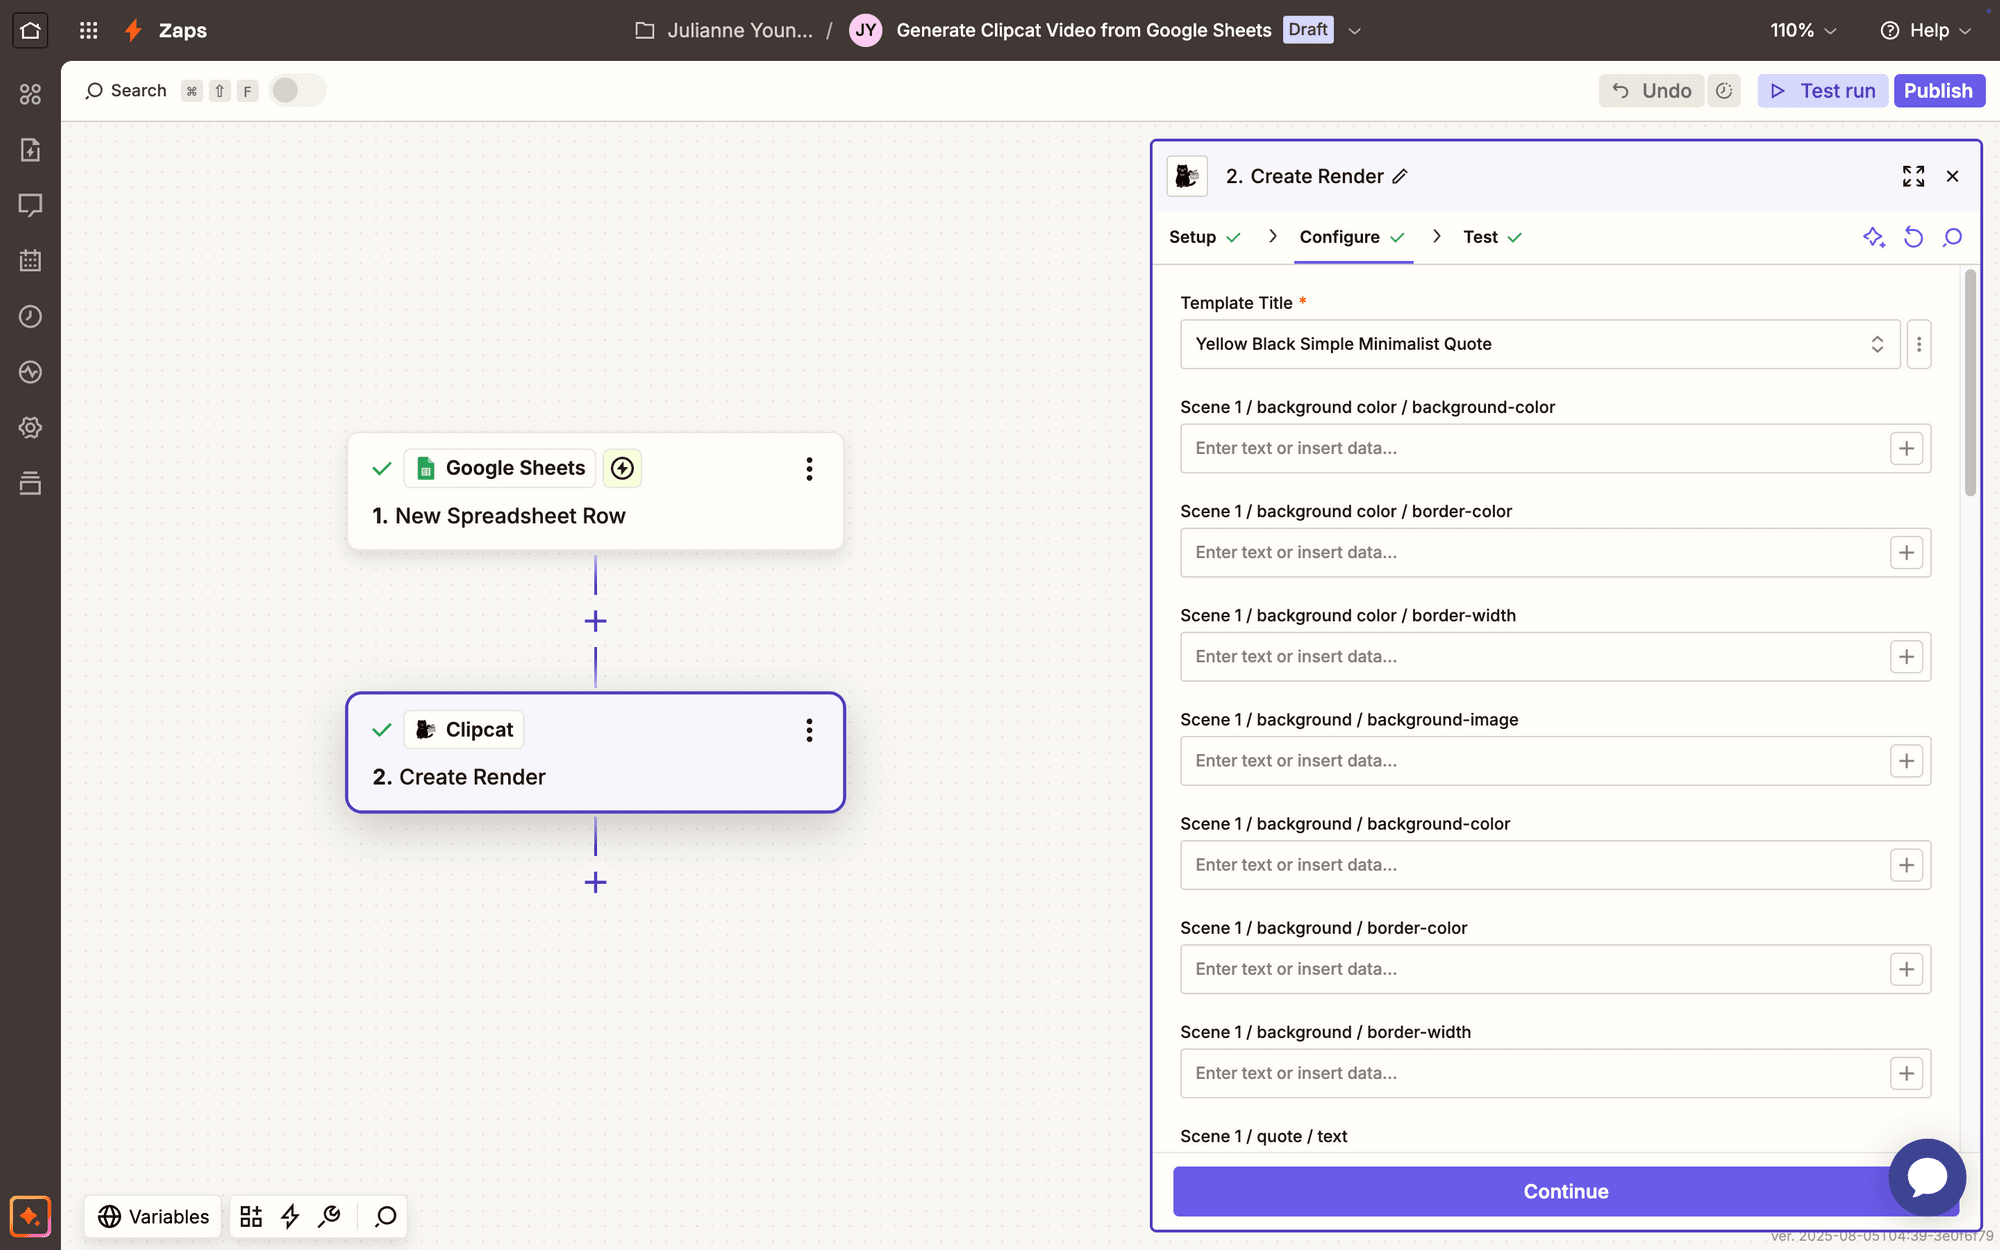
Test the action. A render should be sent to Clipcat, which you can view from your Logs.
That’s all to it!
Conclusion
Automating video creation doesn't have to be complex or expensive. With nocode tools like Clipcat, Google Sheets, and Zapier, you can transform your data into compelling videos in just a few simple steps. Save the manual video editing or time-consuming production processes for creative visions that need your personal touch!
Are you looking to transform your video workflow? Create your first template with Clipcat today and discover how easy and scalable it can be! Your creative energy doesn’t need to be put to rest—but we can make space for you to focus it on what matters.