How to Convert MP4 to GIF Using FFmpeg (Beginner-Friendly Guide)
Contents
If you’ve ever needed to turn a short MP4 clip into a looping GIF, maybe for a website preview, an automated report, or just something fun to share, FFmpeg is one of the best tools out there. It gives you full control over the whole process.
With FFmpeg, you can pick which part of the video you want to turn into a GIF, adjust the quality to make it smoother or reduce the file size, and even automate everything if you’re handling a bunch of videos at once.
In this guide, I’ll walk you through step by step how to convert MP4 to GIF using FFmpeg, including a few handy tricks to make your GIFs look much smoother and keep the file size small. Let’s dive in!
What is FFmpeg
FFmpeg is a powerful cross-platform command-line tool used for handling video and audio files. It can decode, encode, transcode, mux, demux, stream, filter, and play media in just about any format, and it works on all major platforms, including Linux, macOS, Windows, and more.
FFmpeg comes with a set of tools that let you convert, play, and analyse media files, as well as libraries for developers to use in various applications. These include:
- libavcodec
- libavutil
- libavformat
- libavfilter
- libavdevice
- libswscale
- libswresample.
🐱 Meow Memo: These libraries come bundled with FFmpeg, there's no need to install them separately.
How to Install FFmpeg
Before you begin, make sure to download FFmpeg from the official website. You can follow this step-by-step guide to install FFmpeg on your Mac, Windows, or Ubuntu/Linux.
Once it’s installed, you can run the following command in your terminal/command prompt to verify the installation:
ffmpeg -version
Conversion Basics: What Do the FFmpeg Options Mean
Before we jump into the commands, it helps to understand some of the common FFmpeg options you’ll be seeing in the commands. Once you get the hang of these, it becomes much easier to tweak things like frame rate, resolution, duration, and color quality to suit your needs.
Here’s a quick breakdown of what some of these flags and filters actually mean:
i: Stands for input. This specifies the video file you want to convert.ss: Sets the start time. Use this when you want to begin the conversion from a specific point in the video.t: Sets the duration. This tells FFmpeg how many seconds of video to convert.filter_complex: Allows you to chain multiple filters together when working with two inputs.palettegen: Generates an optimized color palette for the GIF (since GIFs can only use 256 colors). You run this once to create a.pngpalette file.paletteuse: Applies the generated color palette to the final GIF for better image quality.fps=n: Sets the frames per second for the GIF. A lower FPS reduces file size but also makes the animation less smooth.scale=w:h: Resizes the video or GIF to a specific width (w) and height (h). If you set one value to1, FFmpeg will maintai the original aspect ratio. For example,scale=480:-1resizes the width to 480px, and the height adjusts automatically to keep the ratio intact.
Understanding these options gives you a lot more power and flexibility. You won’t be blindly copying commands; instead, you’ll actually know how to fine-tune your command to produce GIFs exactly how you want them.
How to Convert MP4 to GIF Using FFmpeg
Basic MP4 to GIF Conversion
Let’s start simple. The command below converts a short MP4 video into a basic GIF:
ffmpeg -i input.mp4 output.gif
Here's what the command does: -i input.mp4 tells FFmpeg which file to convert, while output.gif is the name of the resulting GIF file. FFmpeg automatically converts the input file to the format you specify in the output, which in this case is .gif.
Converting a Specific Section of the Video
Let’s say you don’t want to convert the entire video, but just a short 3-second clip starting from the 5-second mark. In that case, use the command below:
ffmpeg -ss 00:00:05 -t 3 -i input.mp4 output.gif
The ss 00:00:05 part starts the conversion at the 5-second mark, while t 3 tells FFmpeg to convert only the next 3 seconds. This command is useful when your video is long, but you just want to extract a short highlight as a GIF.
Creating High-Quality GIFs with Palettegen and Paletteuse
Now, let’s make the GIF look really good. By default, FFmpeg uses a standard 256-color palette for every GIF, without considering the colors in your input video. This can make the output look pretty bad, especially if your video has gradients or fast-moving scenes.
To fix this, we can use the palettegen and paletteuse filters to generate a custom palette based on the colors in the original video, and use the palette to create a higher-quality GIF. Here are the commands:
Step 1. Generate the Palette
We can generate the palette by adding -filter_complex "[0:v] palettegen" to a FFmpeg conversion command. The example below creates a palette based on the colors from the input video and saves it as palette.png:
ffmpeg -ss 00:00:05 -t 3 -i input.mp4 -filter_complex "[0:v] palettegen" palette.png
Step 2. Create the GIF Using the Palette
Next, use both the original MP4 video and the palette.png we just generated as input, and apply the paletteuse filter to create the final GIF. The paletteuse filter takes in two video streams—[0:v] refers to input.mp4, and [1:v] refers to palette.png:
ffmpeg -ss 23.0 -t 1.8 -i input.mp4 -i palette.png -filter_complex "[0:v][1:v] paletteuse" output.gif
The result? A smoother, more colorful, and detailed GIF:
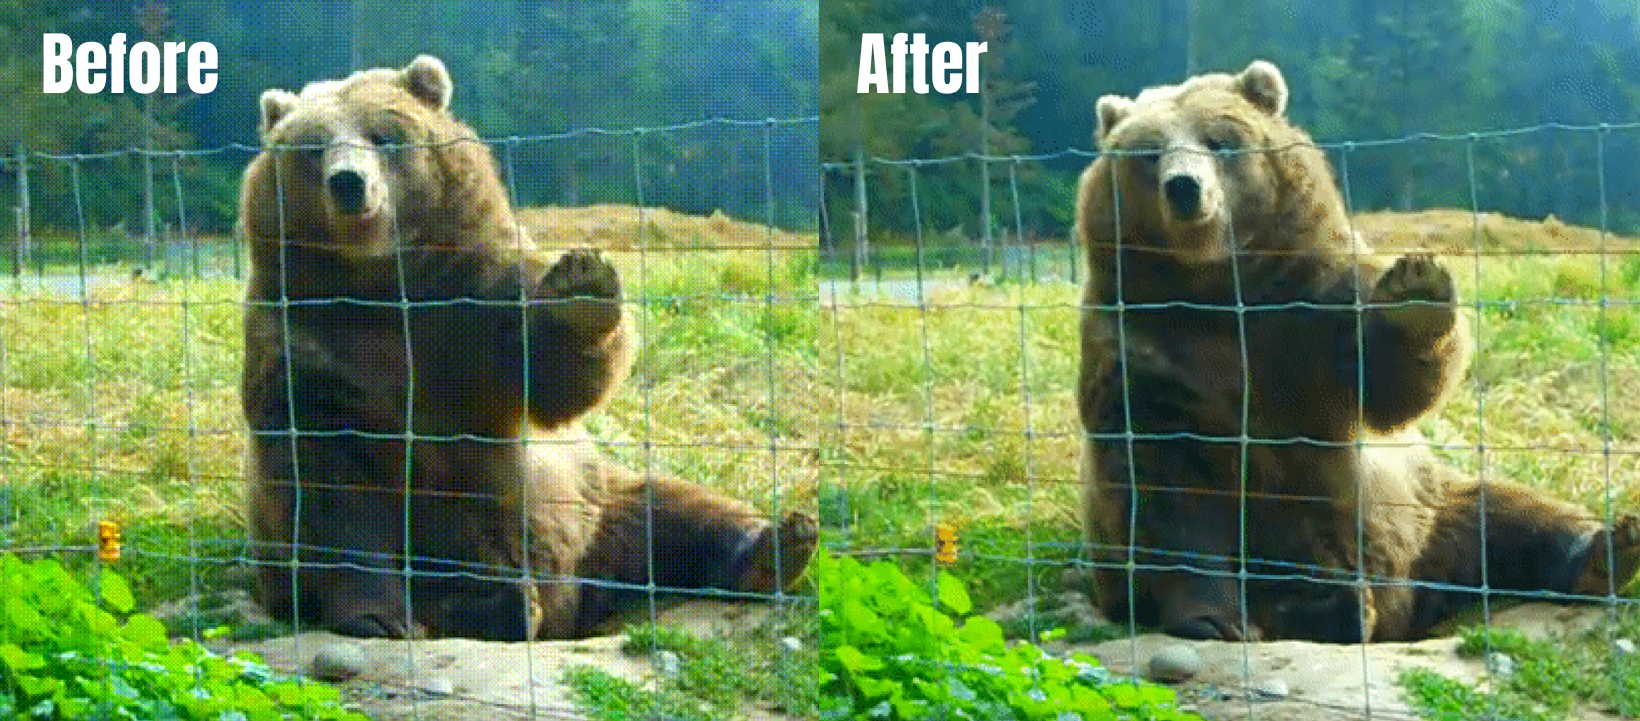
🐱 Meow Memo: Images are used above for comparison instead of GIFs. For a clearer comparison, zoom in on the image.
Bonus: Optimizing File Size
Now that you’ve got your MP4 converted into a GIF, you might notice something a bit odd—the file size is huge. For example, a 2-minute MP4 video might only be around 3MB, but a short 1.8-second GIF from that same video can easily blow up to 3.8MB. If you convert the whole video into a GIF, it can even go beyond 100MB! That’s not ideal.

Here's why: MP4 videos are encoded using efficient, lossy compression formats like H.264 or H.265. These formats store only the differences between frames to keep file sizes small. GIFs, on the other hand, store every frame as a full image. That’s why even short clips can end up being really large in file size.
To fix this, scale down and reduce the number of frames per second by adding fps and scale. Here’s the command:
ffmpeg -ss 23.0 -t 1.8 -i input.mp4 -i palette.png -filter_complex "[0:v] fps=10,scale=320:-1 [new];[new][1:v] paletteuse" output_trimmed_enhanced_reduced.gif
Compared to a normal conversion command, the command above reduces the frame rate to 10 FPS and resizes the video to 320px wide, while keeping the original aspect ratio.
Here’s a quick comparison of the file sizes before and after lowering the frame rate and scaling down the resolution:

Quite a difference, isn’t it?
🐱 Meow Memo: Want to learn more about how to resize a video using FFmpeg? Read How to Crop and Resize Videos Using FFmpeg.
Final Tips
Before you wrap up, here are a few final reminders to keep in mind when converting MP4 to GIF using FFmpeg:
- Trim the video to the right length to avoid unnecessary bloat.
- Use palettegen and paletteuse for higher-quality GIFs with better colors.
- Adjust
fpsandscaleto optimize both the smoothness and file size of your GIF.
With these reminders in mind, you’ll be able to create smooth, optimized GIFs that fit your needs perfectly using FFmpeg!