How to Automatically Save Clipcat Videos with Zapier
Contents
When you're generating multiple videos automatically, storage and management can quickly become a challenge. Video rendering isn't instantaneous—it takes time, which means you could potentially miss videos or find yourself unnecessarily waiting around for completion. And if your video generation process is already running on autopilot, most of the behind-the-scenes technical work is happening without direct human oversight.
The logical question becomes: Why would you want to introduce additional manual steps into an otherwise streamlined workflow? Manually tracking and saving each generated video undermines the efficiency you've worked hard to create.
This is precisely where Clipcat's Zapier integrations shine. By leveraging these powerful automation tools, you can seamlessly set up a workflow that automatically saves your generated videos to your preferred storage location the moment they're rendered—without code. It's a simple, elegant solution that eliminates unnecessary administrative overhead and keeps your video production process running smoothly.
In this quick guide, you’ll learn two easy ways to automatically save Clipcat videos without code. All you need is Clipcat, Zapier, and your chosen storage solution.
What You Will Create
Automated video storage eliminates the manual work of tracking and saving assets as they’re generated. It allows you to access what you need, but otherwise operates in the background as to not interfere with higher value tasks.
To store videos automatically without code, you’ll need these tools:
- Clipcat : To design and generate videos
- Zapier : To trigger actions in different apps
- Storage system of your choice—such as Dropbox or Airtable
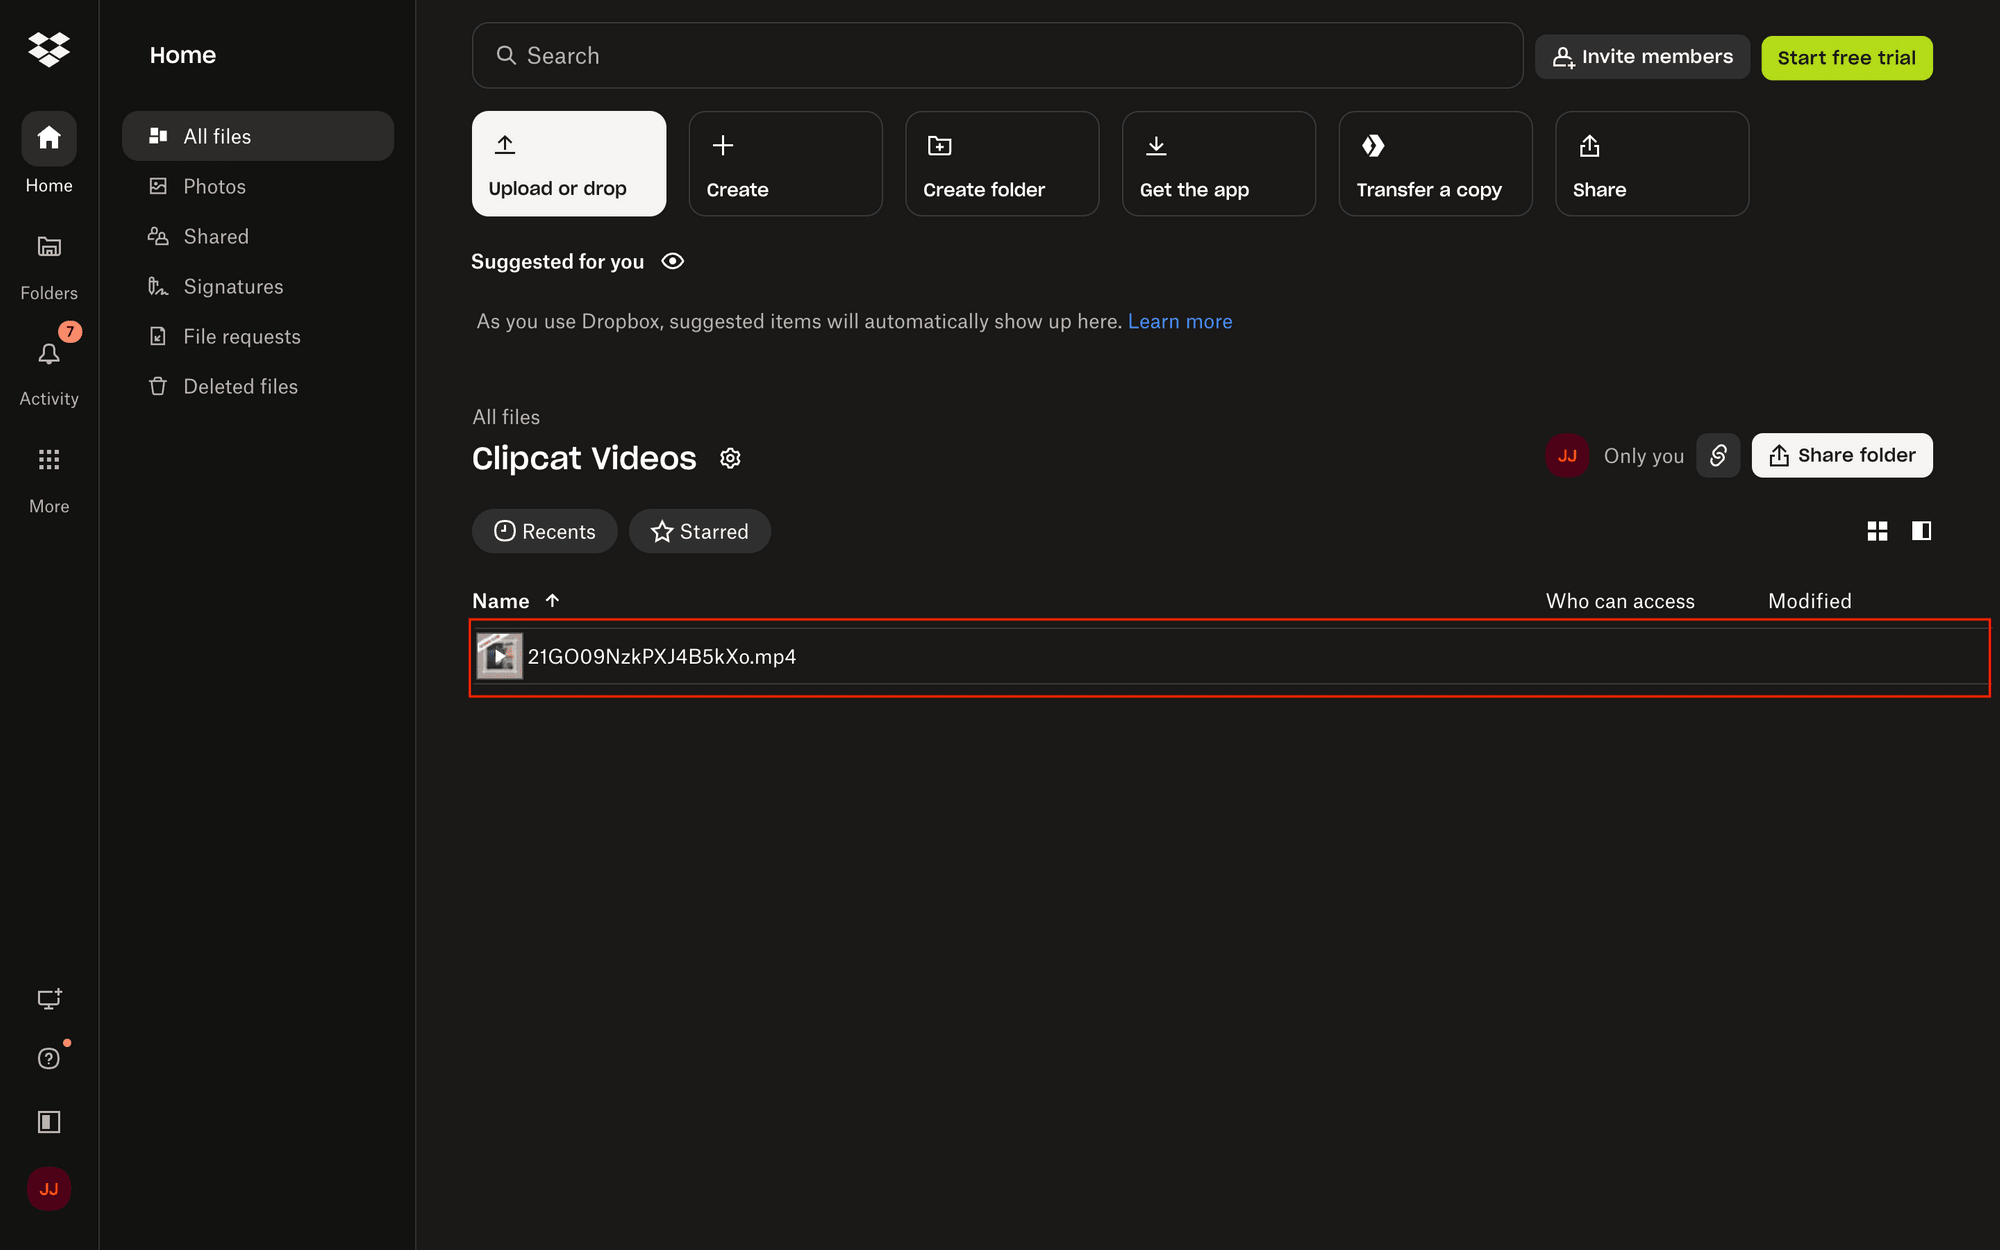
By the end of this tutorial, your Clipcat videos should easily be stored in a cloud storage platform like Dropbox…
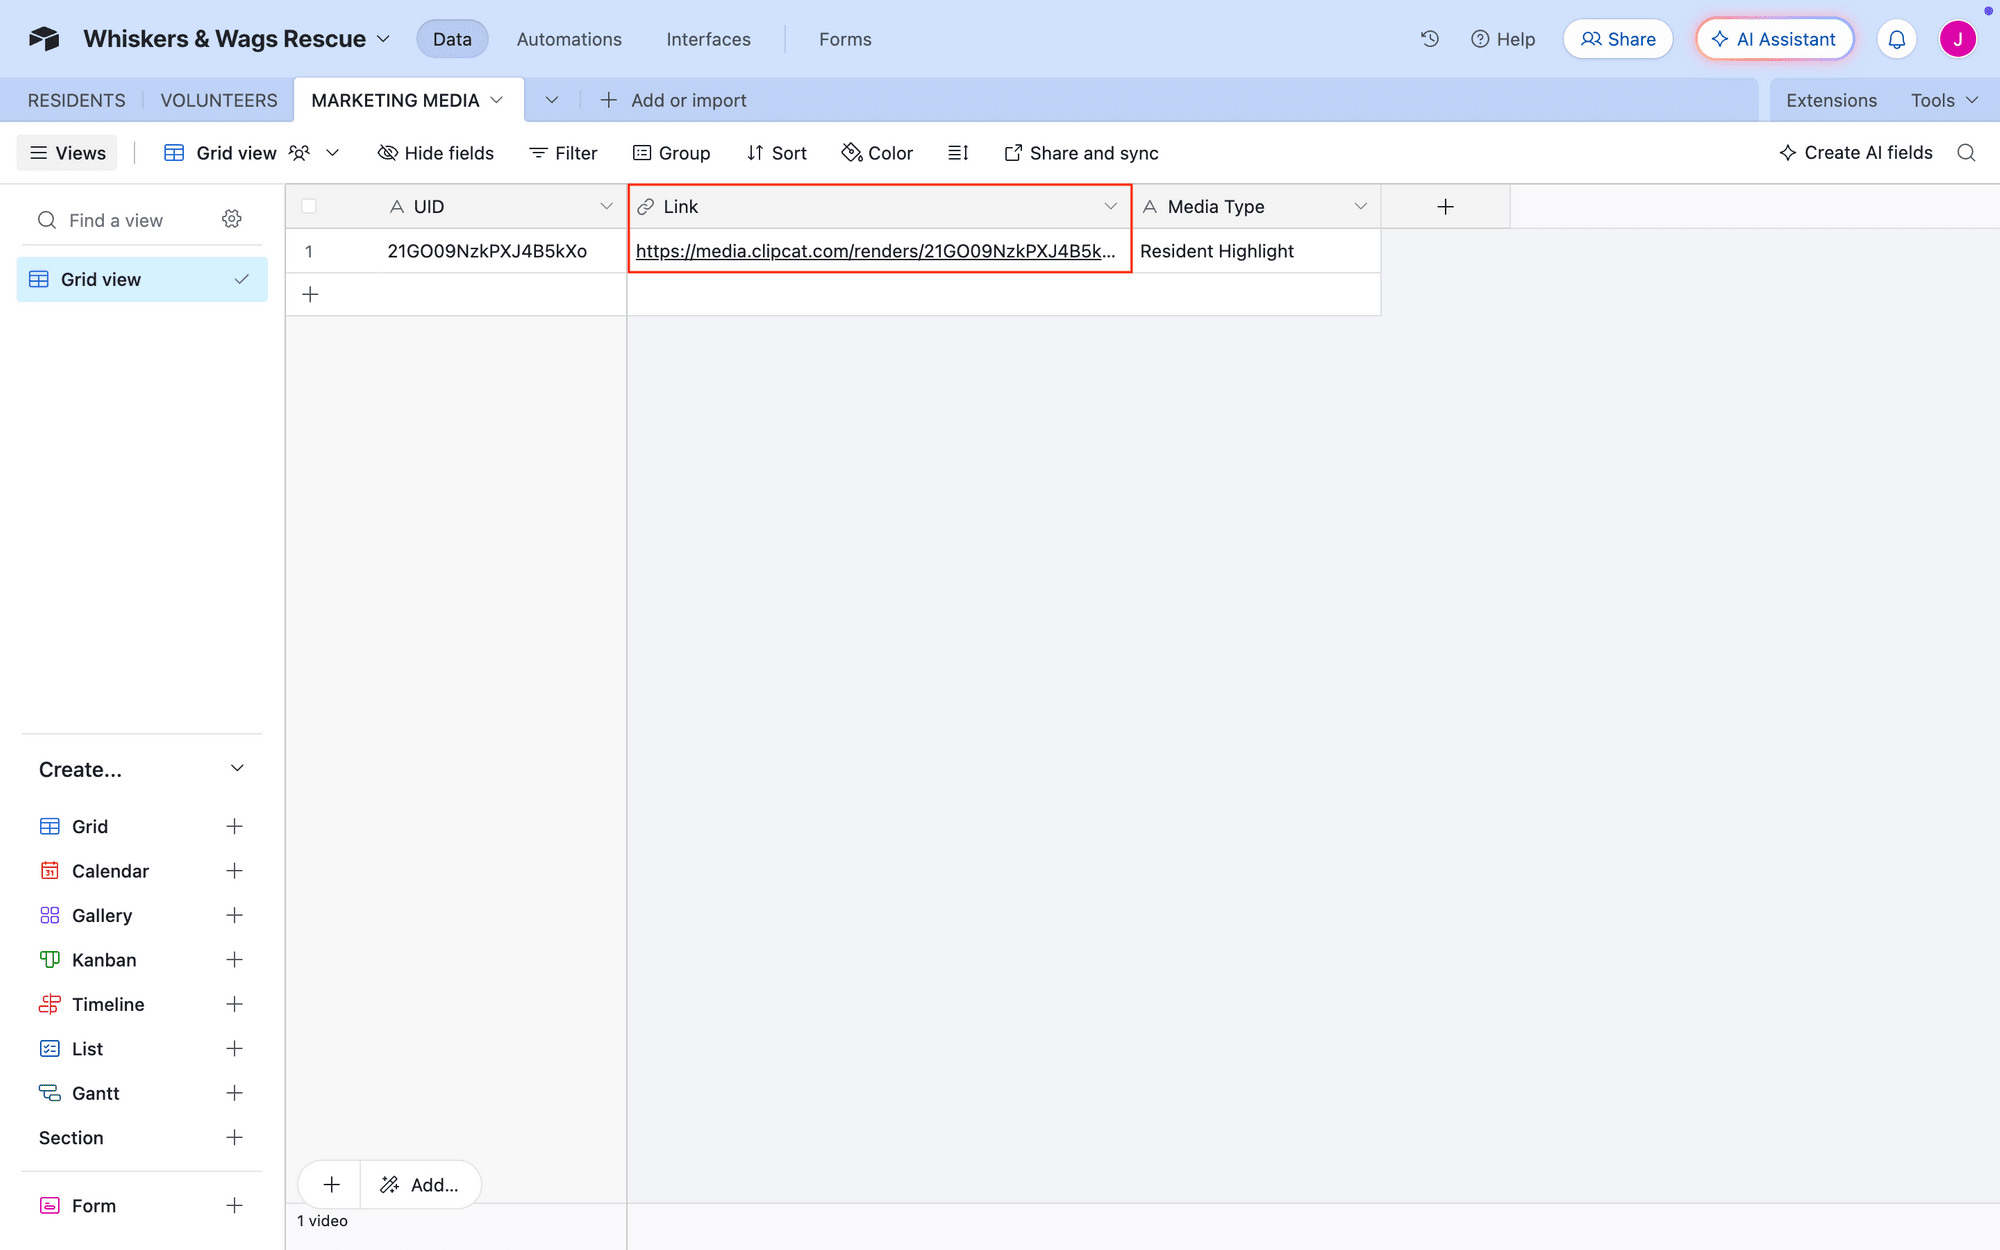
…or accessible via link in a database like Airtable.
Let’s get started!
How to Automate Clipcat Video Storage Without Code
Your video generation and storage workflow should be whatever you need it to be—whatever order, tools, and complexity you need. In the process of designing it, there are some things to consider:
- How many videos need to be stored? The more videos you need to store, the more scalable your storage solution will have to be. Consider costs and technical requirements, then choose a storage option that fits best.
- How long will I need access to the videos? Some use cases—like custom animated holiday greeting cards—don’t necessarily require storage and can simply be distributed after generation.
- Where do the videos go next? Will the videos be published to a social network, emailed to relevant team members, or saved to cloud storage? Considering the next step will help you decide how to build the workflow.
- Who needs to access these videos? Are there any team members that need video access for approval or distribution? Some tools have features that make sharing and collaboration easier, and considering your needs can help you choose and set up the best tool.
After you have a clear idea of your needs, it’ll be easy to decide whether it’s best to simply save output links or upload video files to your chosen storage solution.
Read on to learn how to set up each option.
Saving Links to a Database
Saving links to a database is convenient and time efficient, but you have to consider how long you want the file to be accessible. A link may work for short-term use, but many users find hosting videos on their own storage solutions to be a better long-term archiving option.
If you’ve chosen to dynamically save links to your database, a simple two-step zap will often do the job. The following steps are written for Airtable, but a similar process can be applied to most database apps with Zapier integrations.
Log into your Zapier account, then create a new zap.
Set up the trigger by choosing Clipcat as the app and New Render in Template as the event. You’ll be asked to connect your Clipcat account using an API key, which can be found in the API Keys page when clicking your profile button in the app.
Select your project template.

Test the trigger to ensure Zapier is able to find an output video, then move on.
Add another step to your zap, choosing Airtable as the app and Create Record as the event. If your account isn’t connected, you’ll be prompted to log in and approve the necessary permissions.
Set up the event by choosing the correct base and table, then map the output link to a URL field.
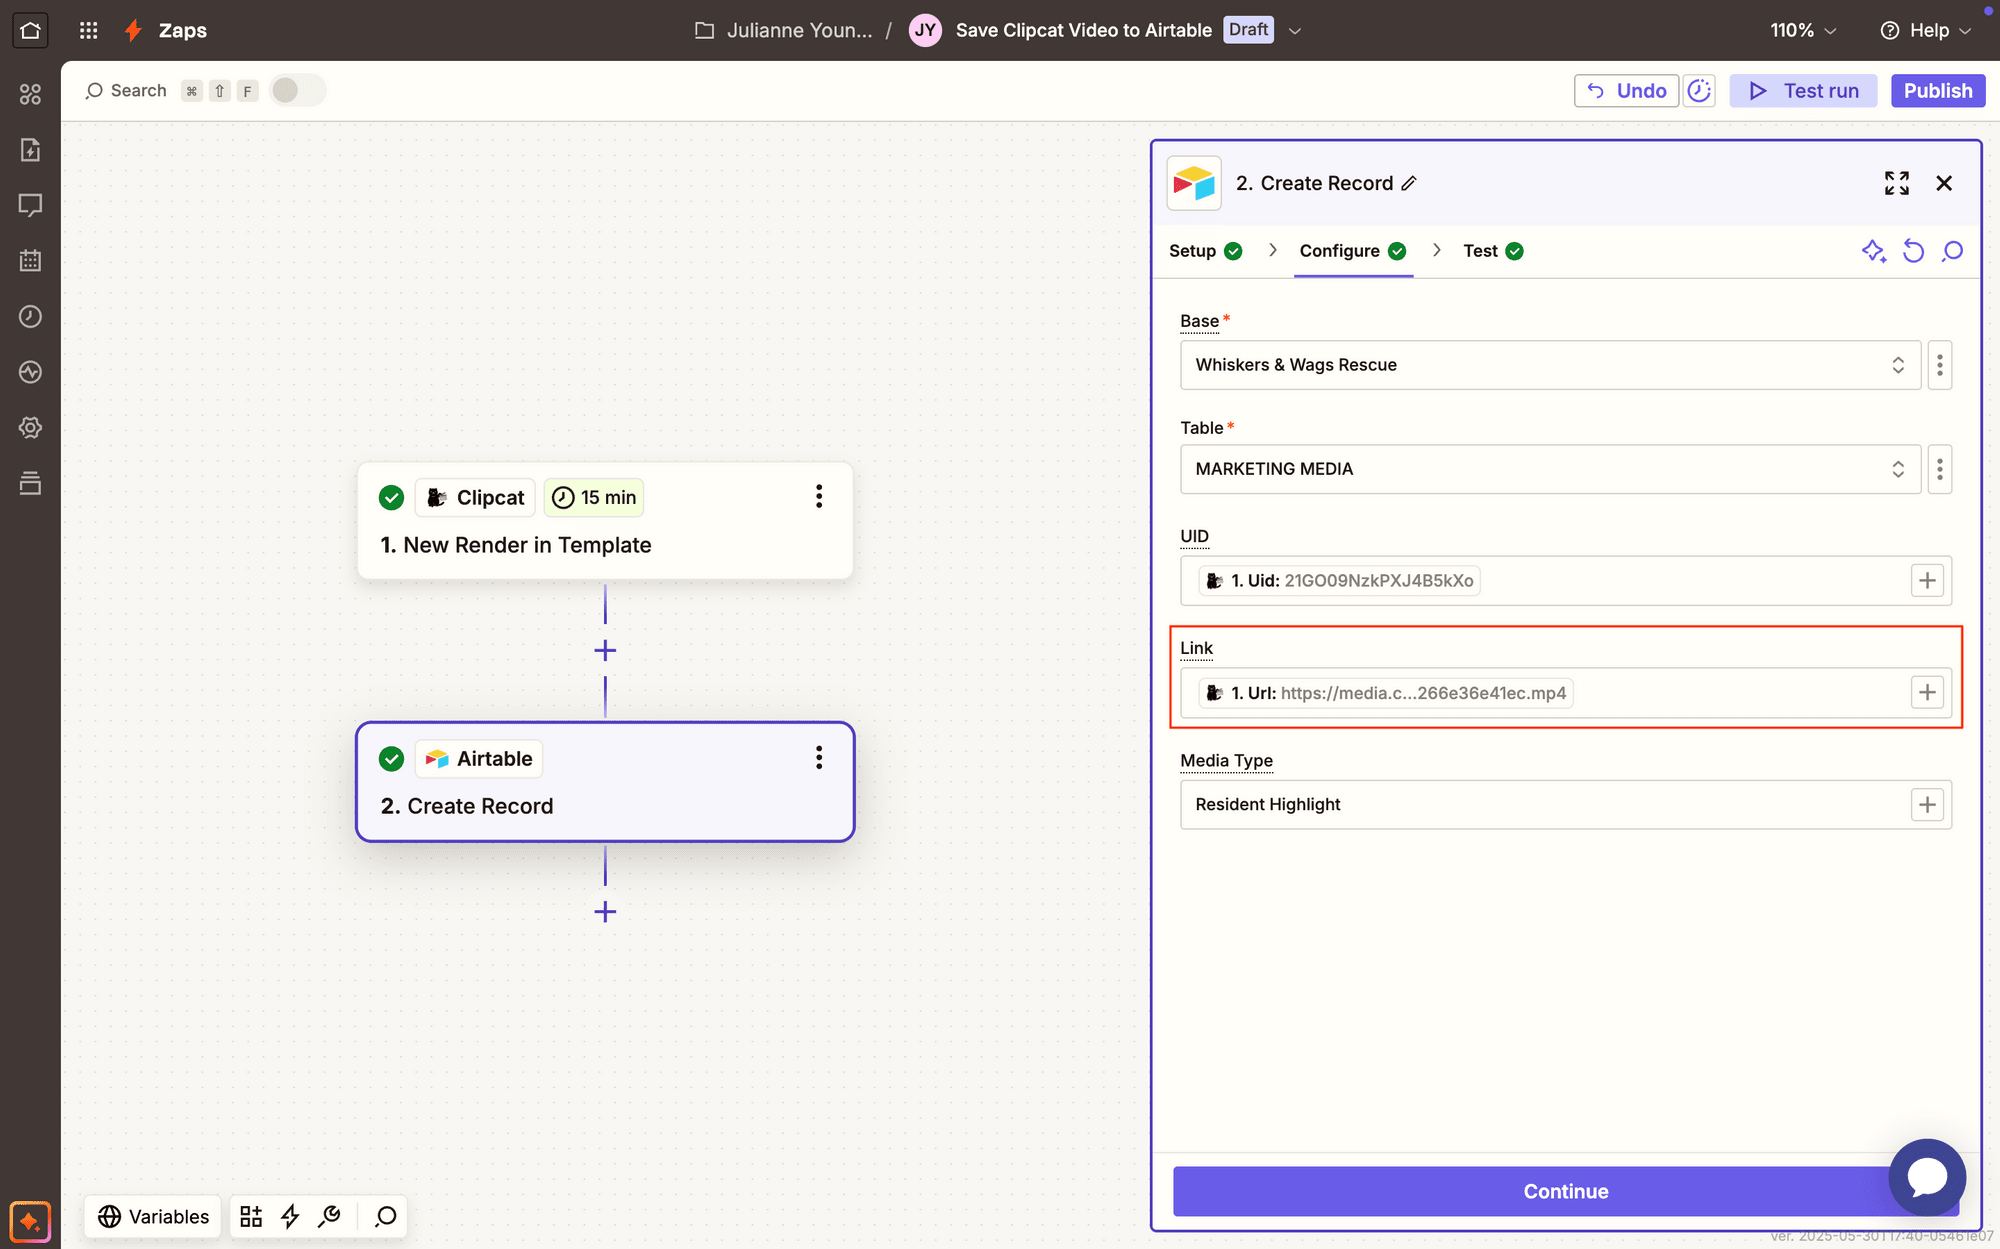
You can also set up additional fields for easier labeling.
Test the action. You should see an entry automatically appear in your Airtable database.

Meow Memo 🐱: You can access your generated Clipcat videos for as long as you have a subscription—the links don’t expire!
Uploading Files to the Cloud
If you’d like to host videos on your own storage solution of choice, setting up a simple workflow that uploads your generated videos will be the better option. Since Clipcat videos are created in MP4 format, you can use practically any platform that supports this file format and has a built-in Zapier integration.
Log into your Zapier account, then create a new zap.
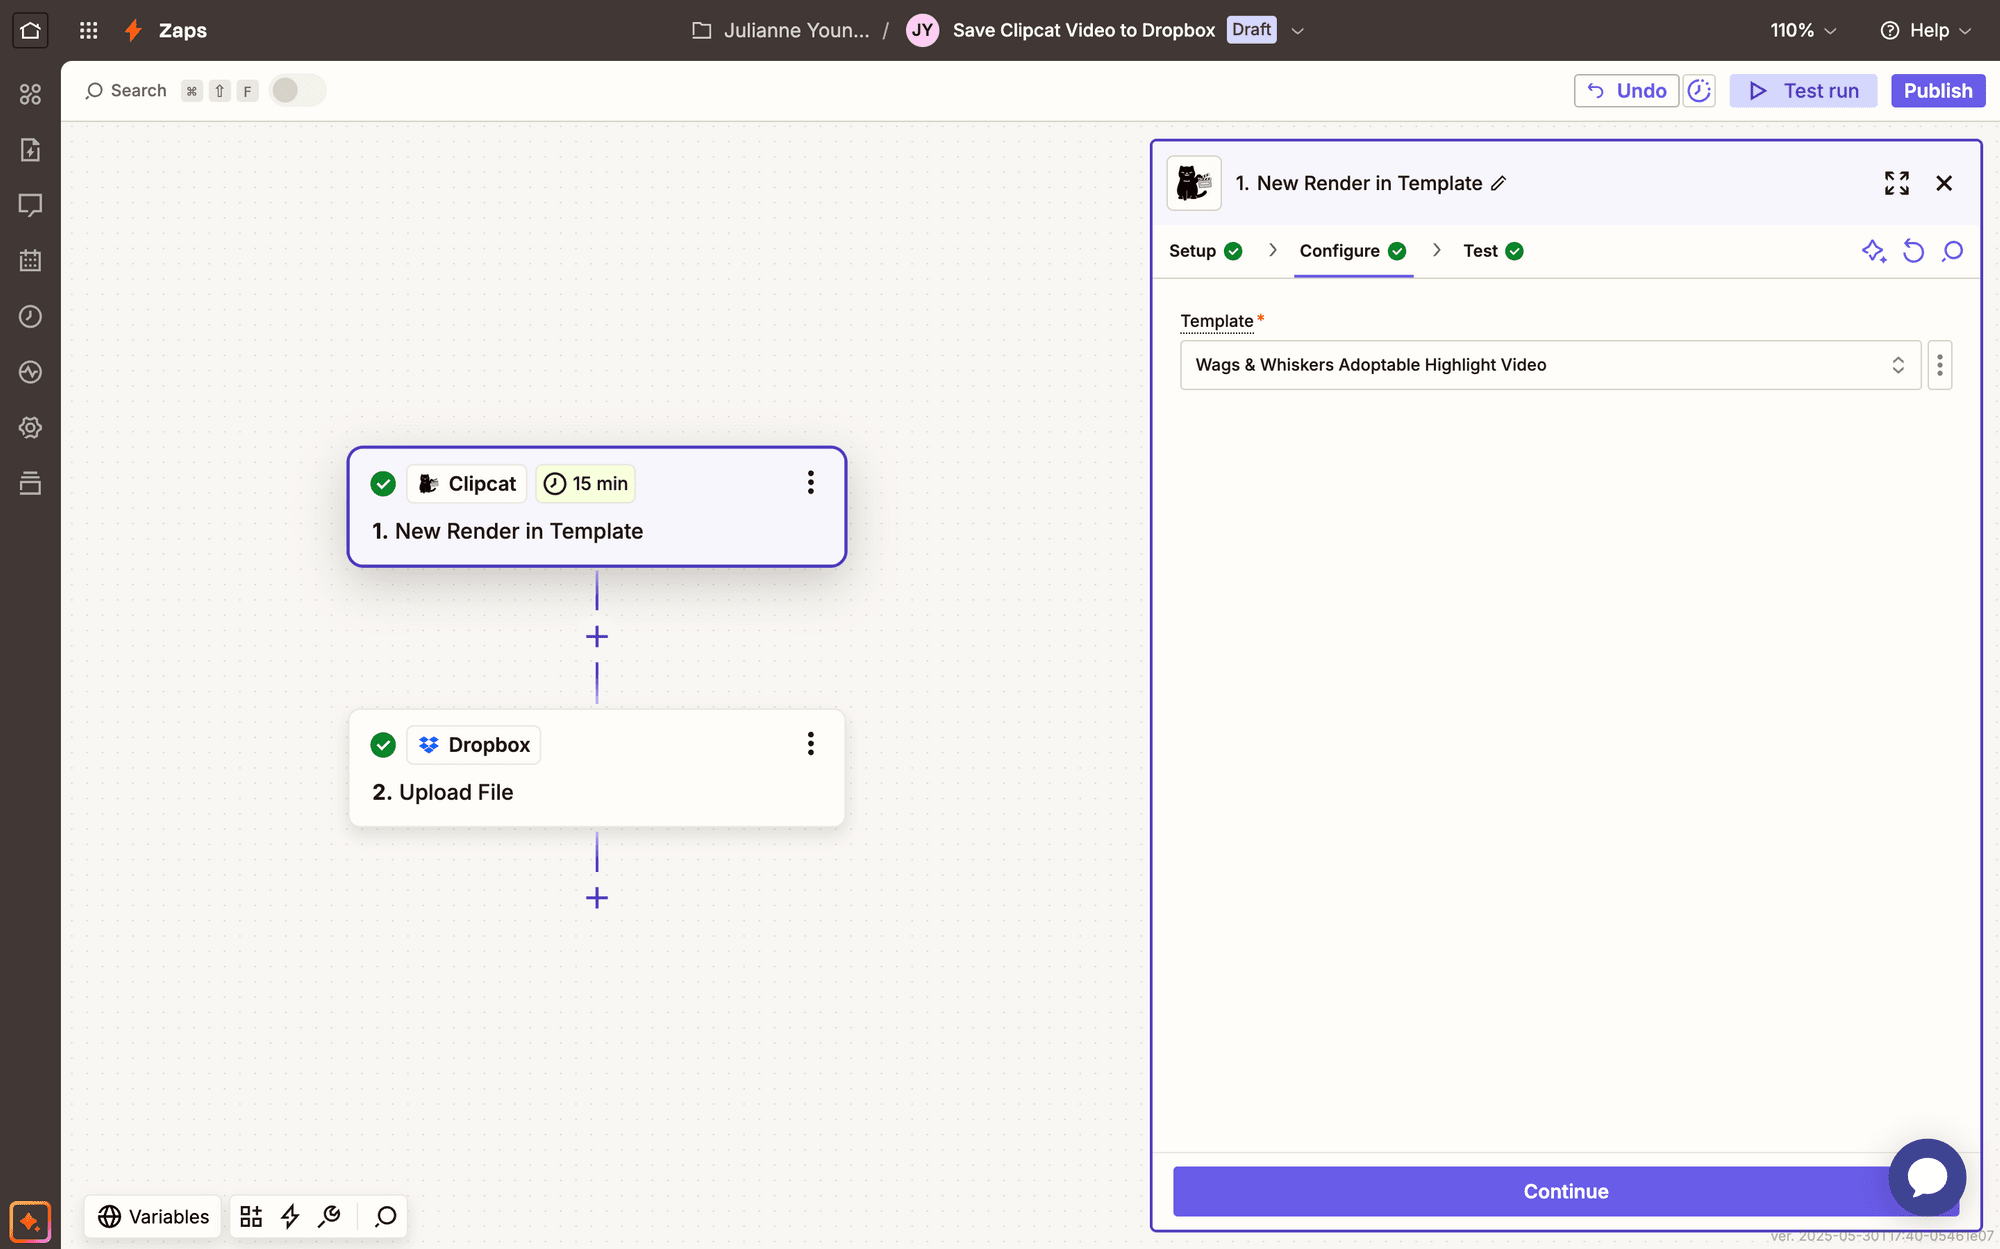
Just like in the previous example, set up the trigger by choosing Clipcat as the app and New Render in Template as the event. You’ll be asked to connect your Clipcat account using an API key, which can be found in the API Keys page when clicking your profile button in the app.
Select your project template.
Test the trigger to ensure a Clipcat video link can be retrieved, then move on.
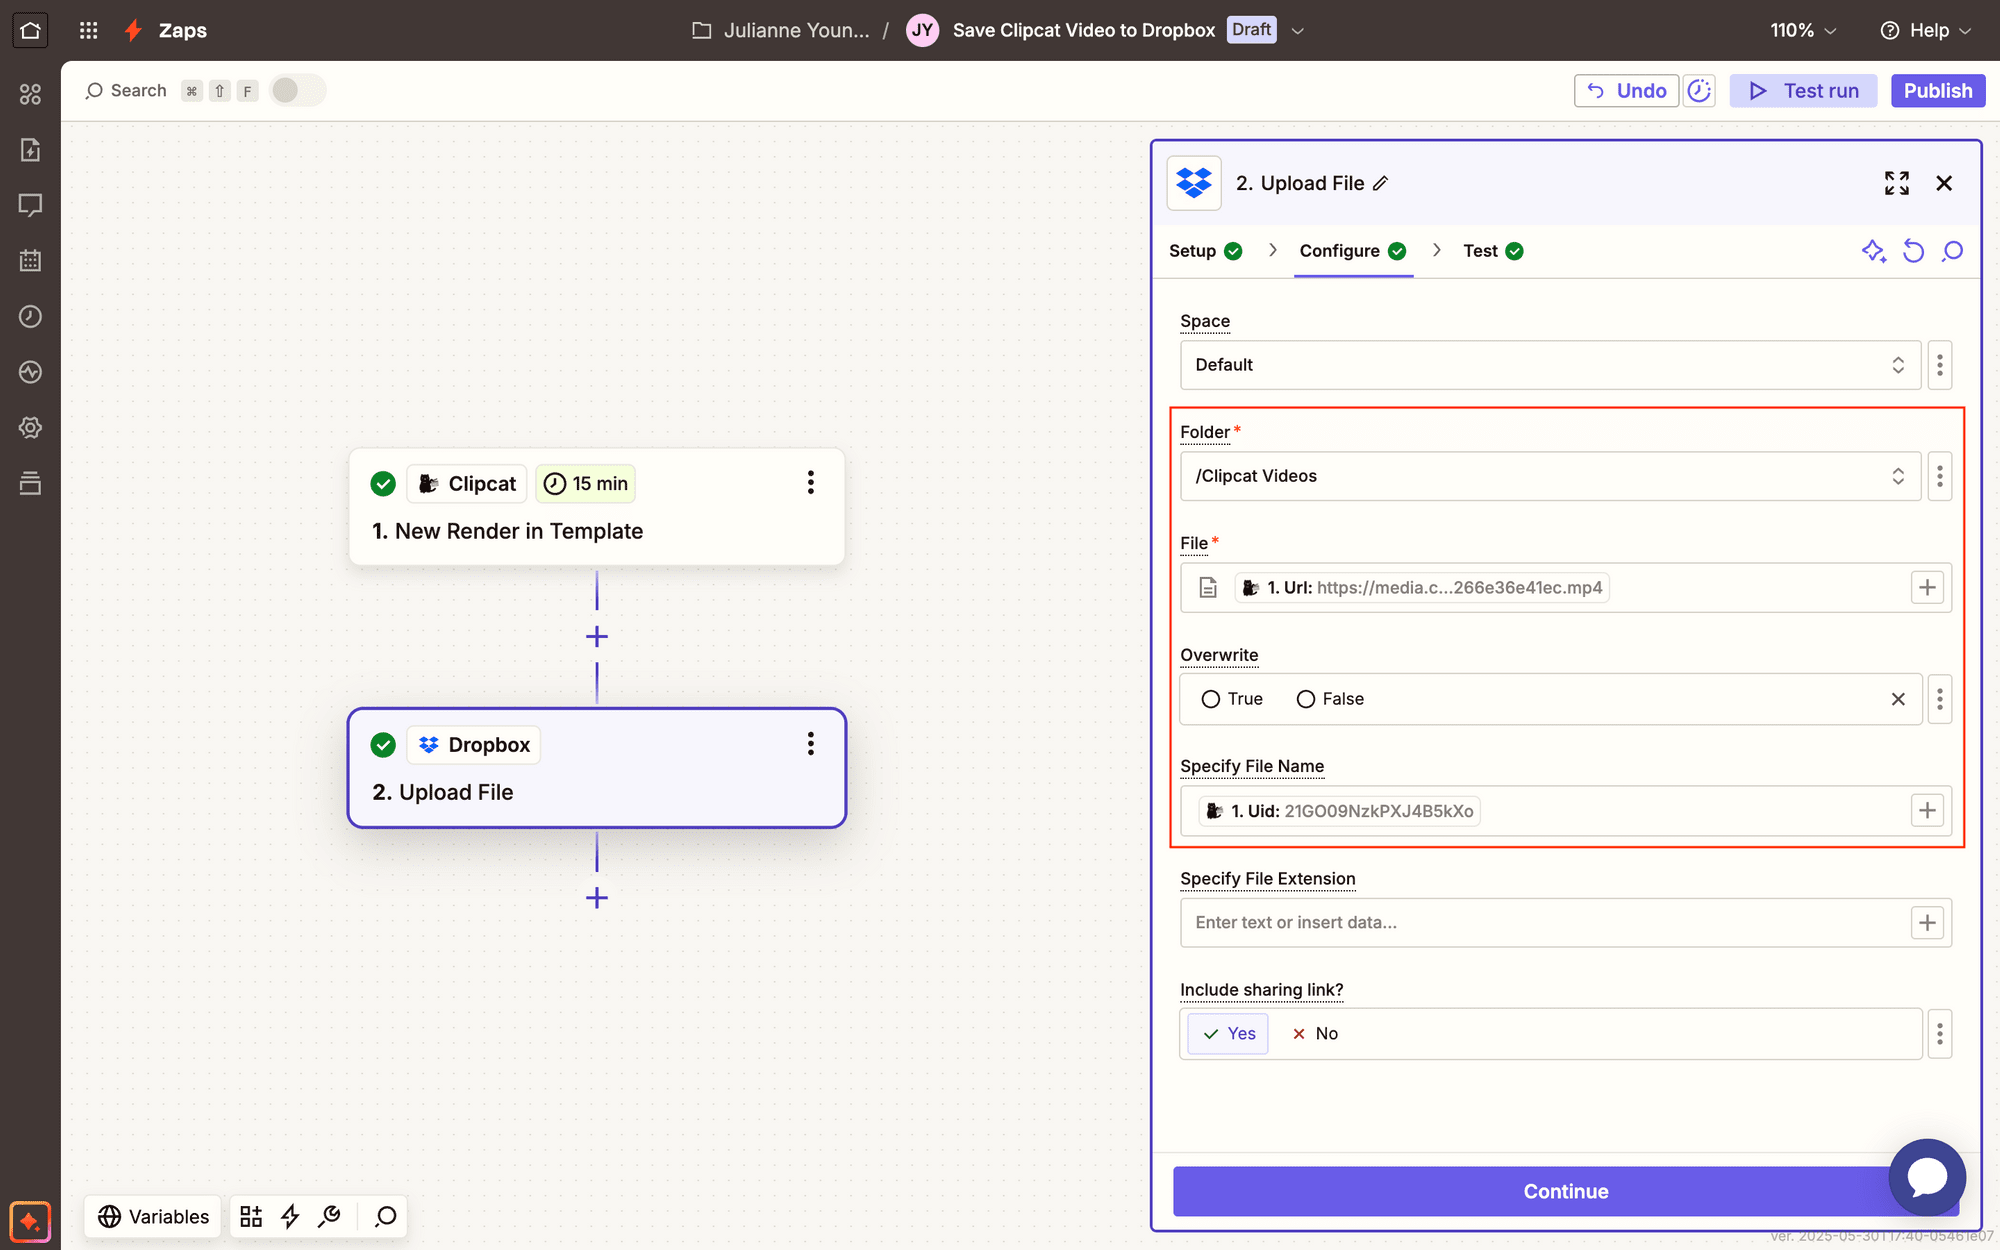
Add another step to your zap, choosing Dropbox as the app and Upload File as the event. If your account isn’t connected, you’ll be prompted to log in and approve the necessary permissions.
Set up the event by selecting the correct folder, then mapping the Clipcat output link to File. You can also specify file name and other settings.
Test the zap. You should see a video appear in your Dropbox folder, easily viewed and managed.

Meow Memo 🐱: Learn to trigger Clipcat video renders in a zap with this quick guide!
Conclusion
Whether you’re saving generated video links to a database or uploading files to a shared cloud folder, a simple Zapier workflow might be the answer to your storage needs. There’s no need to become your own workflow bottleneck—leverage automation tools to eliminate unnecessary administrative overhead.
Want to give automated video generation a try? Sign up for a free Clipcat trial! Design templates, render clips at scale, and connect to your Zapier account to make your video production processes easier than ever.