How to Automatically Generate Travel Guide Videos with Clipcat
Contents
Short-form travel guide videos differ fundamentally from vlogs in their purpose and structure. Rather than documenting personal experiences, they're created to deliver specific information quickly and efficiently.
Because travel guide shorts follow a predictable format—a set number of clips and locations—you can optimize their length and design for your target audience and platform. This predictability isn't a limitation; it's an advantage that makes travel guides ideal candidates for templates.
In this guide, we’ll be discussing how travel guide videos can benefit from templated production. You’ll learn how to set up an automated process of your own using nocode tools like Airtable, Clipcat, and Zapier.
Why Use Templates for Travel Guide Videos?
Templates transform travel guide creation from repetitive and time-consuming to efficient and scalable. Here's why they work so well for this video content type:
- Consistency yields recognition. Platforms reward content creators who maintain recognizable patterns. When you develop a template that performs well, using it over and over with fresh data helps you build a recognizable brand within the algorithm and with your audience. Viewers begin to know what to expect from your content, which increases watch time and engagement.
- Structured data demands structured formats. Travel content naturally contains fixed data points—location names, price ranges, opening hours, ratings—that fit neatly into pre-designed layouts. Rather than reinventing how to present this information with each video, templates let you plug data directly into a tried-and-tested format, eliminating design decisions and keeping your workflow streamlined.
- Consistency maintains quality across volume. Templates ensure that transitions, pacing, and visual style remain uniform whether you're publishing one video a week or ten. This consistency strengthens your brand identity and frees you to focus on sourcing great locations and compelling footage rather than solving production problems.
At the end of the day, creating content is about directing your effort where it matters most. Templates free up your creative energy for what truly moves the needle—longer-form content, in-depth reviews, and authentic storytelling.
By automating the repetitive parts of travel guide production, you preserve your creative energy for the work that builds genuine connection with your audience. Travel guides are the perfect candidate for this approach: they benefit from consistency, follow predictable patterns, and don't require constant creative reinvention.
What You Will Create
The tools you’ll need for travel guide video production are:
- Airtable (or data source of your choice): To store data and trigger video generation
- Clipcat : To generate videos automatically
- Zapier : To build automated workflows with multiple apps
By the end of the tutorial, you should be able to render beautiful travel guide videos with fresh footage in moments!
Let’s get started.
📝 Thanks to Sapol Churanon, Mikhail Nilov, Markus Winkler, and Damrongsak Sattabut for the footage used in this sample video.
4 Steps to Automating Travel Guide Video Generation
Automating the production of travel guide videos is easier than you'd think. If you know the components you need, you can set up a process that not only generates videos, but saves the rendered output to your database so you can access it as needed.
Here's what you'll need to do:
Step 1 - Design a Clipcat Template
Starting with a Clipcat template ensures you know what data points you need for your generation process, and it gives you an idea of any formatting changes required.
Log into your Clipcat account (or sign up for a free trial—no credit card required! 🥳), and create a template.
Customize your template according to your needs, with as many scenes, objects, and keyframes as necessary.
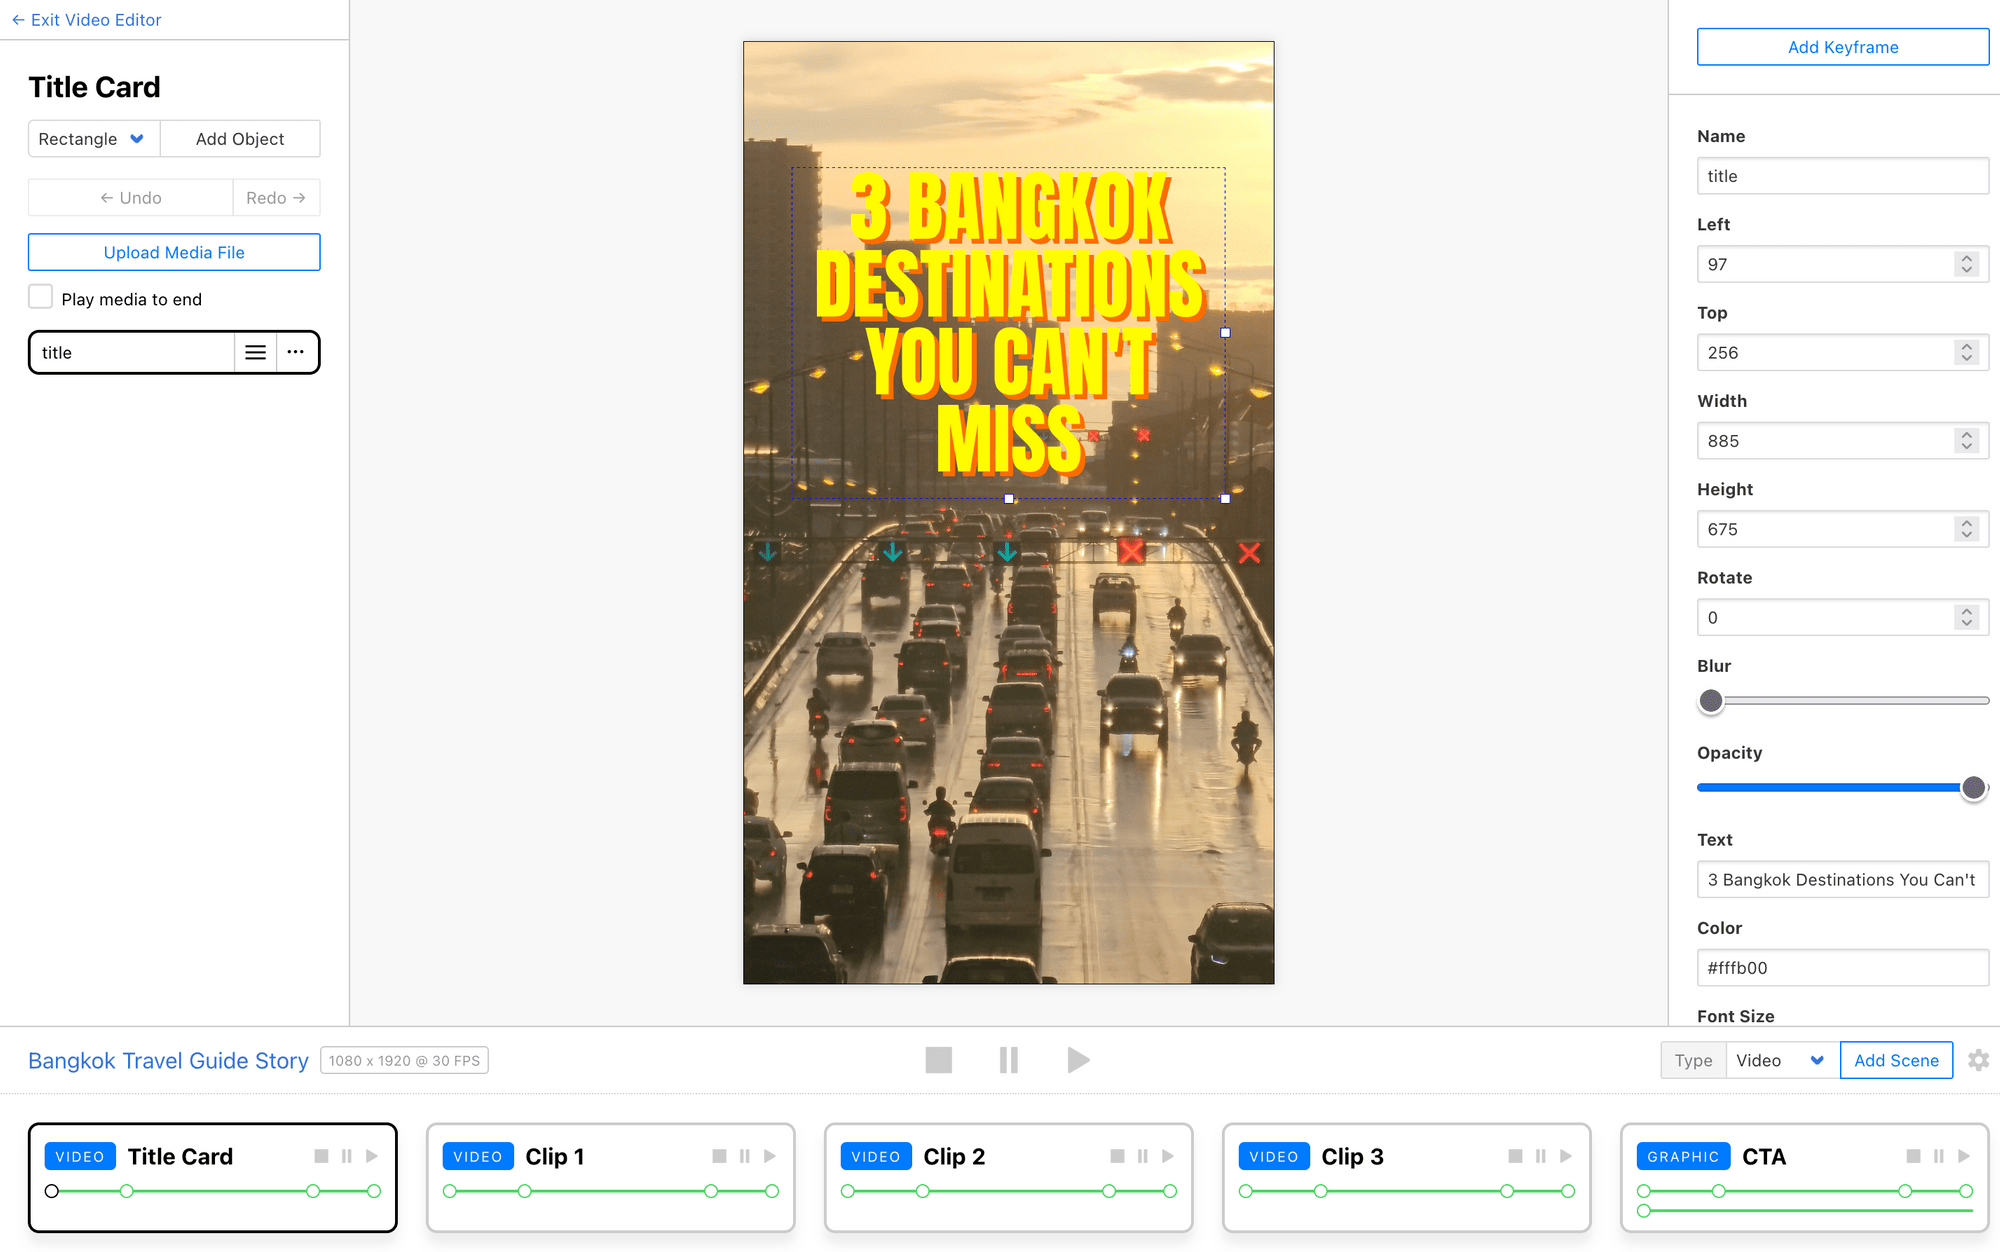
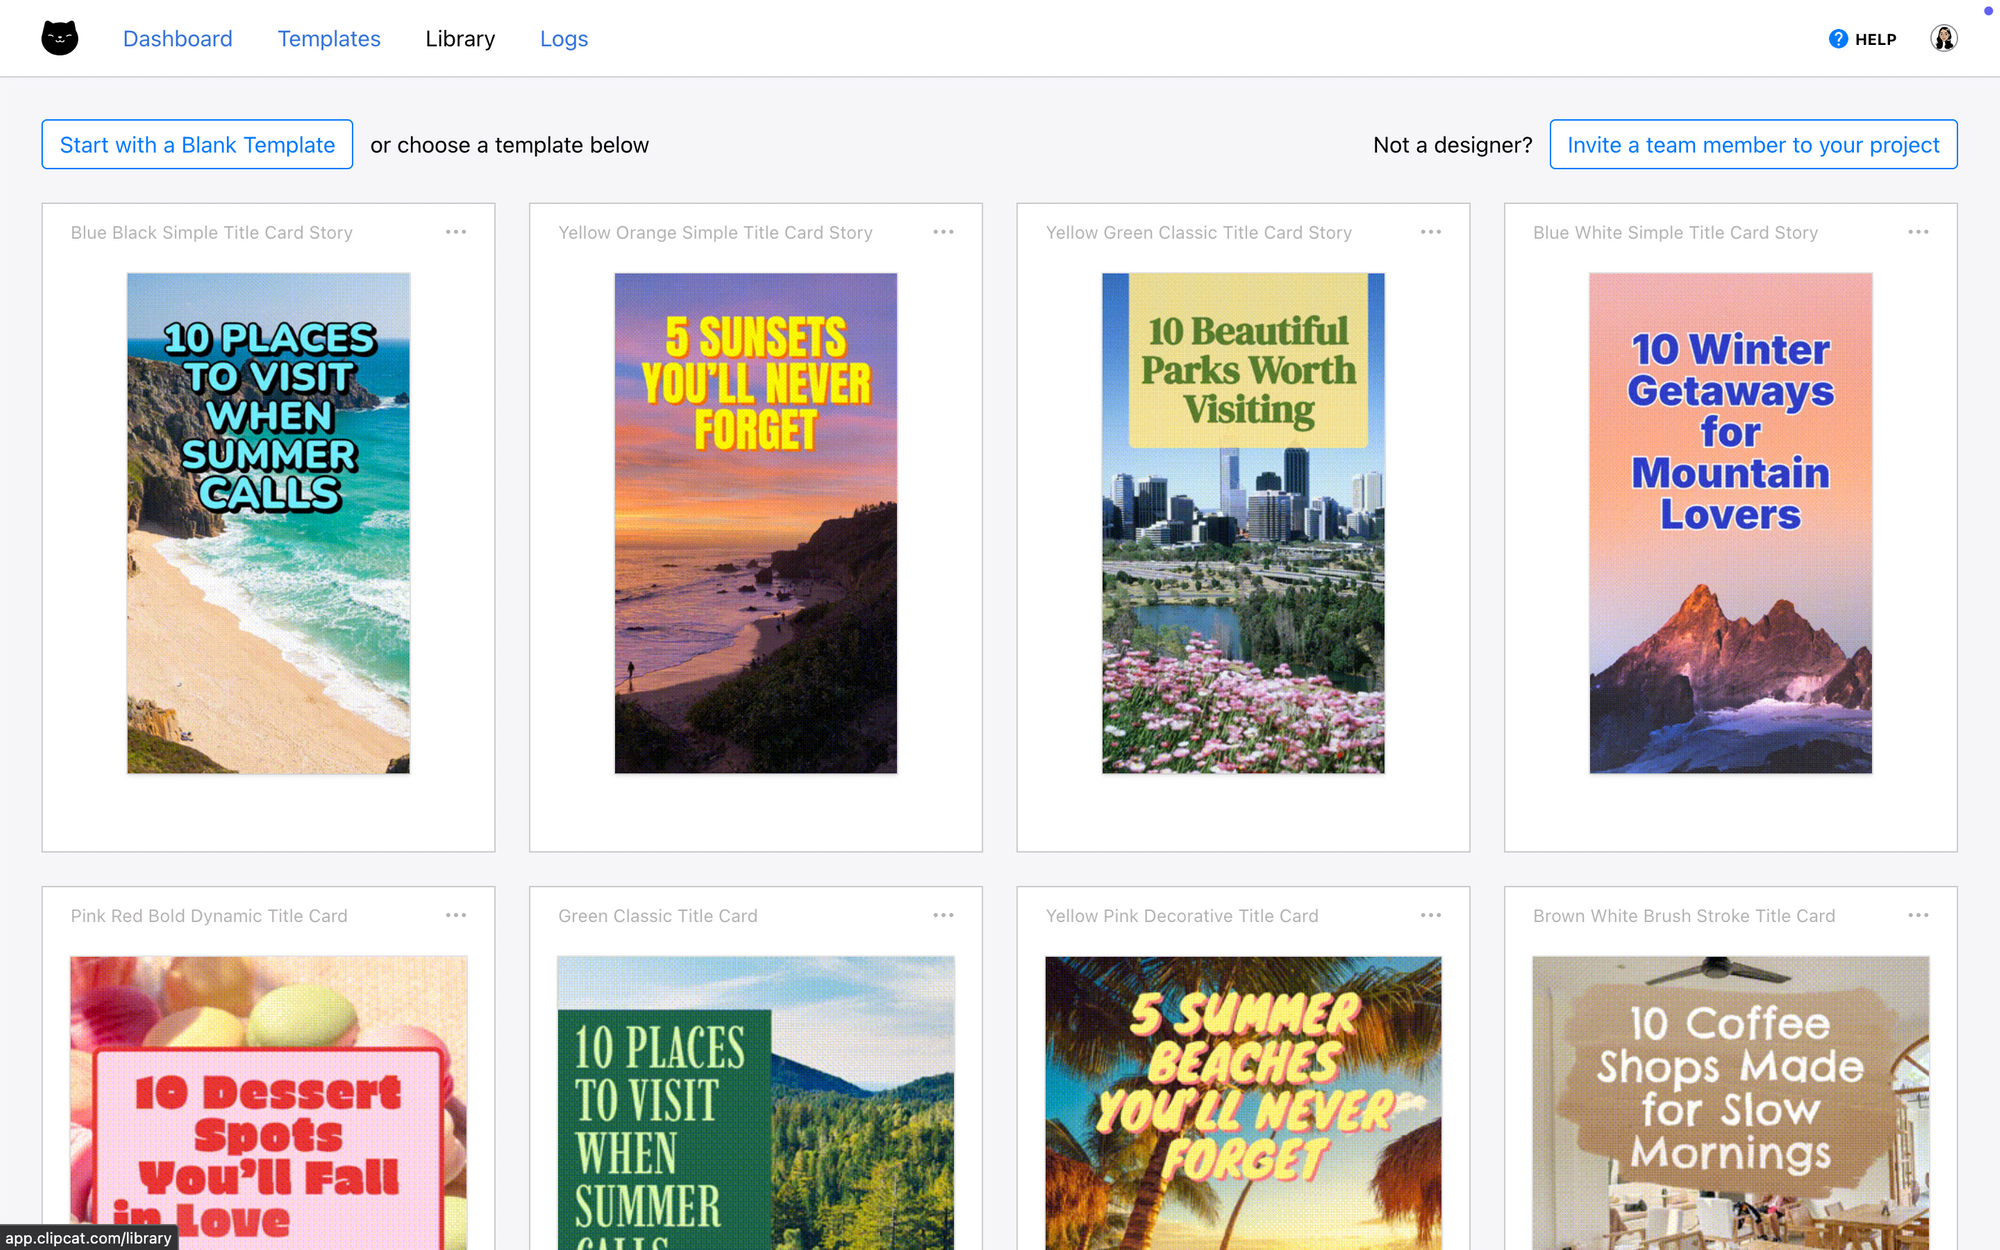
Alternatively, you can start from one of our designs, where we have a good variety of travel guide templates with animated text!
Meow Memo 🐱: Clipcat supports emojis! Add them as input text to add some personality to your templates.
Step 2 - Establish a Data Source
Now that you have a design and know what data points need to be stored, you’ll need to connect a data source. This can be a form, database, spreadsheet, or plenty of other options—it’s up to you!
In this example, we’ll use Airtable.
Create a new base, setting up fields for all of your data points. Some you might use are:
- Headline
- Locations
- Descriptive text
- Media links
- Prices
- Features
We’ll keep it simple with a headline, and three locations along with media.
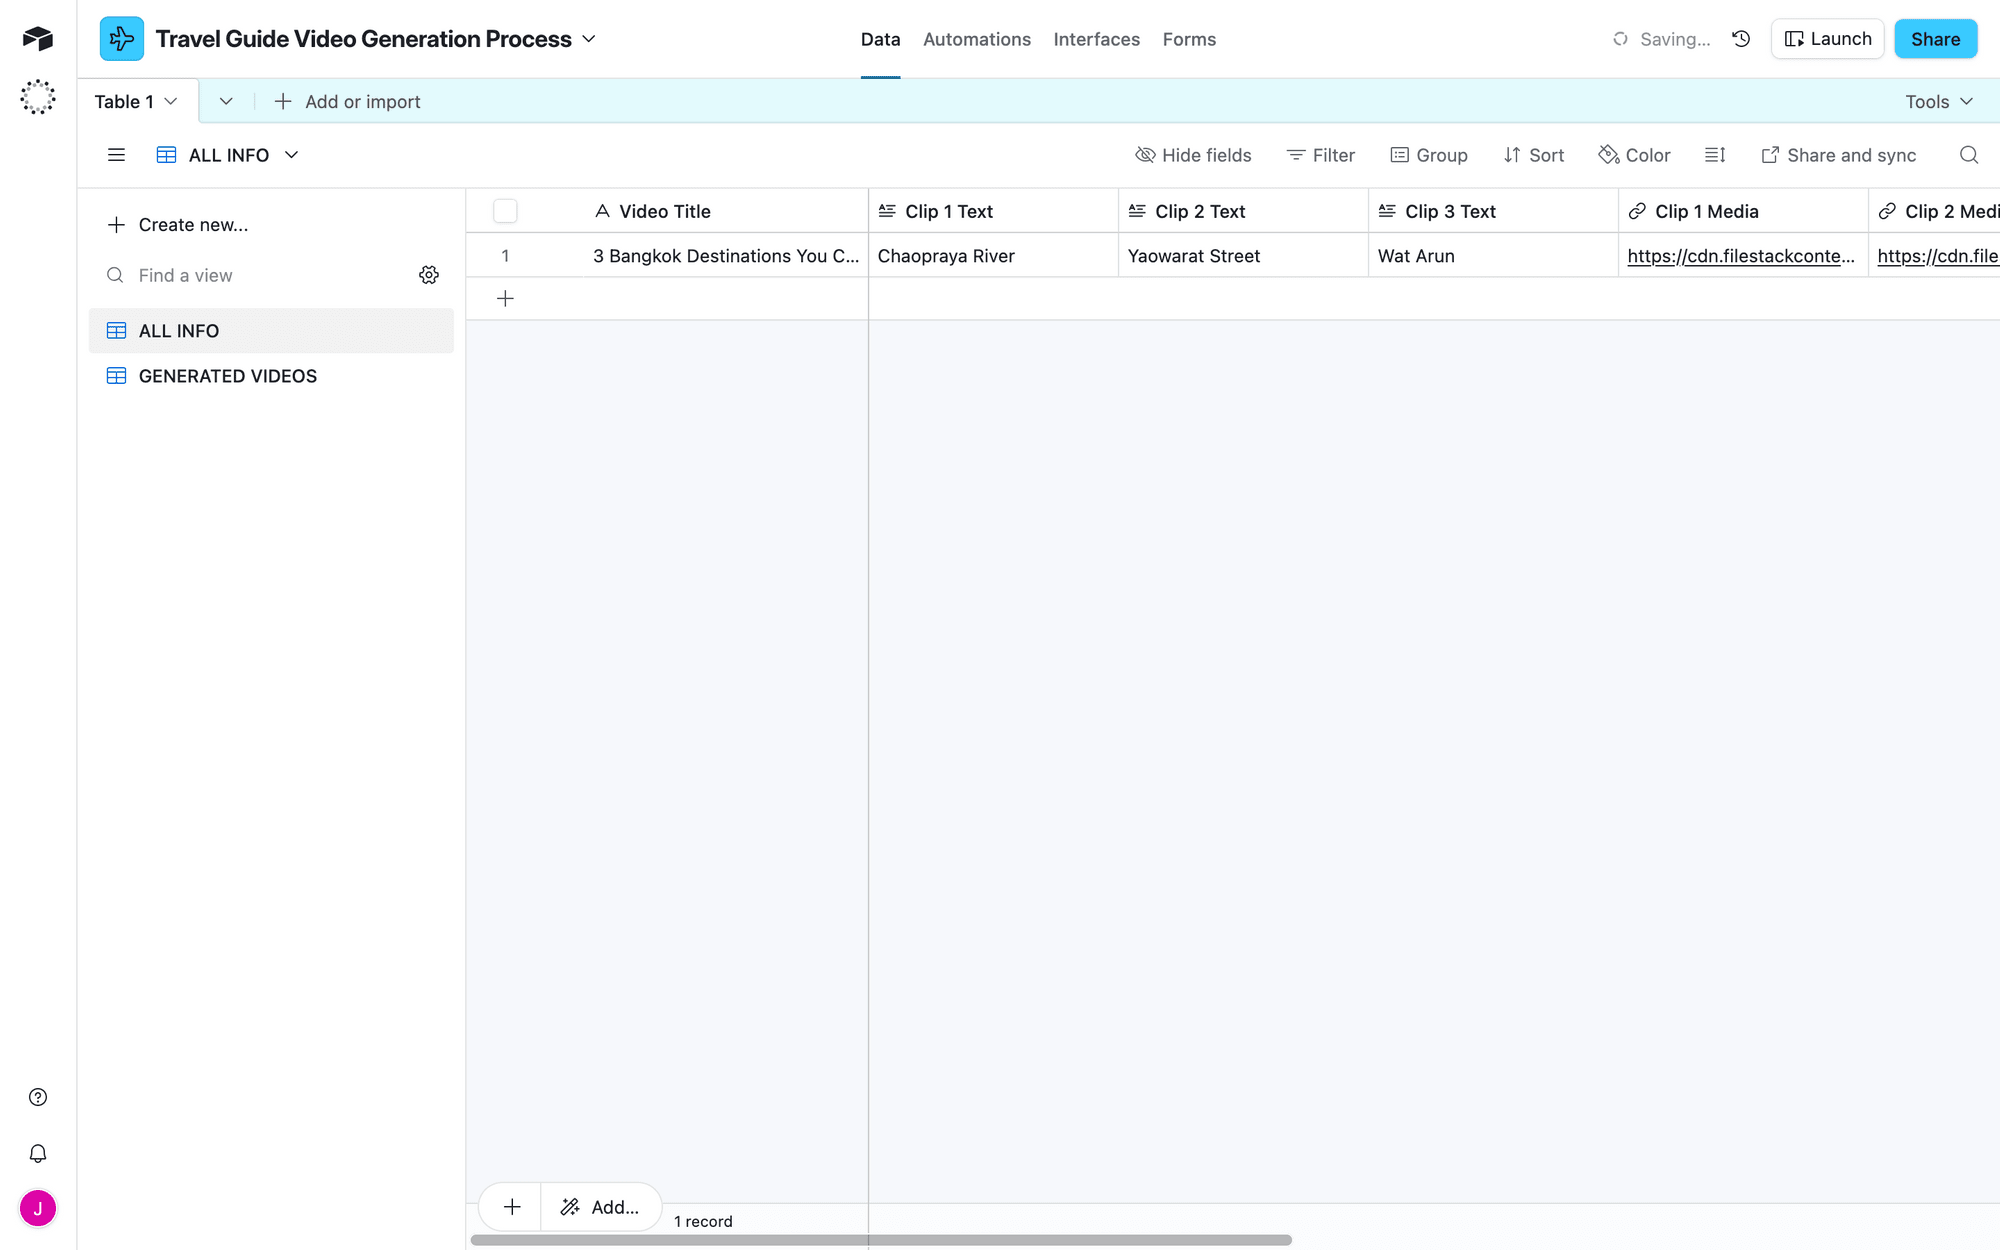
You might also choose to add a URL field to save generated videos to your records after they’re rendered.
We’ll also add a checkbox field to mark records that are ready for production.
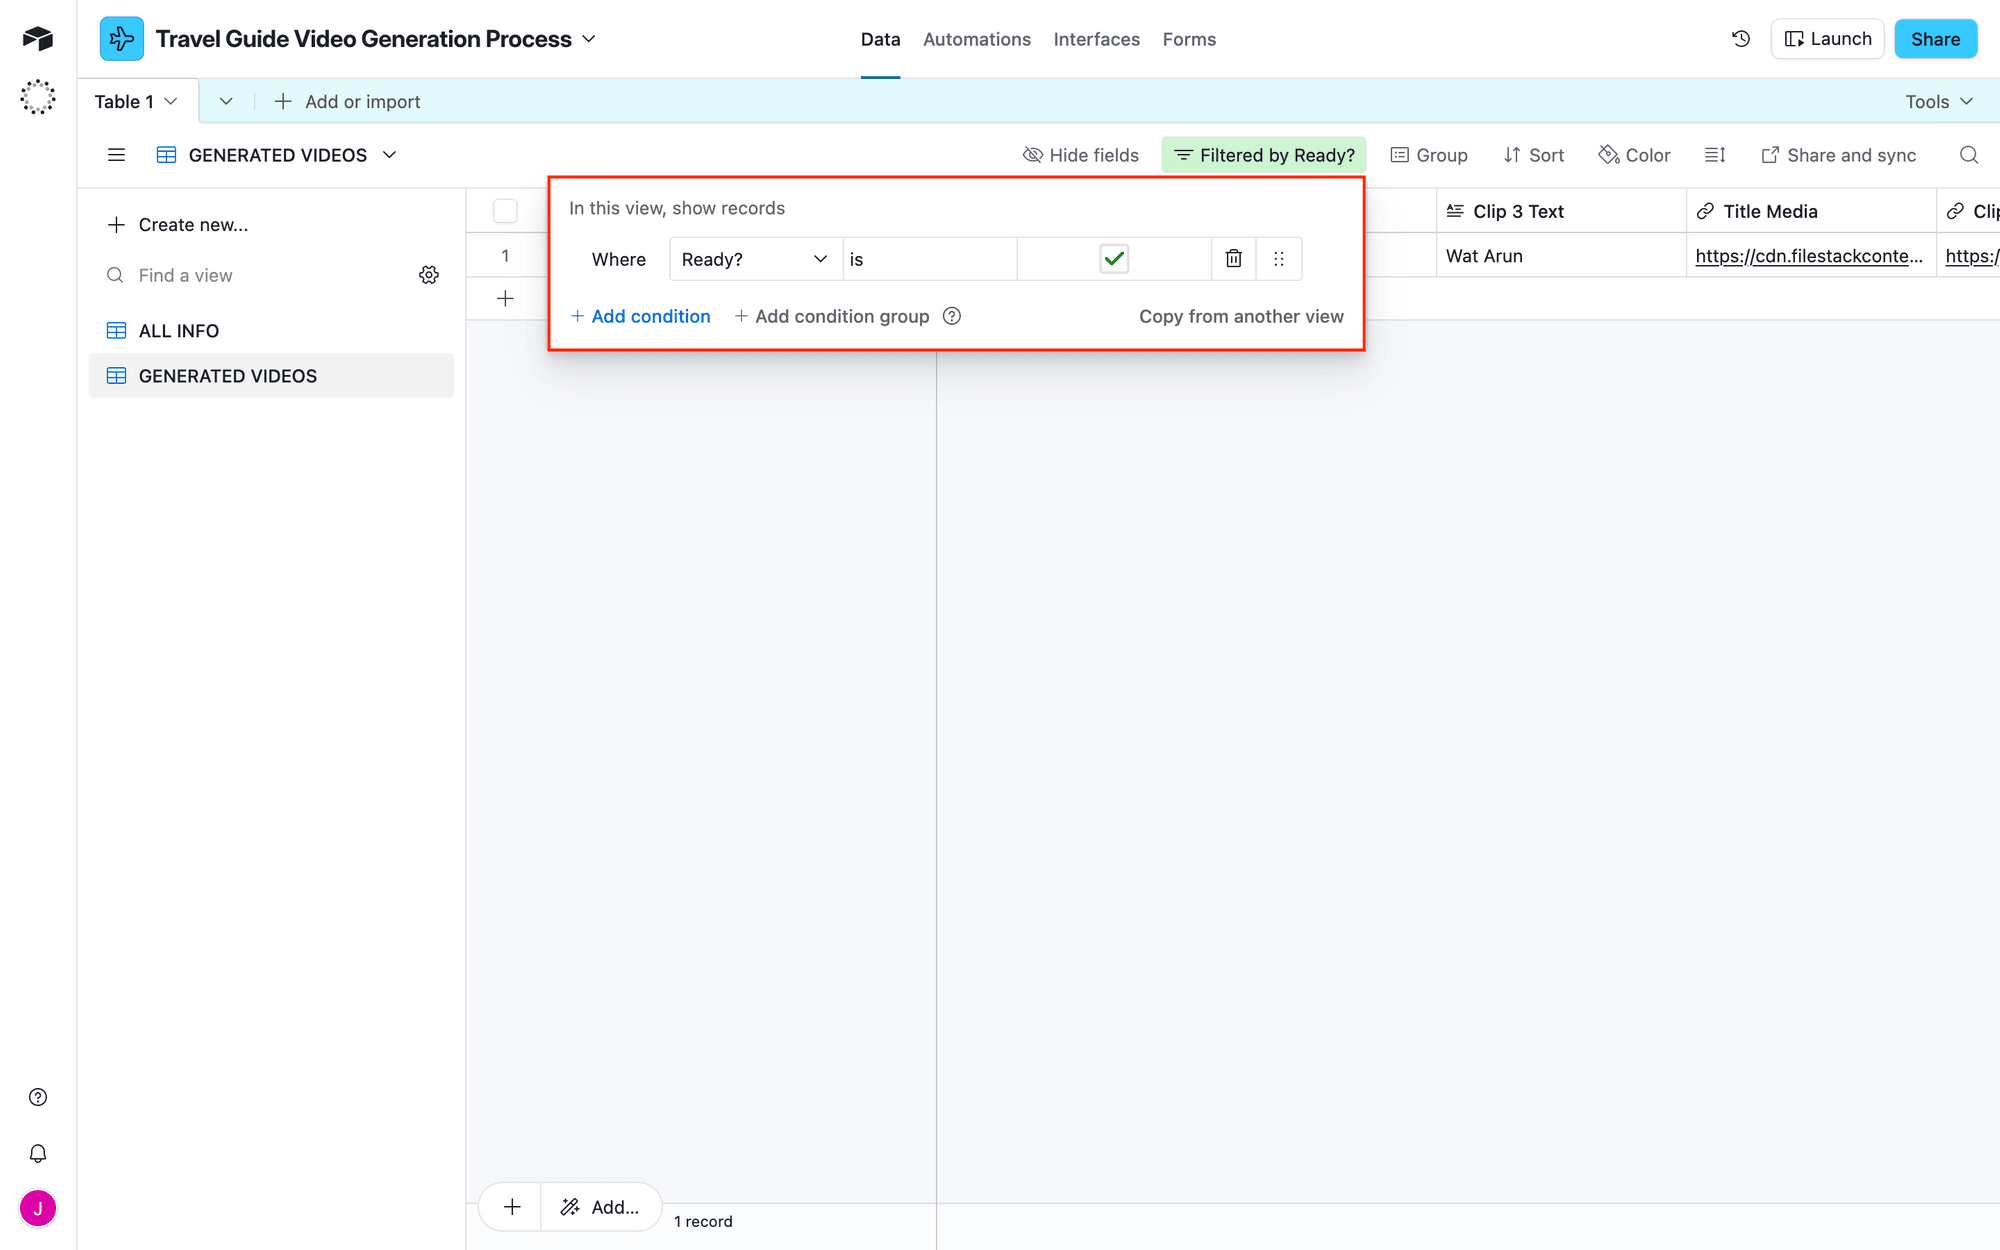
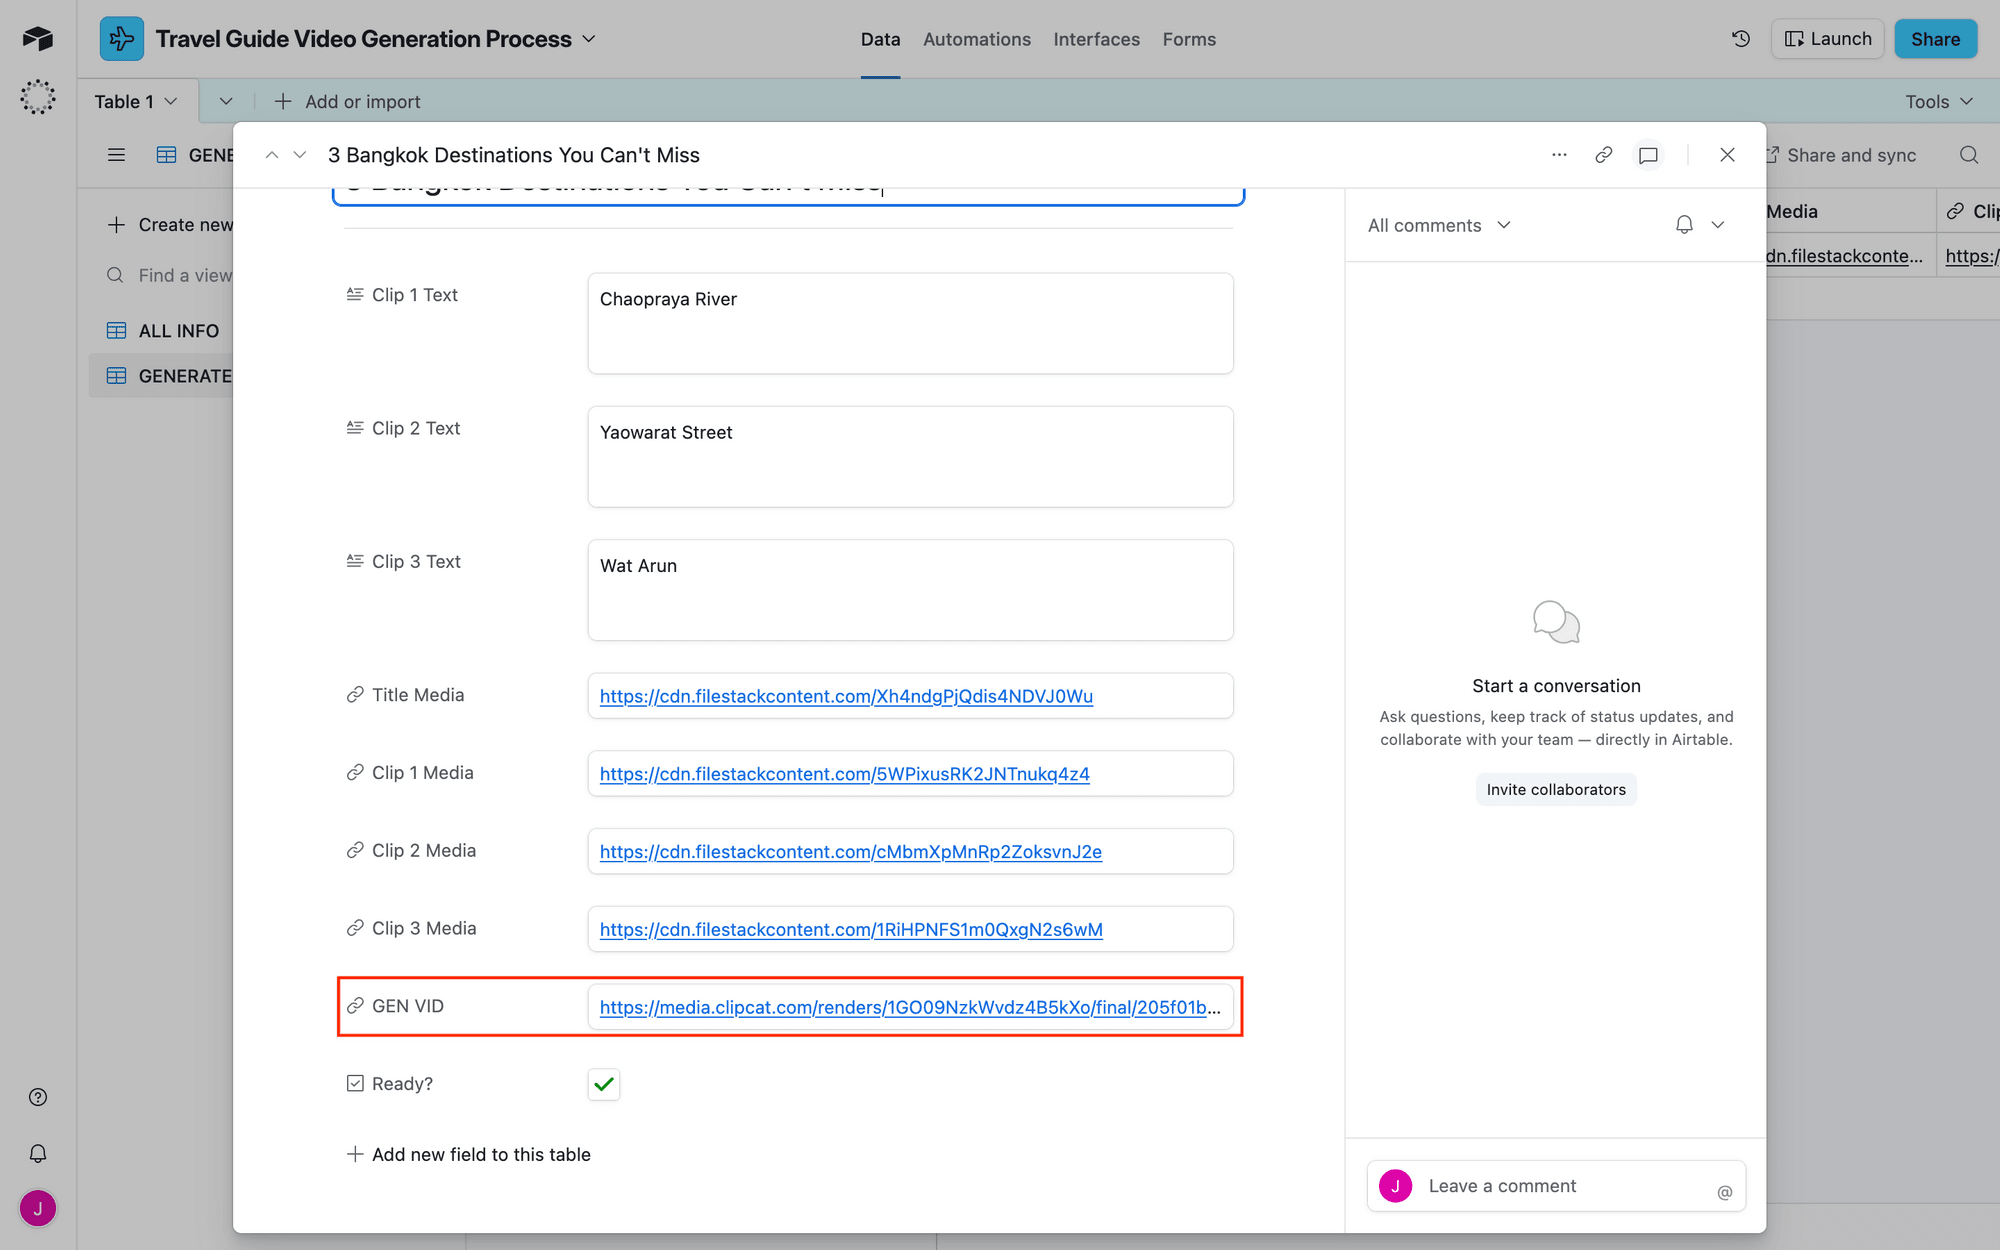
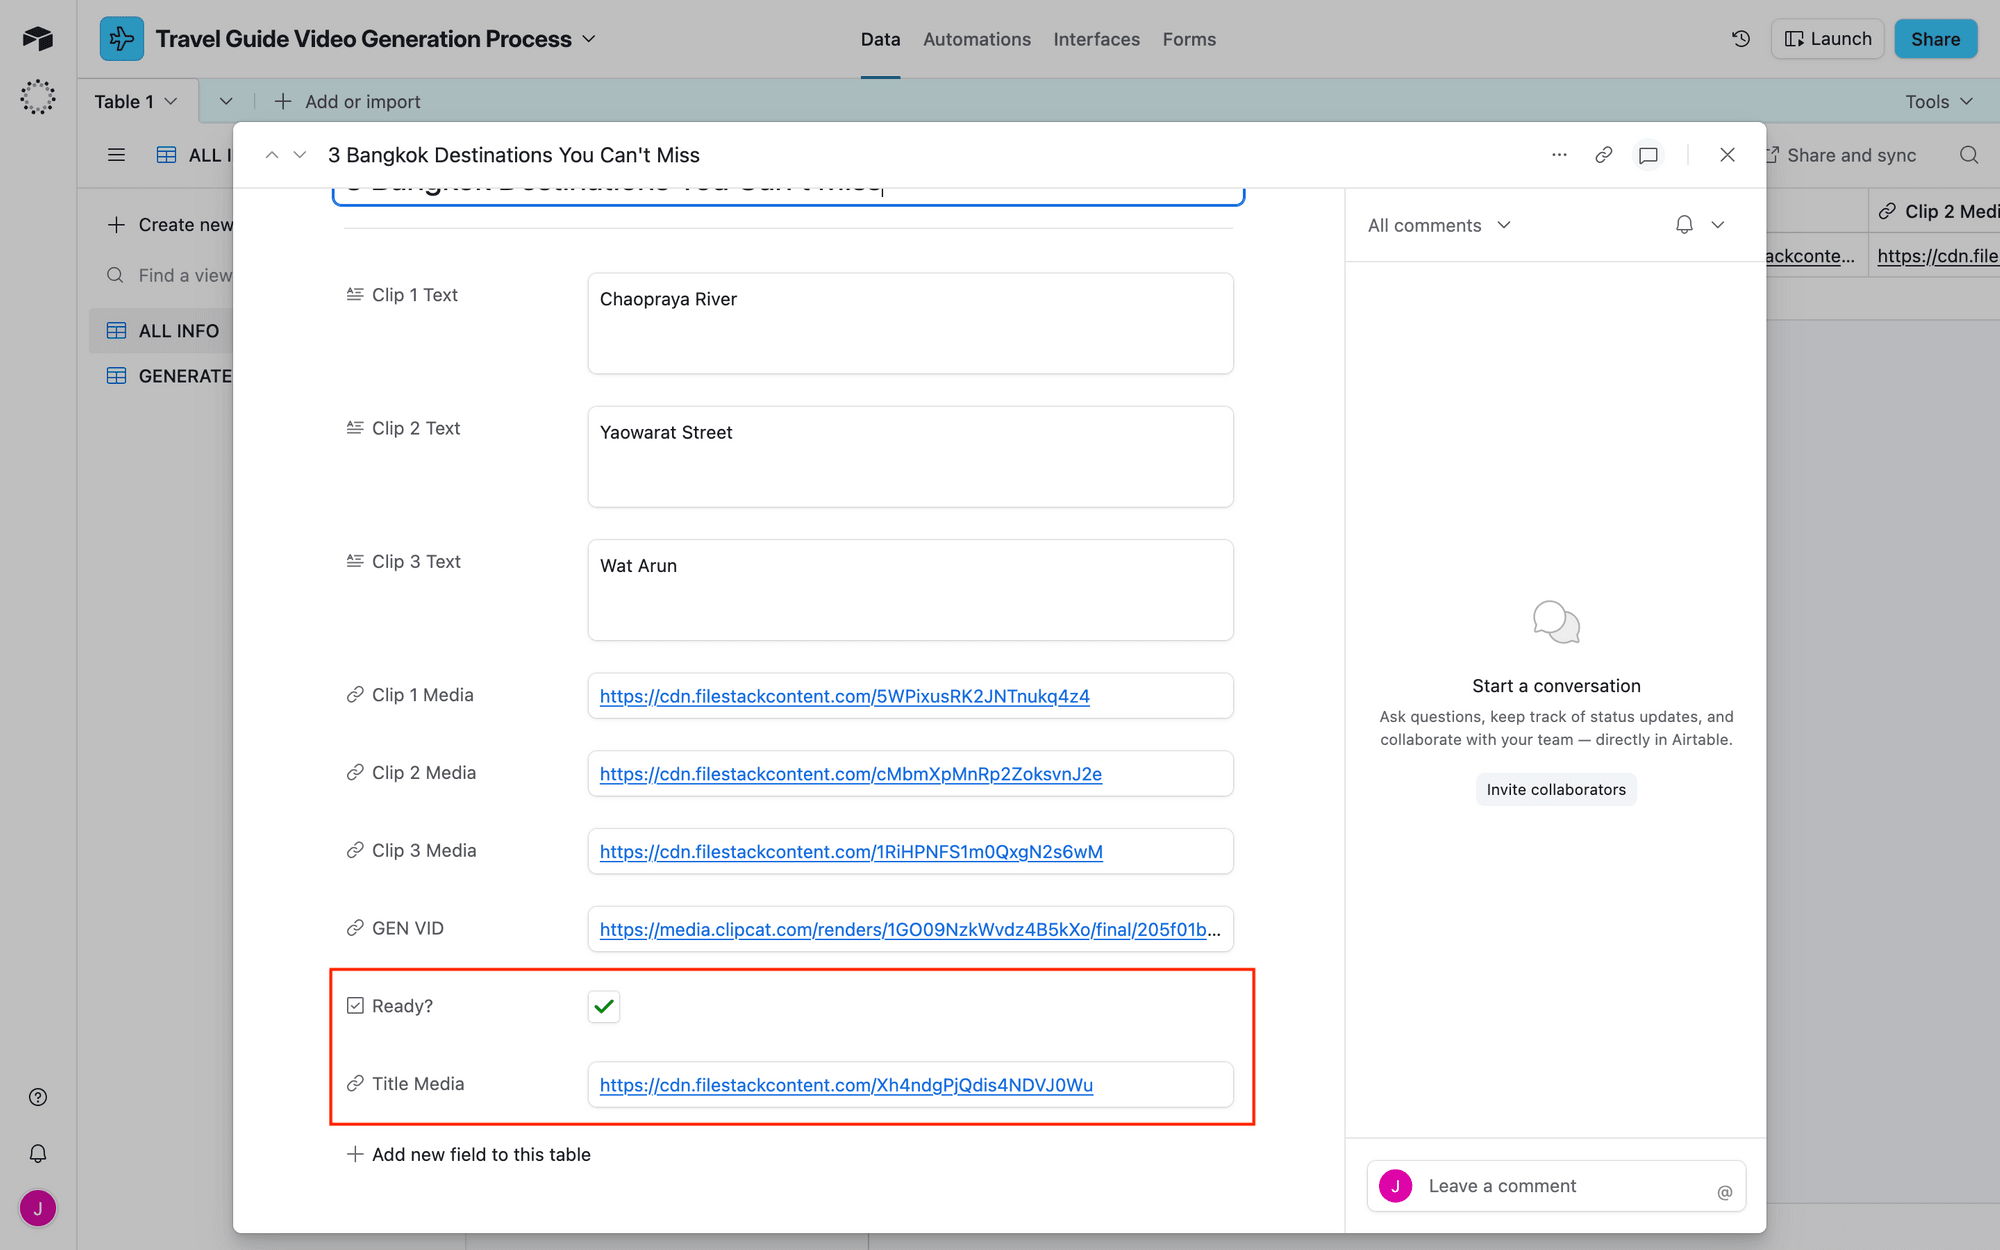 Screenshot of Airtable record with ready and title media outlined in red
We’ll also create a new view that only shows prepared data. Add a filter that only shows records where Ready? is ✅.
This approach requires all your data points to be within a single table, but it has the added benefit of allowing for edits before a video is created.
Make sure you have at least one record ready with test data.
Step 3 - Set Up a Zap to Generate Videos From New Data
Your design and data source are ready—now it’s time to tie it all together. A simple two-step zap will retrieve new records from your Airtable base, then create a render in Clipcat.
Log into Zapier dashboard, create a new zap, and set up the following events:
Trigger: New Record in Airtable
Choose Airtable as the app and New Record as the event. If you haven’t connected your Airtable account yet, you will be prompted to enter a personal access token with the necessary permissions.
Configure the event by selecting the correct base, table, and view.
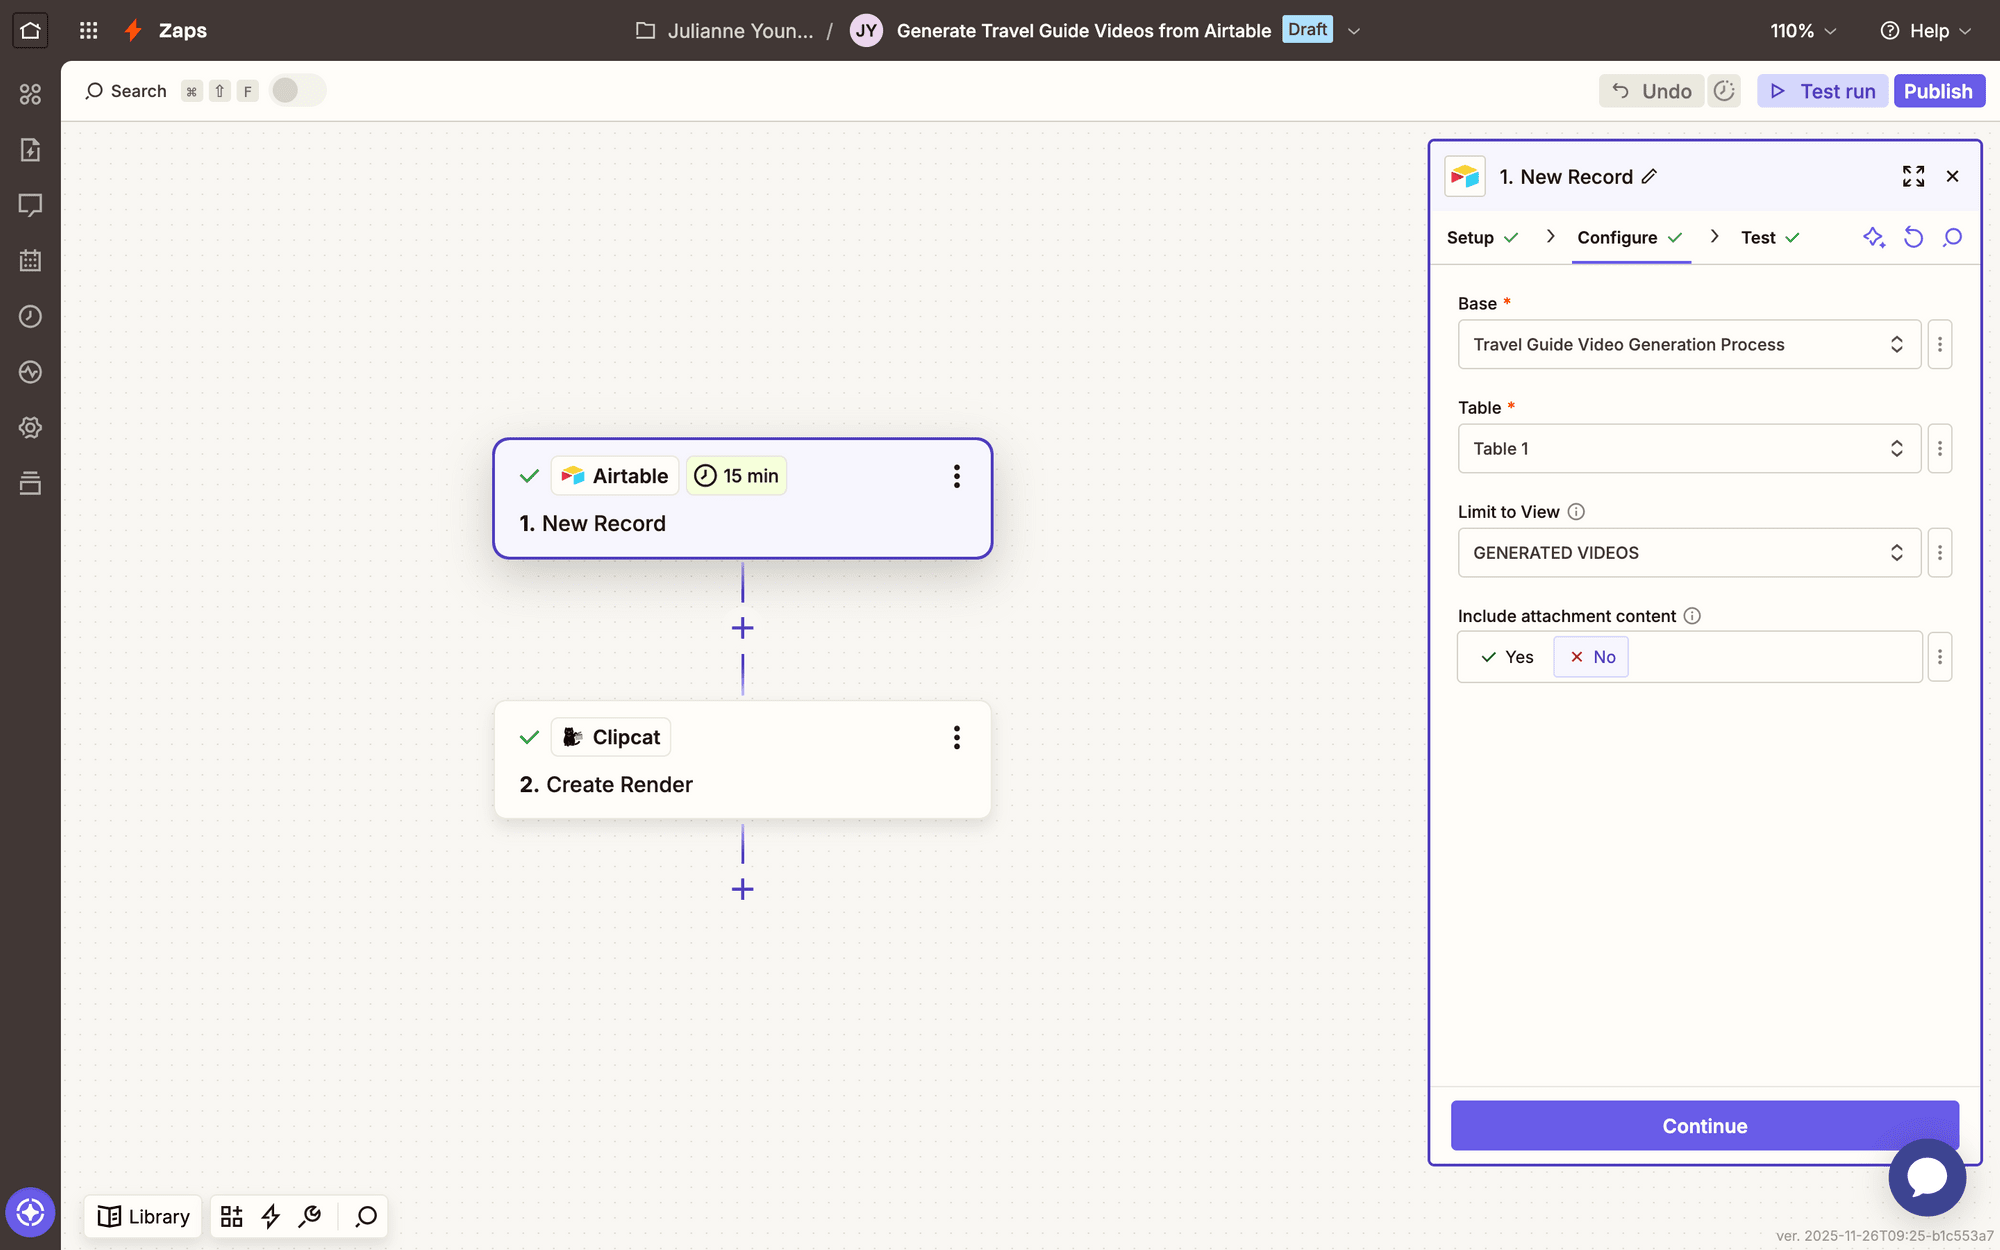
Test the step to ensure Zapier is able to find a record.
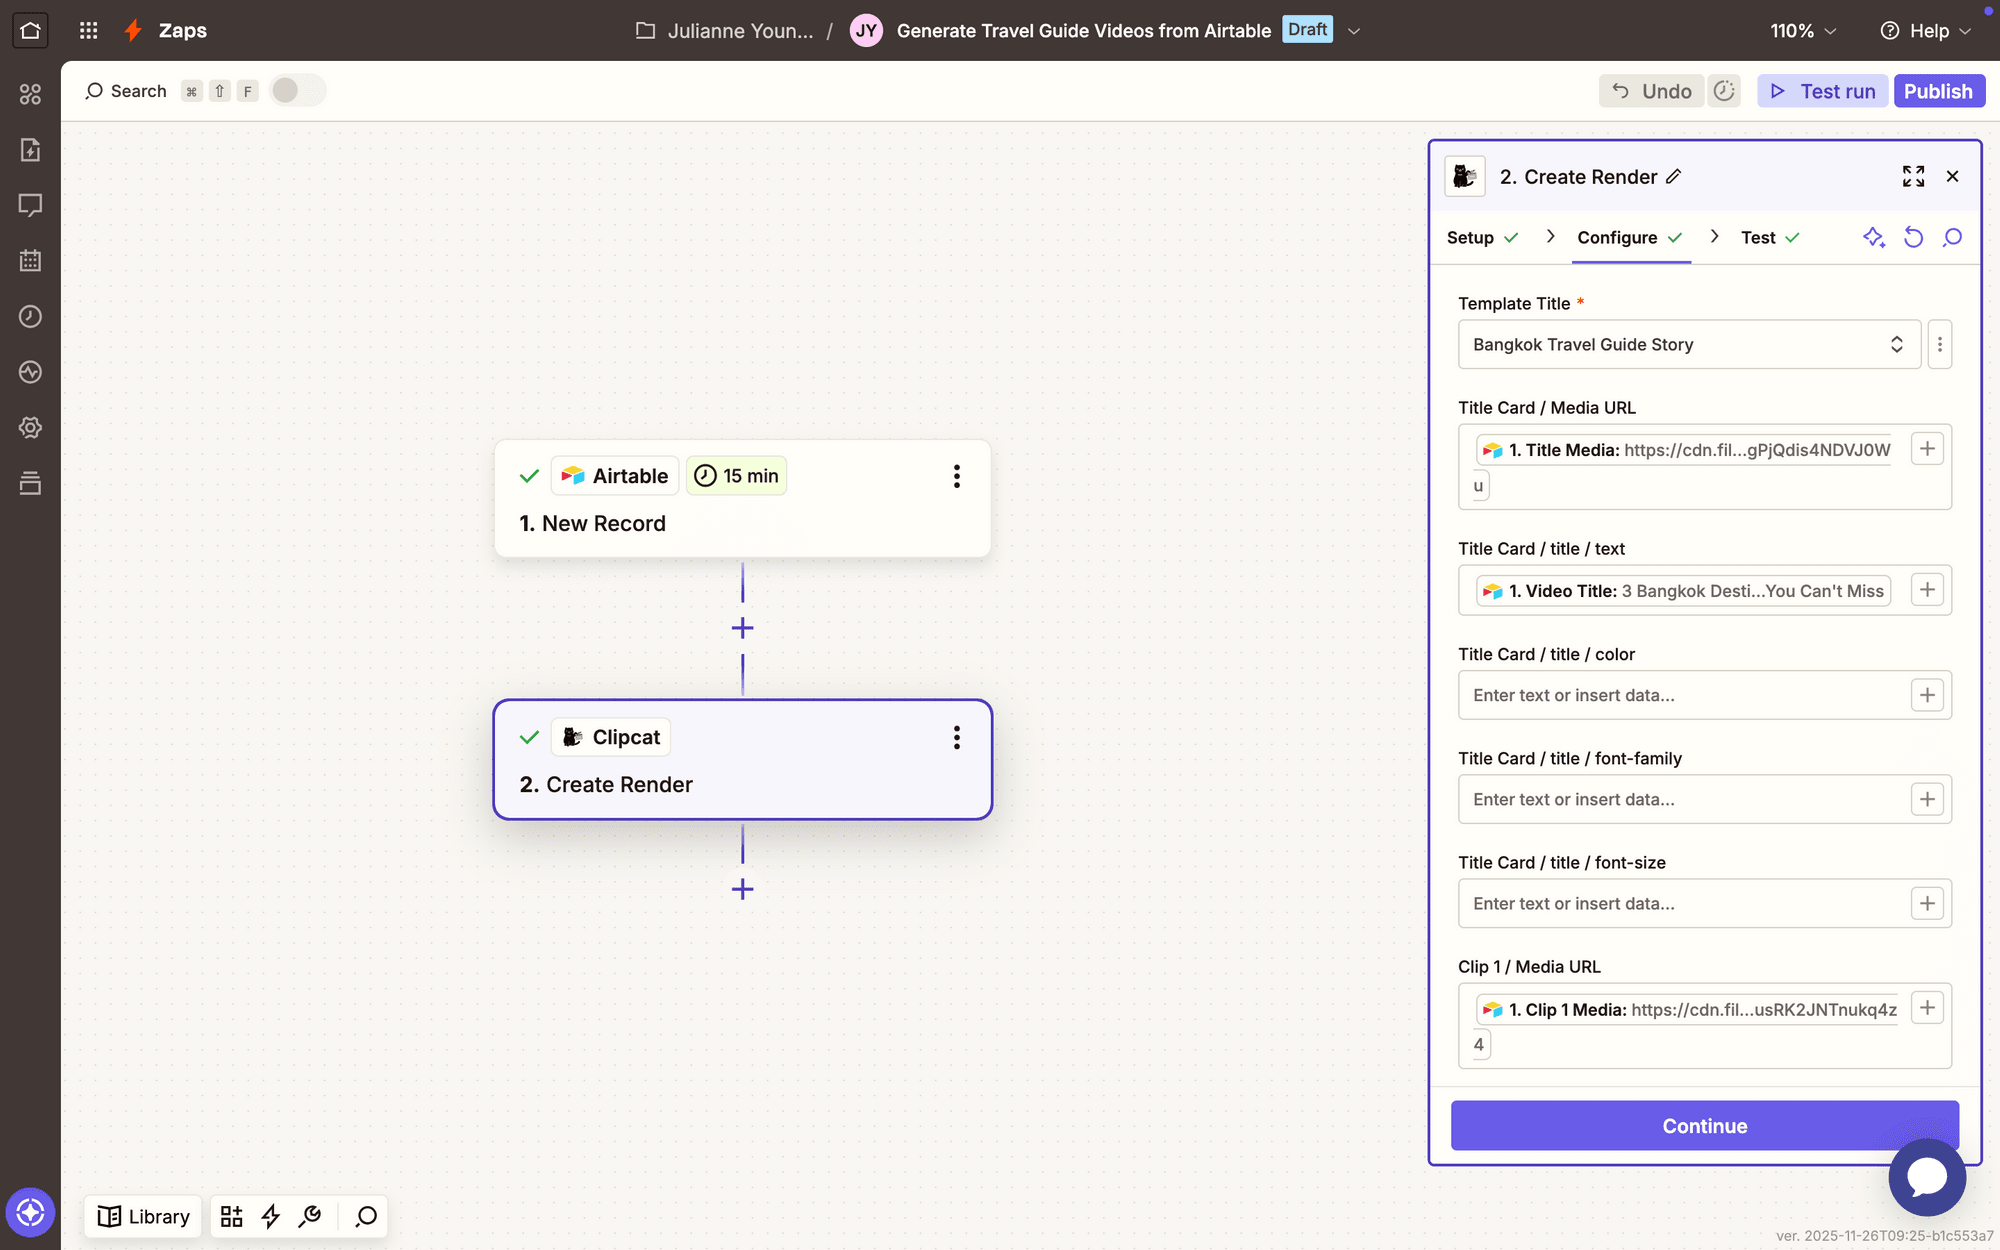
Action: Create Render in Clipcat
Choose Clipcat as the app and Create Render as the event. You’ll be asked to connect your Clipcat account using an API key, which can be found in the API Keys page when clicking your profile button in the app.
Configure the event by selecting your template, then mapping any Airtable data points to their corresponding Clipcat fields.
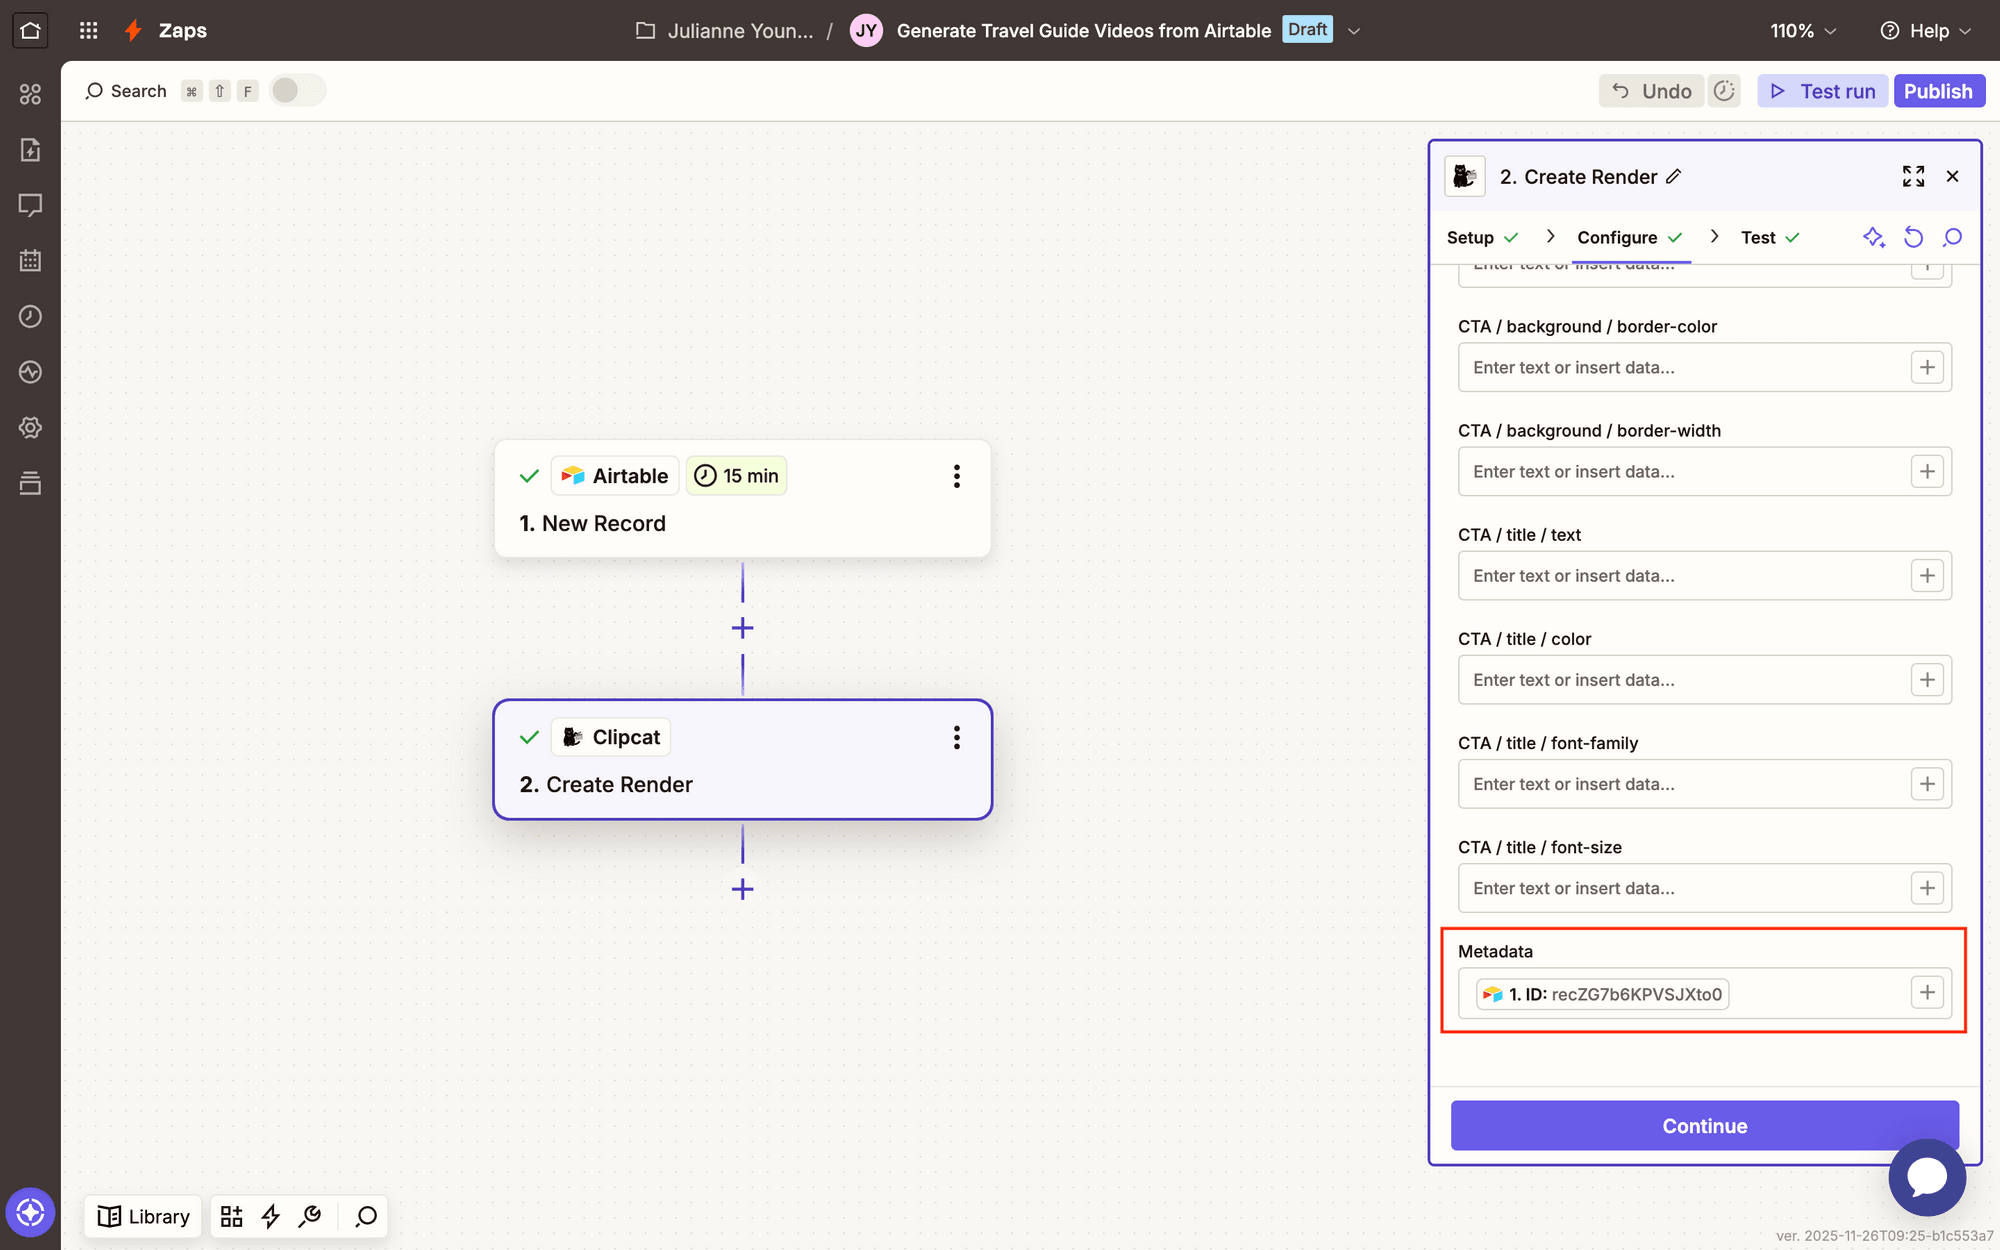
If you want to save generated video links to Airtable, add the record ID as metadata.
Test the action, and watch your Logs to ensure the video is rendered as expected.
Meow Memo 🐱: For more help, read our guide to generating your first Clipcat video with Airtable.
Step 4 - Set Up a Zap to Save Generated Videos
Let’s quickly set up one more zap to save links to generated Clipcat videos back to your Airtable base.
Create another zap, and set up the following events
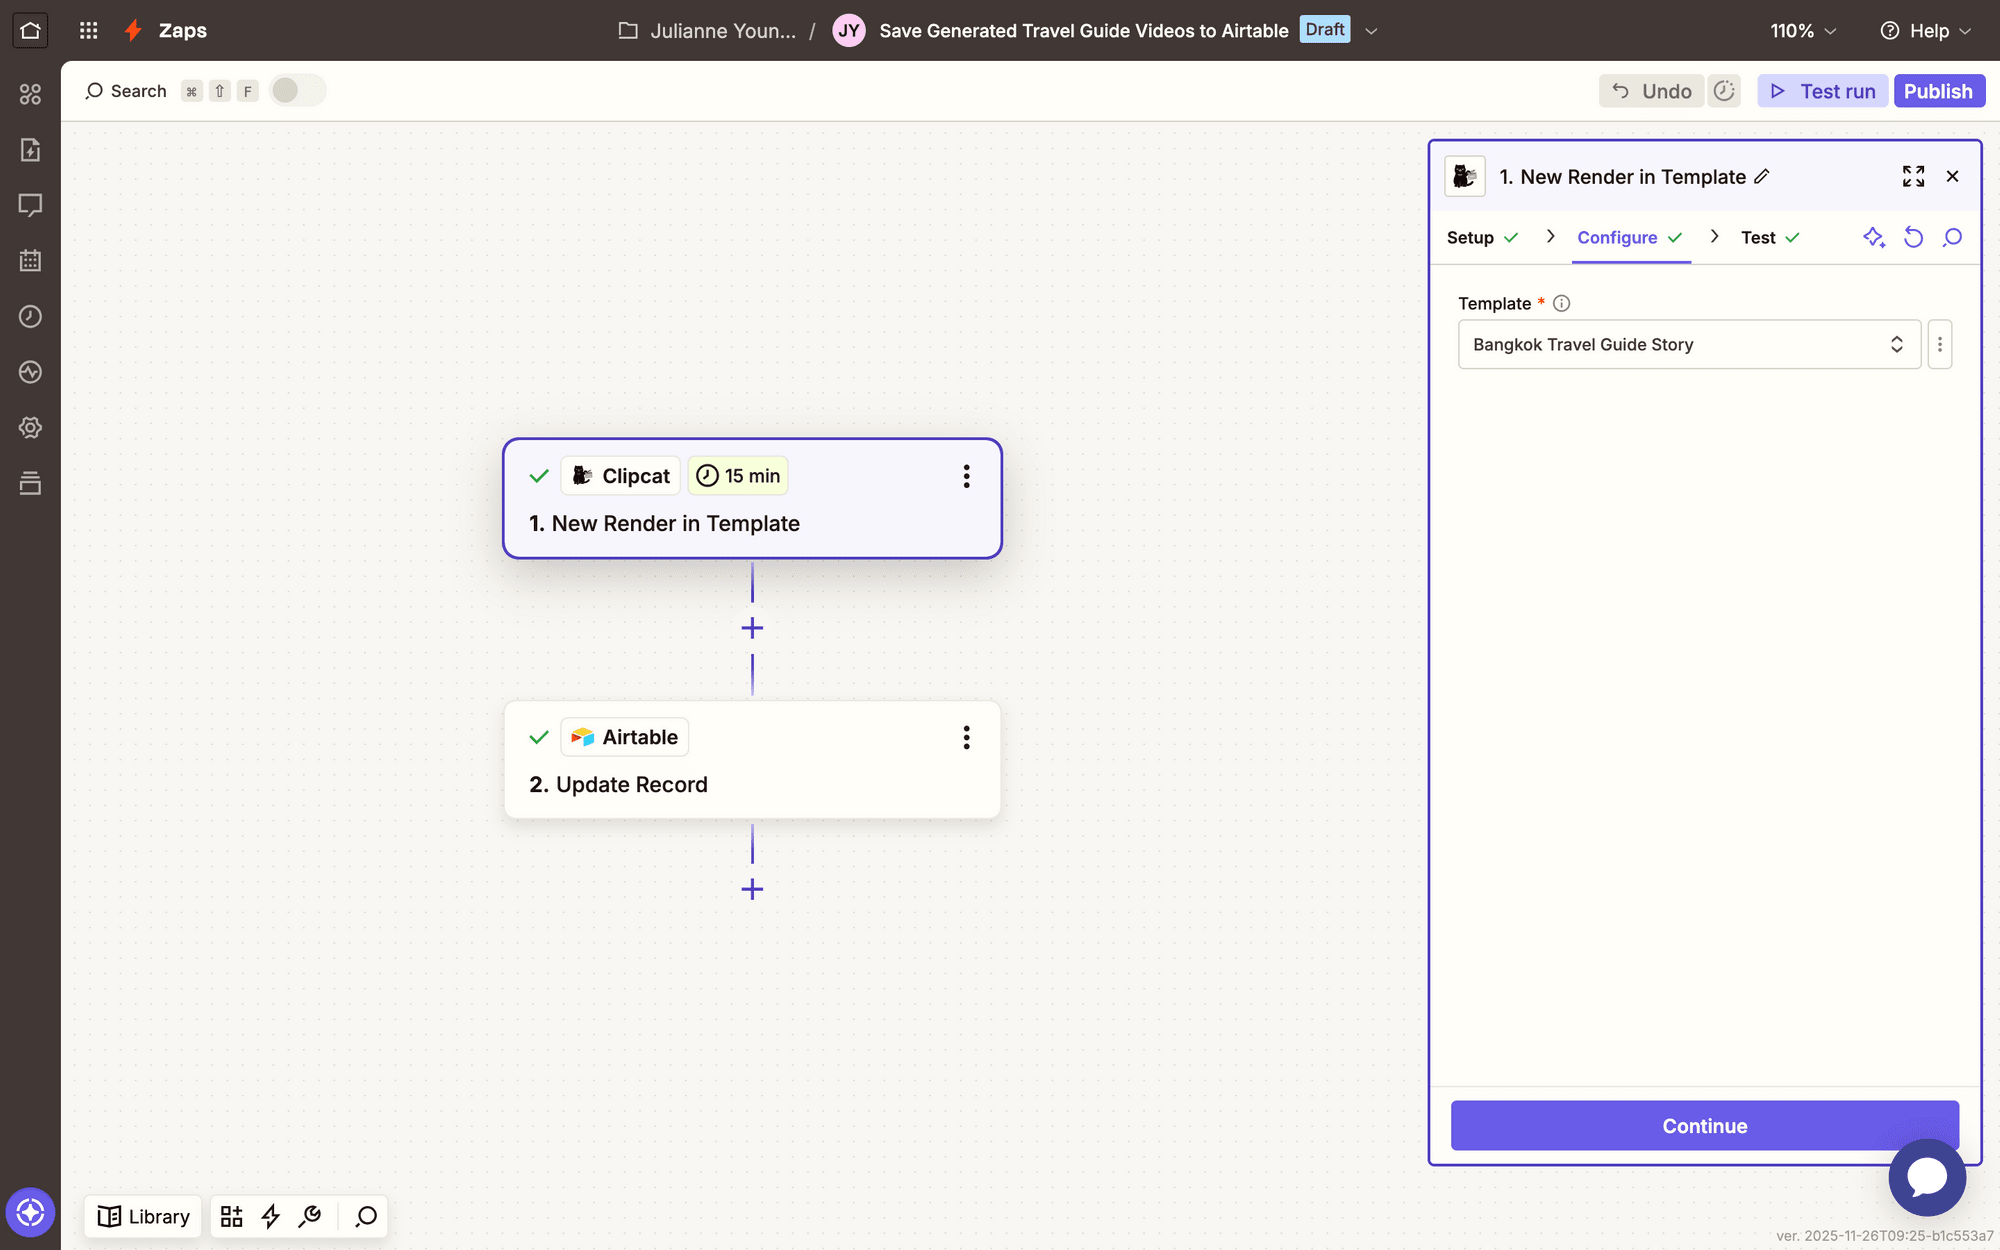
Trigger: New Render in Clipcat Template
Choose Clipcat as the app and New Render in Template as the event. Choose the right account, then select your travel guide template.
Test the action.
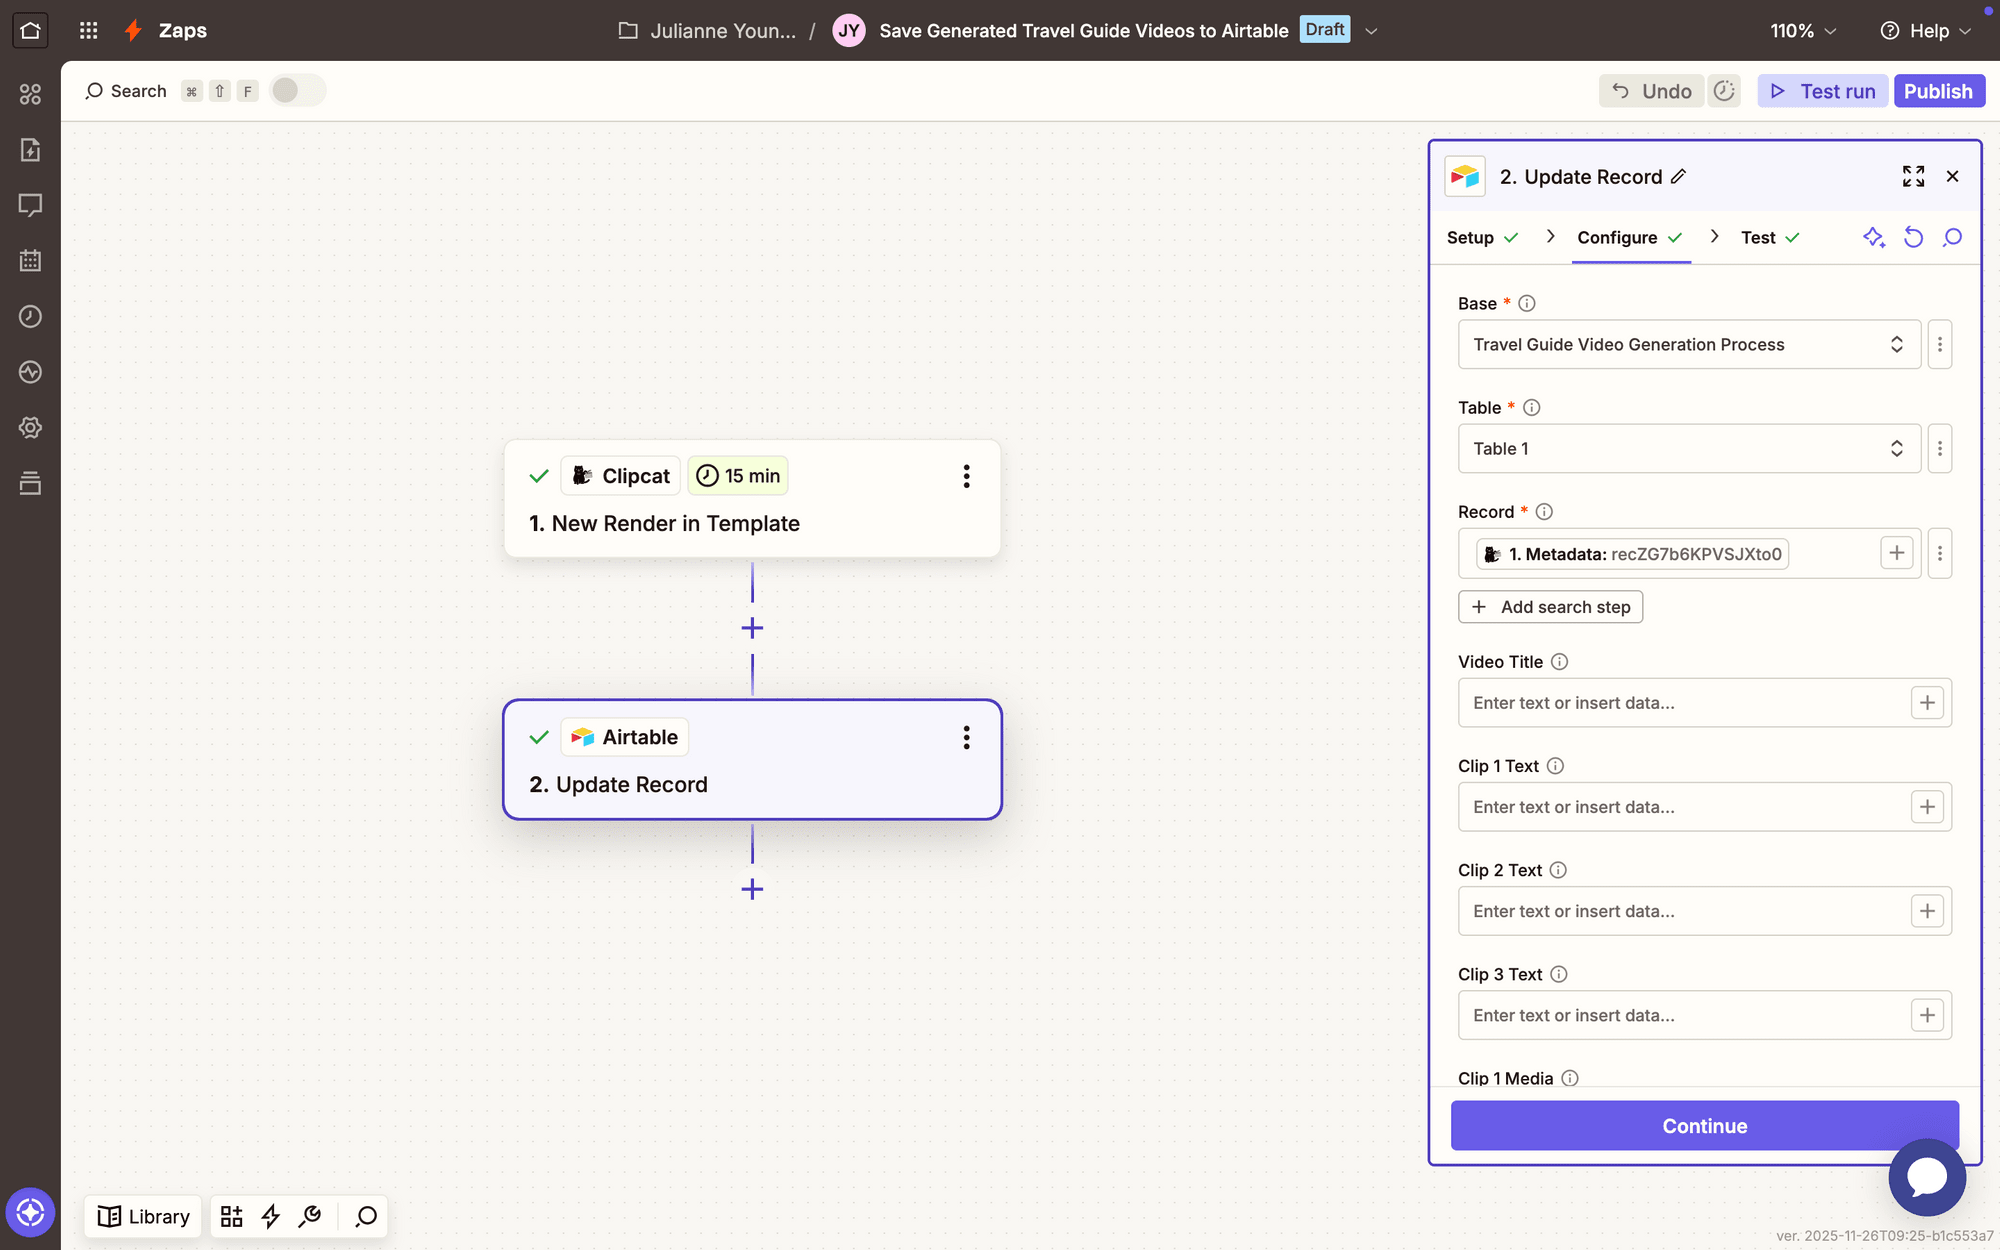
Action: Update Record in Airtable
Choose Airtable as the app and Update Record as the event.
Configure the action by using the video’s metadata as the Record value, then insert the link in the corresponding field.
Test the action. You should see the video link appear in your Airtable base.
You should now have a beautiful travel guide video, ready to be published online.
When you’re happy with your zaps, hit Publish to take them live!
Conclusion
You now have a fully automated system for generating travel guide videos at scale. By combining Clipcat's templating power with Airtable's data management and Zapier's workflow automation, you can transform raw location data into polished, publication-ready videos in minutes. This setup frees you to focus on what matters most—discovering great locations and building an engaged audience. Start with one template, test your workflow, and scale from there!