Developer's Guide to Clipcat Video API
Contents
Creating and editing videos is not an easy task, and neither is building a feature that does that. If you’re building a feature that creates and exports videos using dynamic data, such as personalized user videos, e-commerce product videos, event promo videos, etc., struggling with FFmpeg is not uncommon. Issues like inconsistent video codecs, audio that goes out of sync, or random rendering problems often occur and can slow you down a lot.
As an alternative, Clipcat lets you edit and render videos programmatically without touching FFmpeg or worrying about the underlying processing. All you need to do is set up a template and use its API to update the data in the template.
In this guide, we'll cover everything you need to integrate Clipcat into your application, from authentication to rendering. Let’s get into it!
What is Clipcat
Clipcat is a video generation API that lets you create videos programmatically using templates. All you need to do is design the video template, and then use the API to update elements in the template and generate different videos. You can update the text (e.g., titles, captions, quotes), images (e.g, profile pictures, logos, product photos), and videos (e.g., user-uploaded clips or animated backgrounds).
Here are some examples of the templates…
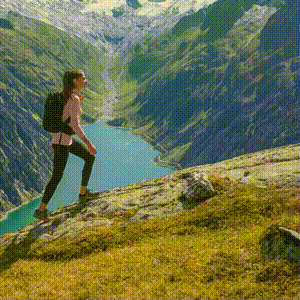
Example 1: Yellow Pink Decorative Title Card Template

Example 2: Brown Yellow Simple Modern Inspirational Quote Template
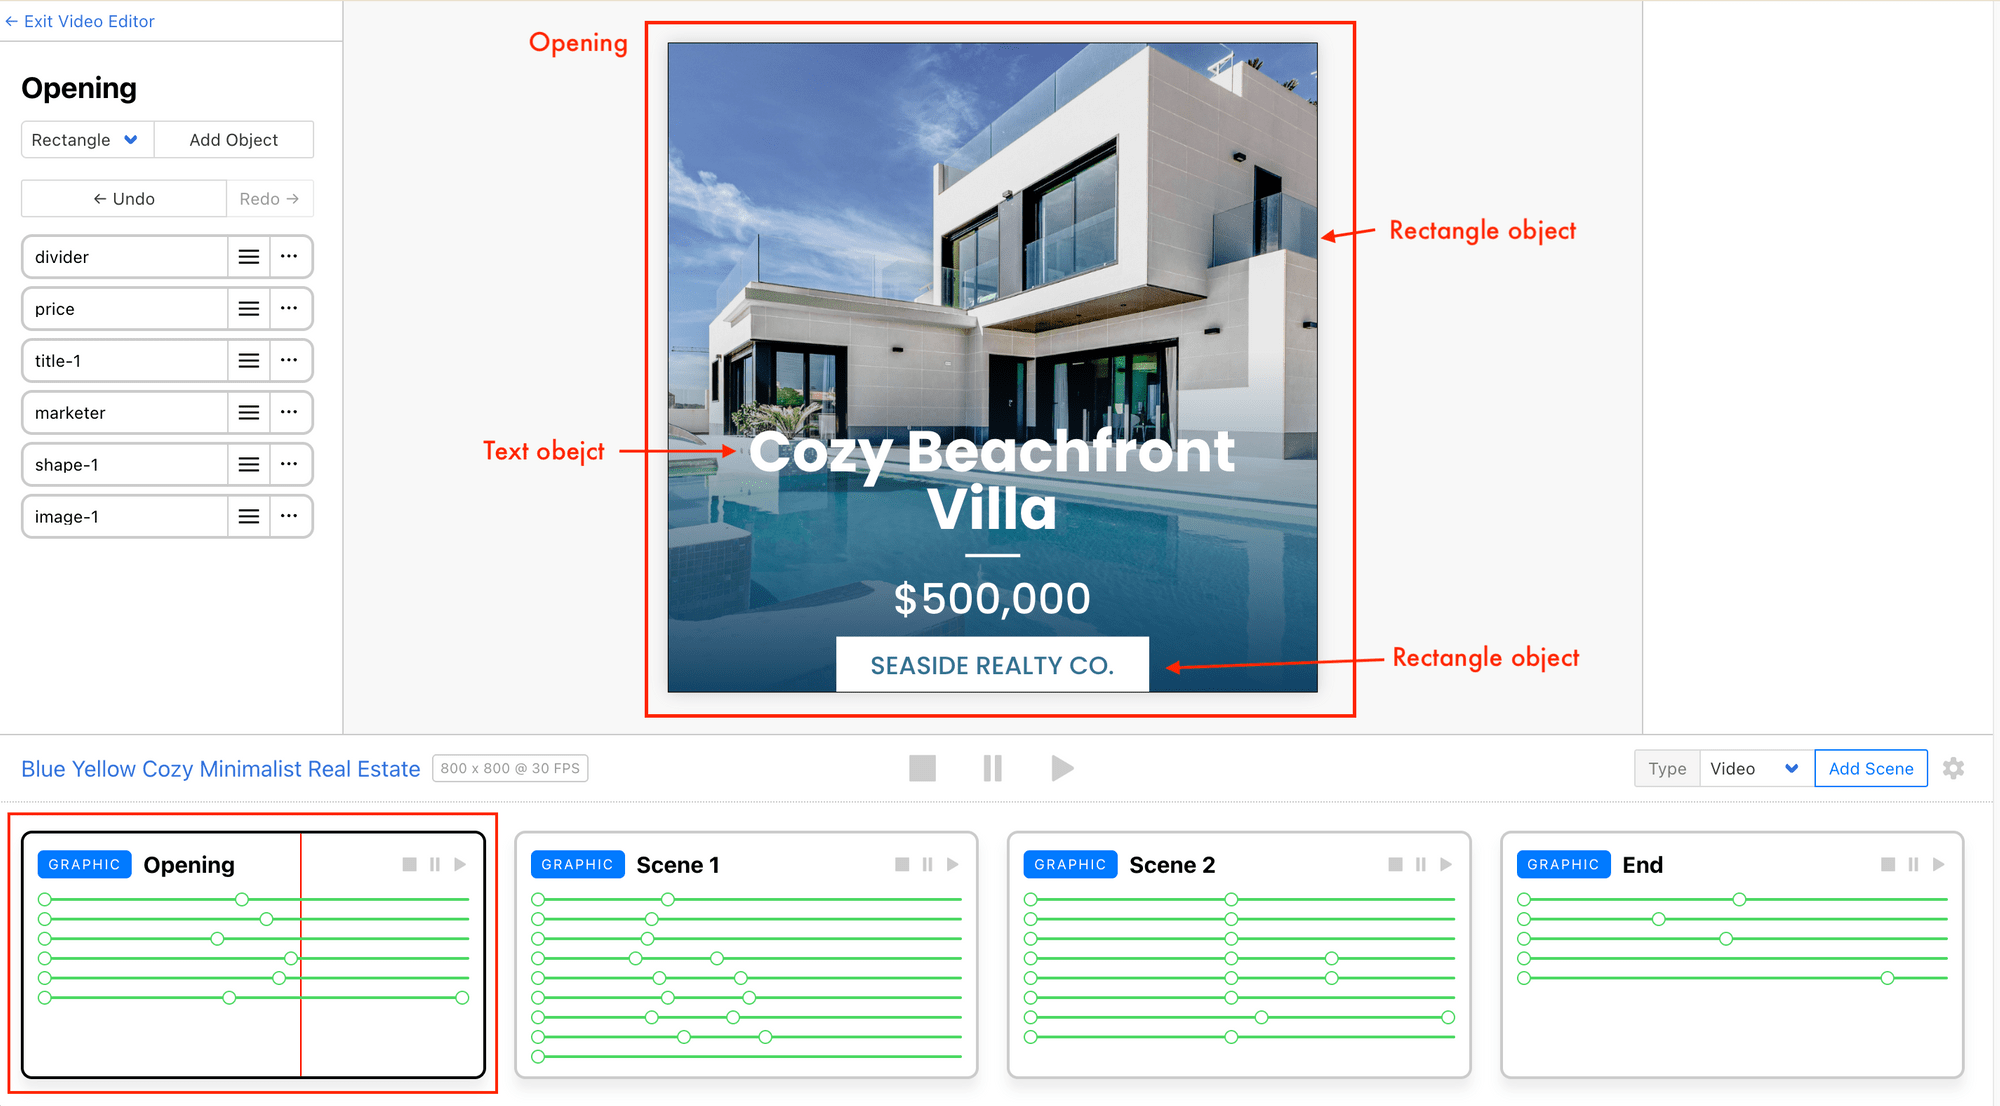
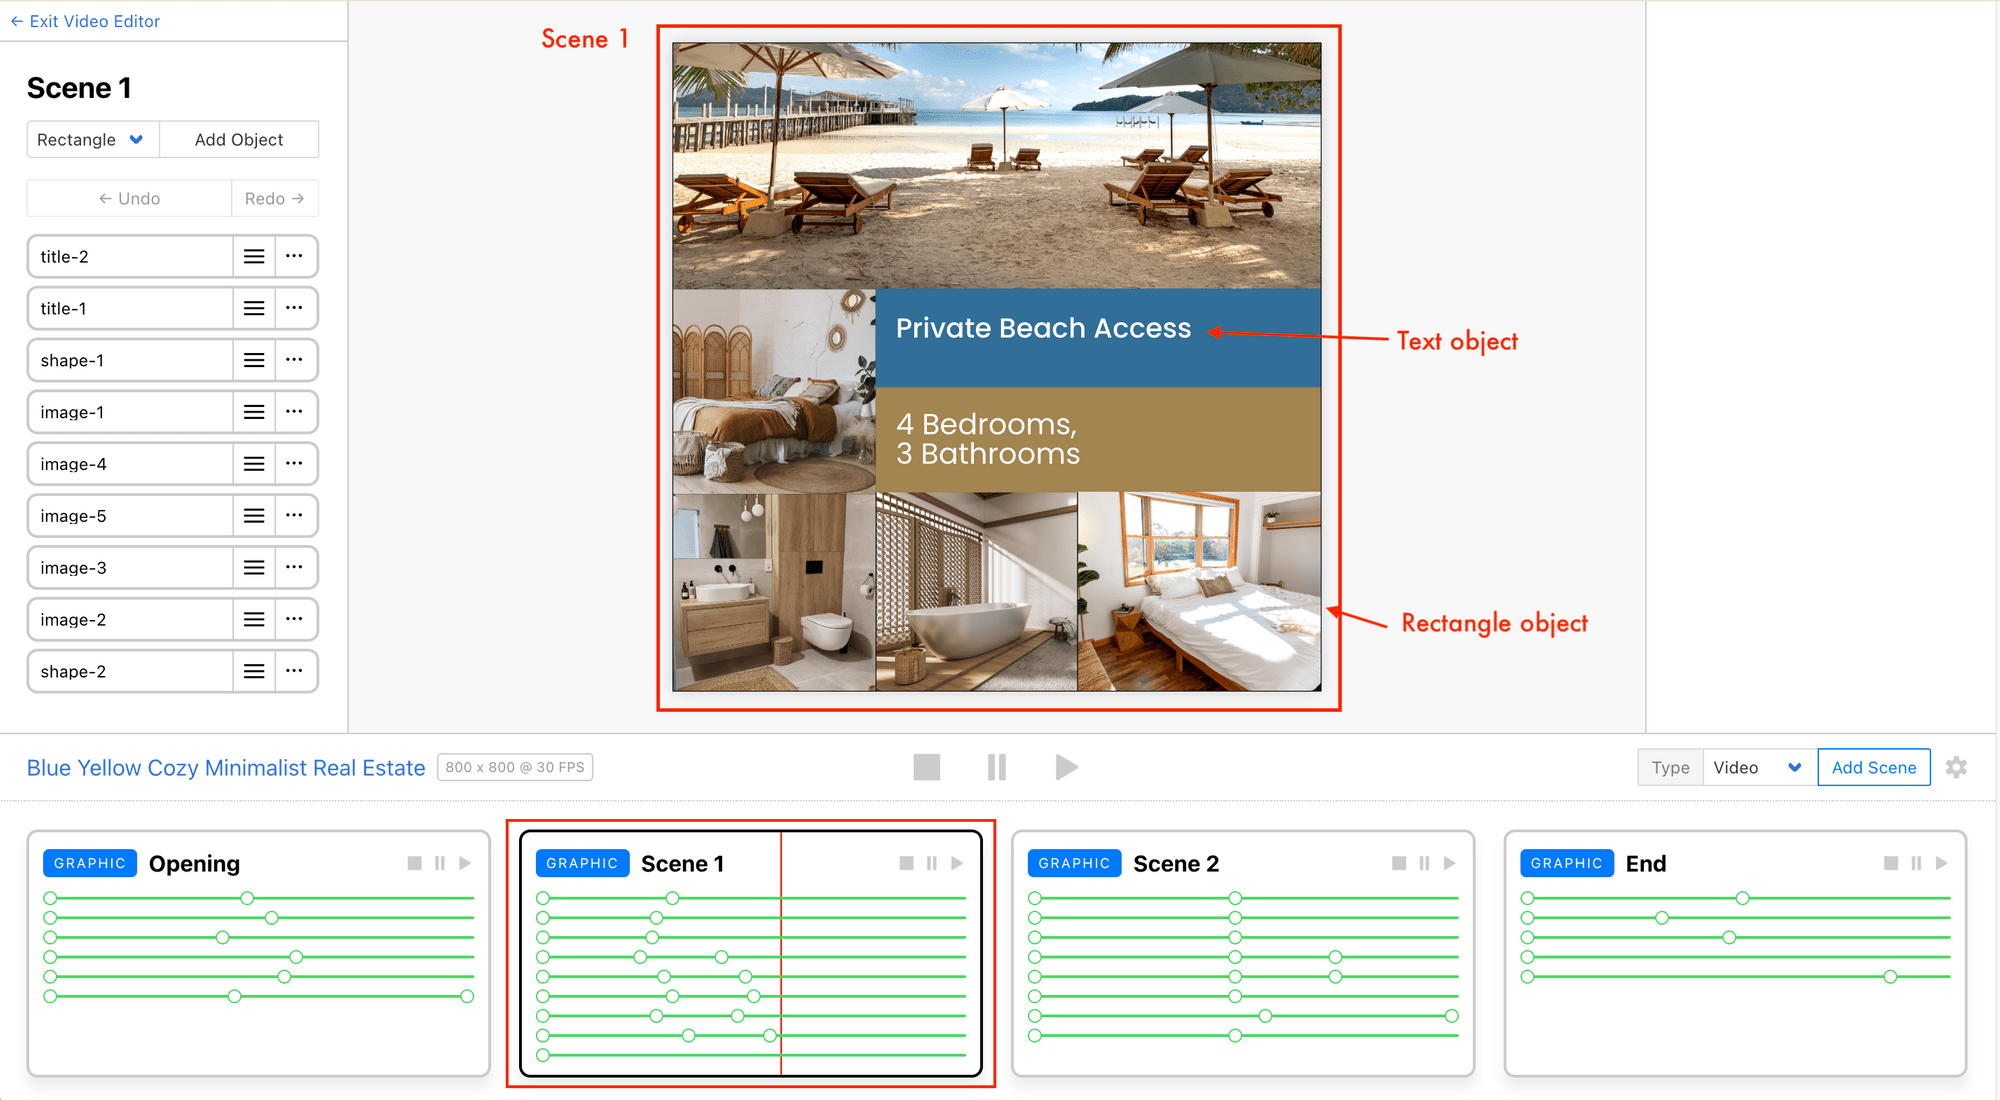
Example 3: Brown Gold Modern Real Estate Template

Understanding Clipcat’s Template
A Clipcat video template can have multiple graphic or video scenes, each containing different objects like text, rectangles, and circles:
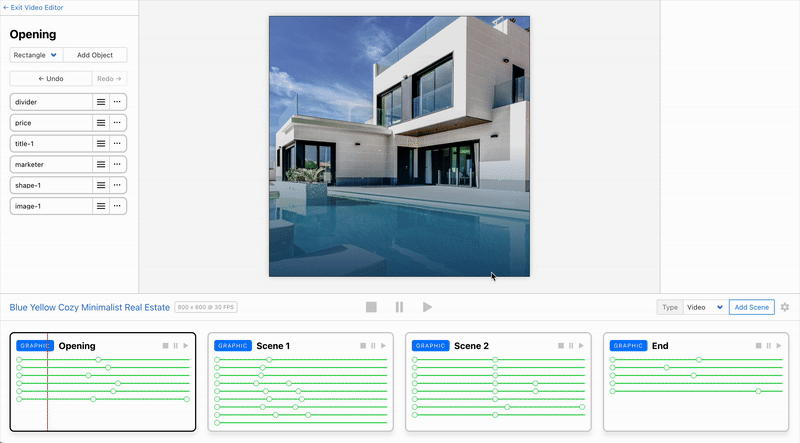
Scene: Opening
Scene: Scene 1
For each object in the scenes, you can add keyframes to define its properties like position, opacity, size, etc., at specific times:
Keyframe 1
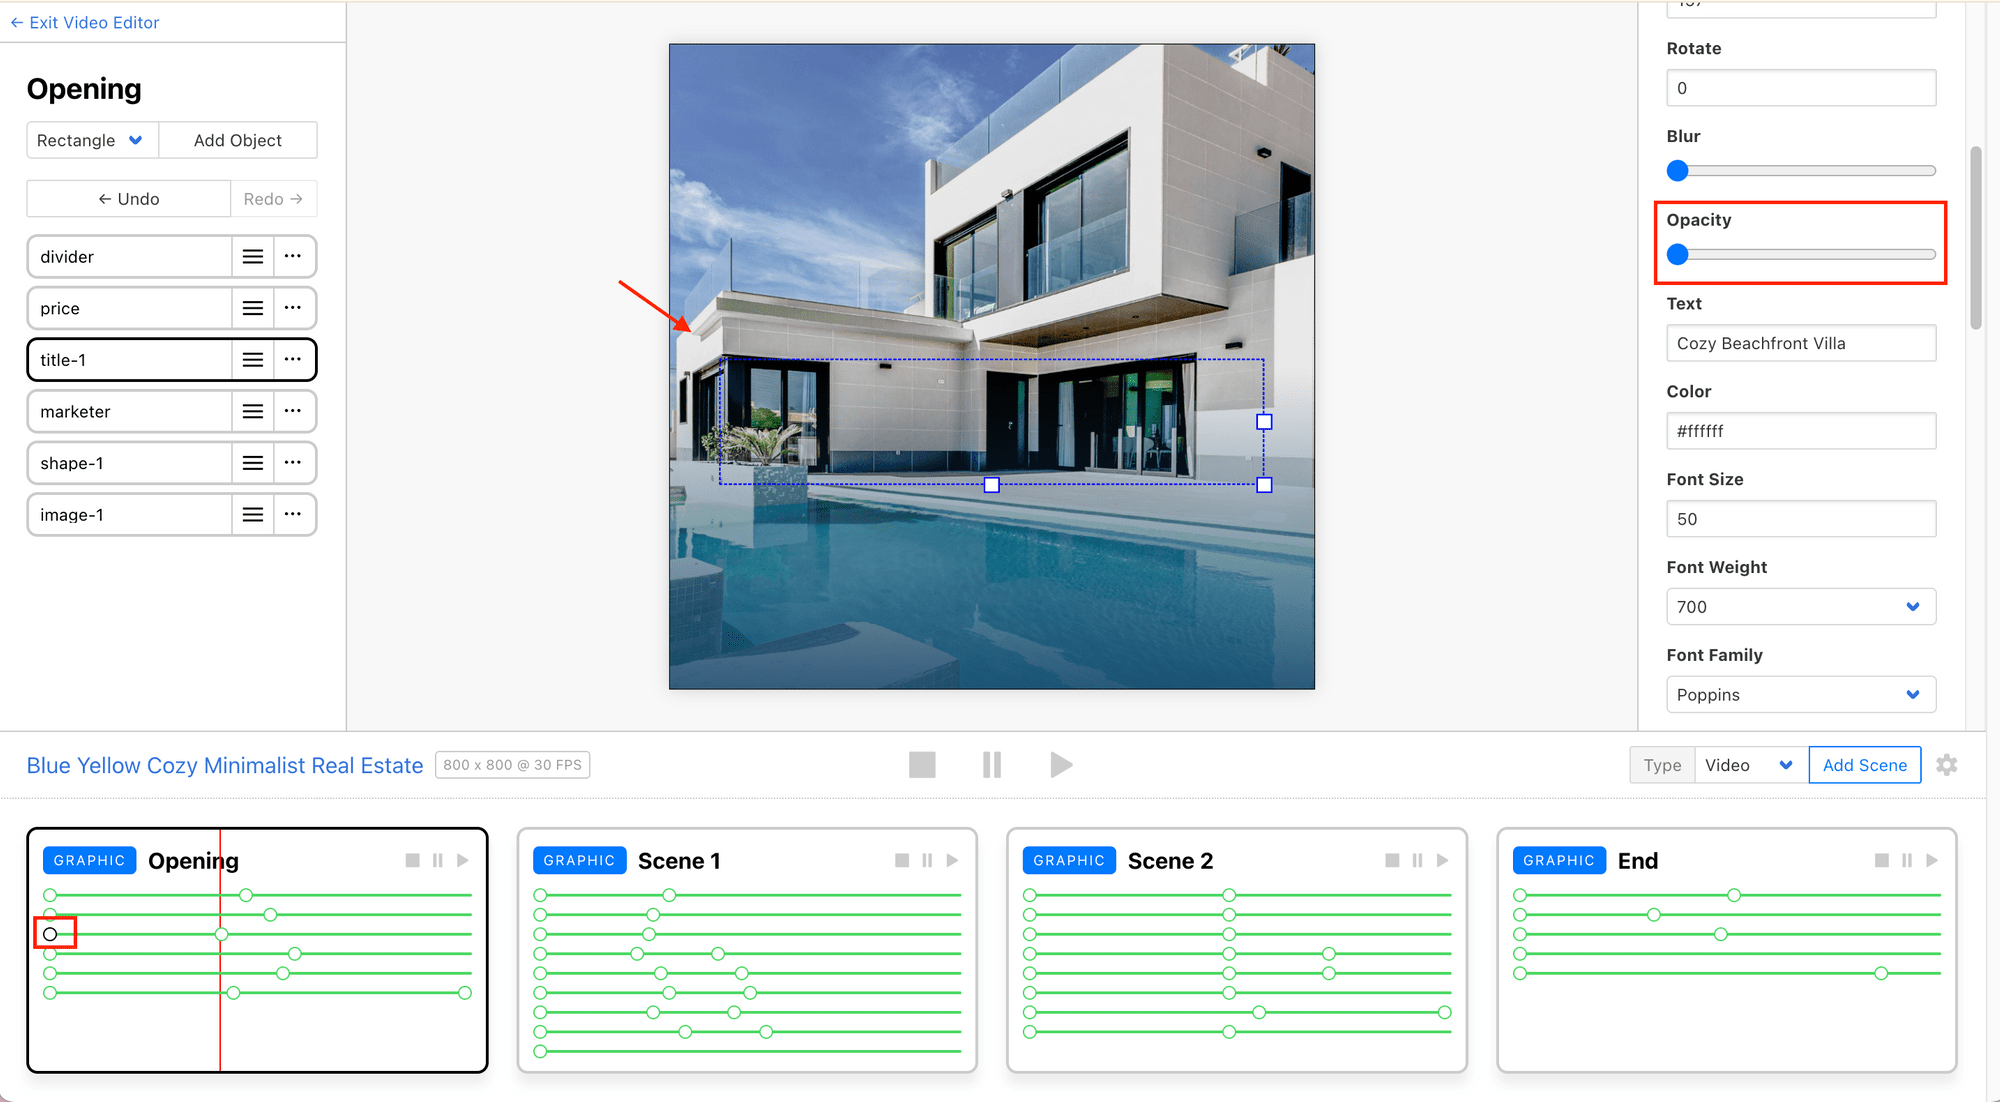
Keyframe 2
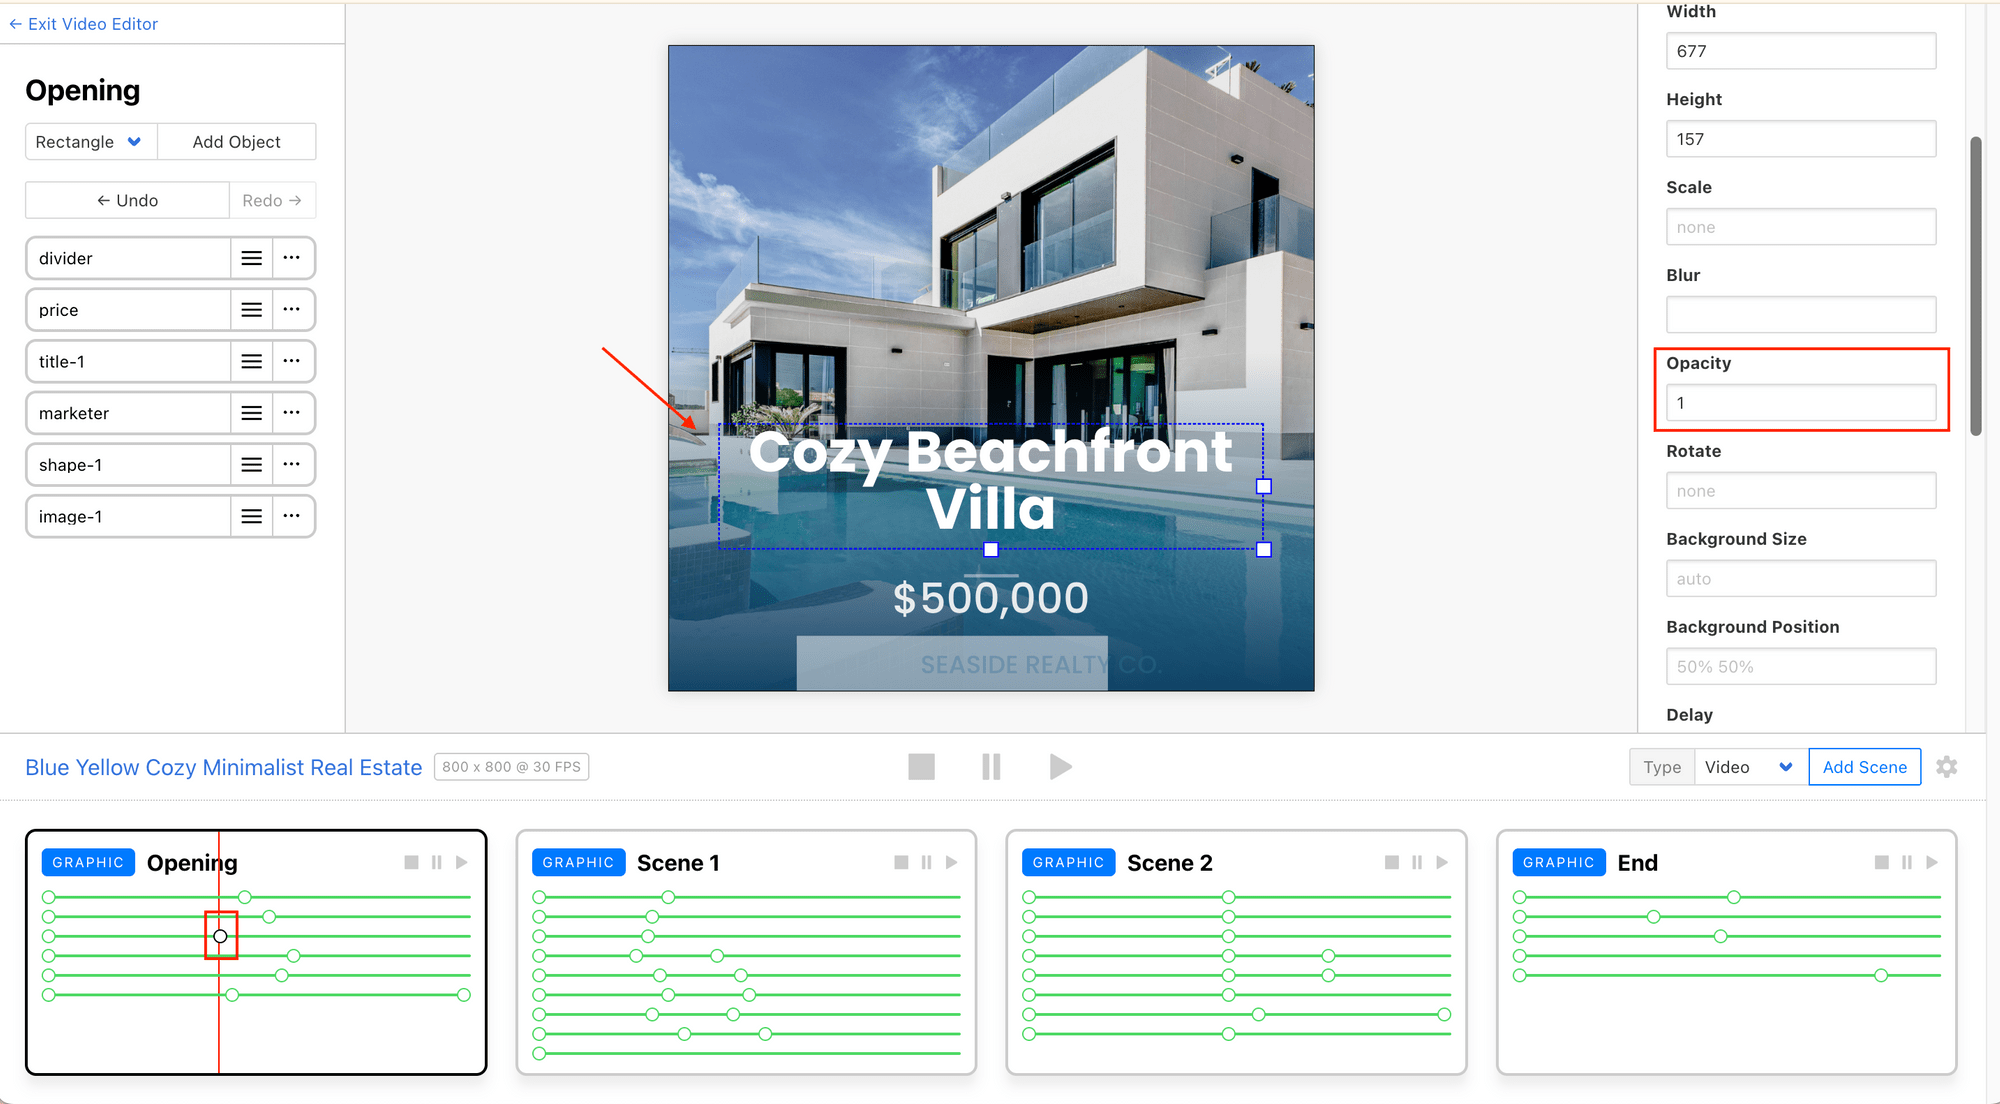
This enables animation and transition effects to be applied to the object:
By passing different data to update the objects’ values in the template via API calls, you can generate different videos without touching the editor.
Understanding Clipcat’s API
When using the Clipcat API, Renders are the main resource. To generate a video, simply send a POST request with a template ID and a list of template modifications:
var data = {
  "template": "rZYyExAwA2KzW42bVG",
  "modifications": [
    {
      "scene": "Scene 1",
      "object": "_ej2891",
      "text": "This is some different text"
    },
    {
      "scene": "Scene 1",
      "object": "_md3ma3",
      "background-image": "https://cdn.clipcat.com/assets/test_data/photography/barcelona-345efddb03cb628590e0e3a180b9b61d264a6e7756e5a11264da9112482207a9.jpg",
    },
  ]
}
fetch('https://api.clipcat.com/v1/renders', {
  method: 'POST',
  body: JSON.stringify(data),
  headers: {
    'Content-Type' : 'application/json',
    'Authorization' : `Bearer ${API_KEY}`
  }
})
The modifications can be anything from updating text to swapping images or adjusting colours in the template. For every object you want to modify, include its scene name, object name, and the specific property you want to update together with the new value you want it to have.
Updating the text
{
      "scene": "Scene 1", // scene name
      "object": "_ej2891", // object name
      "text": "This is some different text" // property and new value
    }
Updating the image
{
      "scene": "Scene 1", // scene name
      "object": "_md3ma3", // object name
      "background-image": "https://cdn.clipcat.com/assets/test_data/photography/barcelona-345efddb03cb628590e0e3a180b9b61d264a6e7756e5a11264da9112482207a9.jpg" // property and new value
    },
In the response, the render ID ( uid ) will be returned:
{
  "created_at": "2024-12-12T12:21:55.936Z",
  "uid": "mQqK6lZJw9XVrN0a7G",
  "self": "https://api.clipcat.com/v1/renders/mQqK6lZJw9XVrN0a7G"
  "status": "completed",
  "template": "rZYyExAwA2KzW42bVG"
  "url": "https://clipcat-media-local.s3.us-east-1.amazonaws.com/renders/xOv902dD4mVwPWjZGN/final/9600249b11153f703ce969029e486dd830c73d66.mp4",
  "modifications": [
    {
      "scene": "Scene 1",
      "object": "_ej2891",
      "text": "This is some different text"
    },
    {
      "scene": "Scene 1",
      "object": "_md3ma3",
      "background-image": "https://cdn.clipcat.com/assets/test_data/photography/barcelona-345efddb03cb628590e0e3a180b9b61d264a6e7756e5a11264da9112482207a9.jpg",
    },
  ],
  "metadata": null,
  "webhook_url": null,
  "credits": 12,
  "progress": 100
}
You can then send a GET request with the render ID to retrieve the result:
fetch(`https://api.clipcat.com/v1/renders/${UID}`, {
  method: 'GET',
  headers: {
    'Authorization' : `Bearer ${API_KEY}`
  }
})
🐱 Meow Memo: In a real-life scenario, you will need to keep polling the GET request until the render is complete to retrieve the final result. We’ll walk you through how to do this later in the article.
Creating Your First Video
Let's create a simple video using this template, swapping out the text and images:

Before you start, make sure you have:
- Node.js installed on your local machine
- A Clipcat account (sign up for a free account here, no credit card needed!)
🐱 Meow Memo: While this guide focuses on Node.js, Clipcat's API works with any language that can make HTTP requests.
Step 1. Create a Template
To use the template above, follow this link and duplicate the template into your Clipcat project.
Step 2. Set Up Your Node.js Project
In your terminal, run the commands below to create a new folder for your Node.js project and initialize it:
mkdir my-first-clipcat-video
cd my-first-clipcat-video
npm init
In your project root, create a .env file to store your Clipcat API key and template ID:
CLIPCAT_API_KEY=your_api_key_here
CLIPCAT_TEMPLATE_ID=your_template_id
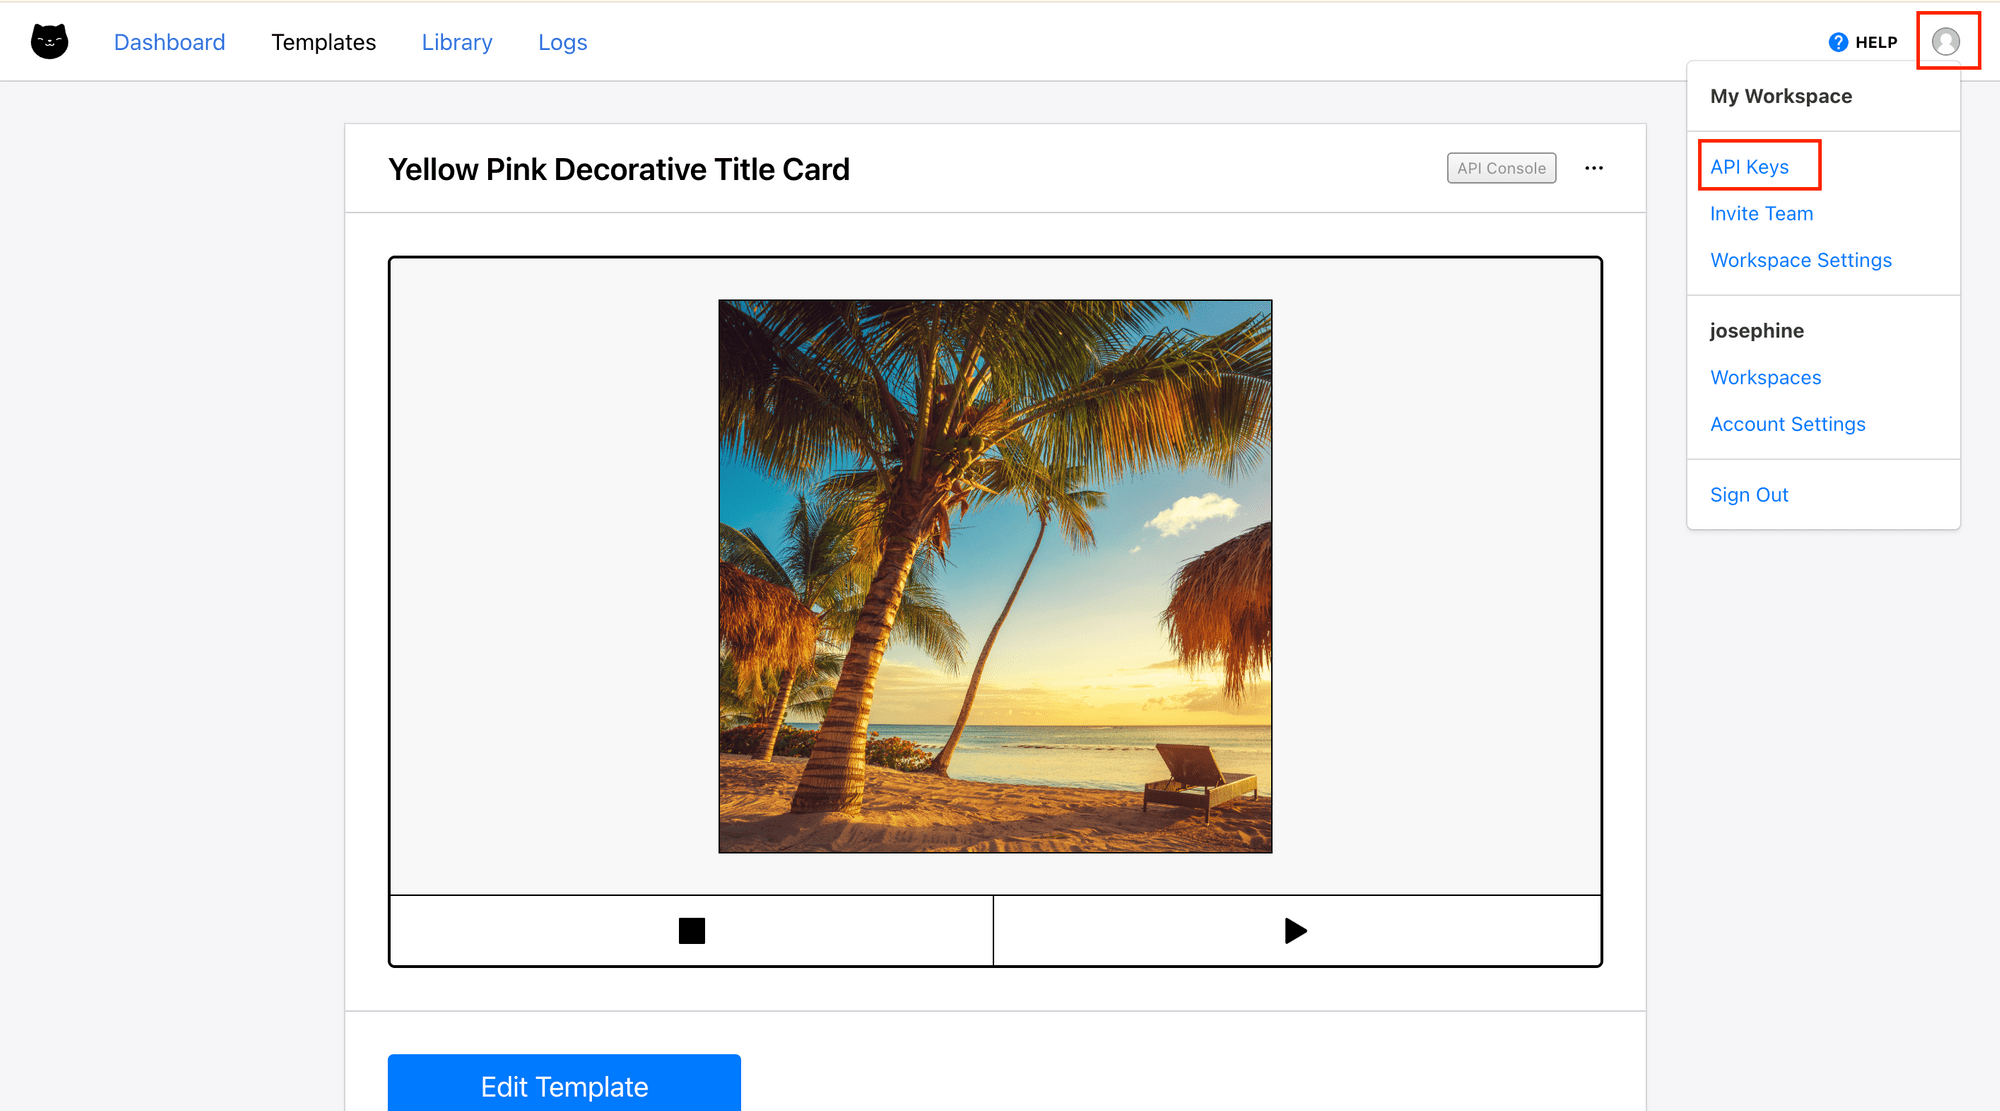
Your Clipcat API key can be found in your Clipcat dashboard by clicking the profile icon at the top right corner:
To get the template ID, click on the three dots at the template's the top right corner:

Step 3. Create the Video
Create a new file called index.js and add the following code:
async function generateVideo() {
  var data = {
    "template": process.env.CLIPCAT_TEMPLATE_ID,
    "modifications": [
      {
        "scene": "Scene 1",
        "background-image":
          "https://images.pexels.com/photos/2132126/pexels-photo-2132126.jpeg?_gl=1*14tqfli*_ga*MTg4MDE1MjgxMC4xNzIxODkxMzkz*_ga_8JE65Q40S6*czE3NjQ3NDg4OTMkbzMzJGcxJHQxNzY0NzQ5MDA3JGo1MyRsMCRoMA..",
        "object": "background",
      },
      {
        "scene": "Scene 1",
        "text": "3 Asia Cities to Visit in 2026",
        "object": "title",
      },
      {
        "scene": "Scene 2",
        "background-image":
          "https://images.pexels.com/photos/16386339/pexels-photo-16386339.jpeg?_gl=1*xdmson*_ga*MTg4MDE1MjgxMC4xNzIxODkxMzkz*_ga_8JE65Q40S6*czE3NjQ3NDg4OTMkbzMzJGcxJHQxNzY0NzQ5MTA2JGoxNCRsMCRoMA..",
        "object": "background",
      },
      {
        "scene": "Scene 2",
        "text": "Tashkent",
        "object": "title",
      },
      {
        "scene": "Scene 3",
        "background-image":
          "https://images.pexels.com/photos/12587256/pexels-photo-12587256.jpeg?_gl=1*1053uvg*_ga*MTg4MDE1MjgxMC4xNzIxODkxMzkz*_ga_8JE65Q40S6*czE3NjQ3NDg4OTMkbzMzJGcxJHQxNzY0NzQ5MTgzJGo0NiRsMCRoMA..",
        "object": "background",
      },
      {
        "scene": "Scene 3",
        "text": "Penang",
        "object": "title",
      },
      {
        "scene": "Scene 4",
        "background-image":
          "https://images.pexels.com/photos/3217663/pexels-photo-3217663.jpeg?_gl=1*1rvicp1*_ga*MTg4MDE1MjgxMC4xNzIxODkxMzkz*_ga_8JE65Q40S6*czE3NjQ3NDg4OTMkbzMzJGcxJHQxNzY0NzQ5MjkwJGo0NiRsMCRoMA..",
        "object": "background",
      },
      {
        "scene": "Scene 4",
        "text": "Siem Reap",
        "object": "title",
      },
    ],
  };
  const res = await fetch("https://api.clipcat.com/v1/renders", {
    "method": "POST",
    "body": JSON.stringify(data),
    "headers": {
      "Content-Type": "application/json",
      "Authorization": `Bearer ${process.env.CLIPCAT_API_KEY}`,
    },
  });

  const resData = await res.json();
  const renderUid = resData.uid;

  return renderUid;
}
This function sends a POST request to Clipcat with the new data to trigger the video rendering process and return the render ID.
Step 4. Retrieve the Video
In the same file, create another function:
async function getVideo(renderUid) {
  const res = await fetch(`https://api.clipcat.com/v1/renders/${renderUid}`, {
    "method": "GET",
    "headers": {
      "Authorization": `Bearer ${process.env.CLIPCAT_API_KEY}`,
    },
  });

  const data = await res.json();
  const videoUrl = data.url; // "url" will only have a value when the render is complete.

  console.log(videoUrl);
  return videoUrl;
}
This function checks the job status and returns the video URL.
Step 5. Putting it Together
Create a main function to call the two functions above to trigger the video rendering and retrieval processes:
async function main() {
  const renderUid = await generateVideo();

  let videoUrl;

  while (!videoUrl) {
    console.log(`Polling the result for render ID: ${renderUid}...`);
    videoUrl = await getVideo(renderUid);
    await new Promise((resolve) => setTimeout(resolve, 5000)); // wait 5 seconds before checking again
  }
}

main();
Video rendering takes time, so Clipcat processes videos asynchronously. Therefore, we call getVideo() in a while loop until a valid video URL is returned:
while (!videoUrl) {
    console.log(`Polling the result for render ID: ${renderUid}...`);
    videoUrl = await getVideo(renderUid);
    await new Promise((resolve) => setTimeout(resolve, 5000)); // wait 5 seconds before checking again
  }
🐱 Meow Memo: The function is called continuously at an interval of 5 seconds to avoid overwhelming the API.
Step 6. Running the Script
When you run the script, you should see the log printed in the console and the video URL returned when the job is done:
Polling the result for render ID: rMeKy9D2xA1zN4XAvZ...
null
Polling the result for render ID: rMeKy9D2xA1zN4XAvZ...
null
Polling the result for render ID: rMeKy9D2xA1zN4XAvZ...
https://media.clipcat.com/renders/9WnyLKzPoEEVMZYe4E/final/084372b1123816fd3efefd1cb17412a722464c35.mp4
Here’s the result:
Using Webhooks for Real-Time Updates
Other than polling for the render status, you can also set up webhooks to receive notifications when your video is ready:
var data = {
    "template": process.env.CLIPCAT_TEMPLATE_ID,
    "modifications": [
      {
        "scene": "Scene 1",
        "background-image":
          "https://images.pexels.com/image_url",
        "object": "background",
      },
      {
        "scene": "Scene 1",
        "text": "3 Asia Cities to Visit in 2026",
        "object": "title",
      },
      {
        "scene": "Scene 2",
        "background-image":
          "https://images.pexels.com/image_url_2",
        "object": "background",
      },
      {
        "scene": "Scene 2",
        "text": "Tashkent",
        "object": "title",
      },
      {
        "scene": "Scene 3",
        "background-image":
          "https://images.pexels.com/image_url_3",
        "object": "background",
      },
      {
        "scene": "Scene 3",
        "text": "Penang",
        "object": "title",
      },
      {
        "scene": "Scene 4",
        "background-image":
          "https://images.pexels.com/image_url_4",
        "object": "background",
      },
      {
        "scene": "Scene 4",
        "text": "Siem Reap",
        "object": "title",
      },
    ],
    "webhook_url": "https://webhook.site/031c1514-237c-4ef0-a95d-0c027e8925a1" // add webhook URL here
  };
Clipcat will send a POST request to the webhook URL when rendering is done. Here's a screenshot of the result returned when testing with Webhook.site:

🐱 Meow Memo: Webhooks are more efficient than polling and allow your application to respond immediately when videos are ready.
That's It!
You now have everything you need to start creating videos programmatically with Clipcat Video API. Feel free to experiment with different layer types, effects, and compositions following the guides below:
- Create Engaging Video Overlays with Rectangles, Circles, and Text in Clipcat: A Guide with Examples
- 5 Dynamic Text Animations You Can Add to Your Clipcat Videos [+ Templates!]
- Clipcat's Crash Course to Designing Lower Thirds (+ Video Template Guide)
And if you need more template design inspirations, check out the Template Library!