A Beginner’s Guide to FFmpeg-Python: How to Convert Video Formats
Contents
Handling video files in projects can be tricky, whether you’re building a web application, preparing videos for machine learning, or creating a custom video processing pipeline. Sometimes the files are too big, or the formats don’t work on all devices.
FFmpeg is a powerful tool for tackling these problems, but managing the CLI commands in your Python code can be complicated. Luckily, there's a library called ffmpeg-python that lets you use FFmpeg with Python syntax instead. This makes it easier to read and maintain compared to running the CLI commands using the subprocess module in Python.
In this article, I’ll show you how to convert videos using the ffmpeg-python library and adjust things like resolution, codec, bitrate, and CRF depending on what you need.
Setting Up the Environment
Before you can start converting videos with ffmpeg-python, make sure both FFmpeg and the Python wrapper (ffmpeg-python) are installed on your machine:
- FFmpeg is the actual engine that handles all the video and audio work, like reading files, trimming, encoding, and more.
- ‘ffmpeg-python’ is the Python wrapper that lets you build FFmpeg commands using Python code, so you don’t have to write them out in the command line.
Step 1. Install FFmpeg
Follow this step-by-step guide to install FFmpeg on your Mac, Windows, or Ubuntu/Linux. Once it’s installed, you can run ffmpeg -version in your terminal/command prompt to verify the installation.
Step 2. Install ‘ffmpeg-python’
Install the Python wrapper using pip:
pip install ffmpeg-python
This package gives you access to a Pythonic interface to FFmpeg's functionalities.
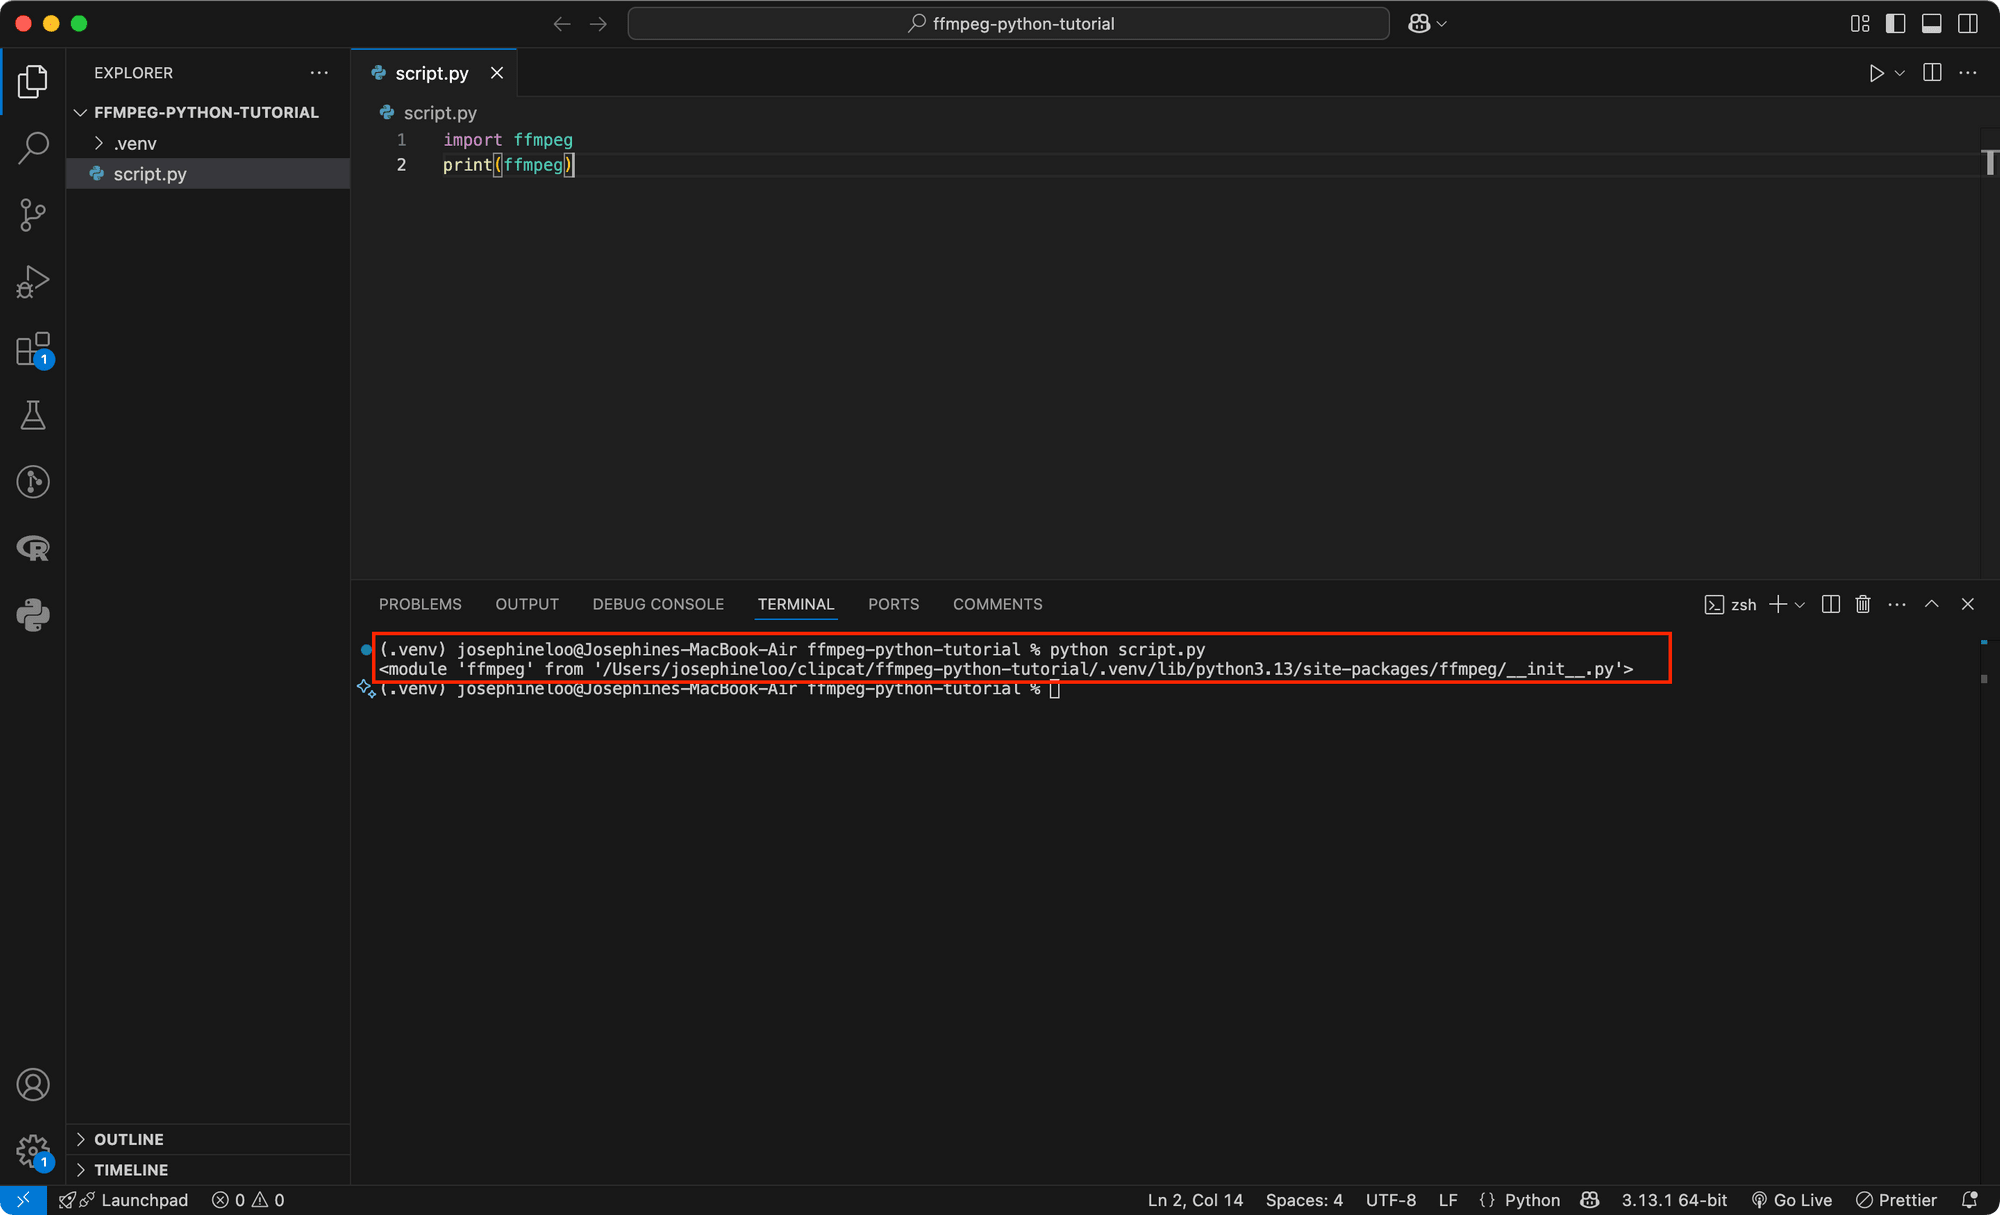
Step 3. Test Your Setup
Open a Python shell or create a script, and execute the code below:
import ffmpeg
print(ffmpeg)
If this runs without error, your setup is complete!
Understanding Video Format Conversion with FFmpeg
Before jumping into code, let’s take a quick look at some of the FFmpeg flags you’ll often use when converting video formats:
i: This flag specifies the input file.c:v: Sets the video codec (e.g.,libx264for H.264 encoding).c:a: Sets the audio codec (e.g,aacfor AAC audio).crf: Controls video quality when using certain codecs like H.264 (lower = better quality, higher = smaller file).vf: For applying a video filter (used when applying filters likescale,trim,crop, or other transformations)
Here’s an example of a simple CLI command that converts a .mov video to .mp4:
ffmpeg -i input.mov output.mp4
The command above takes input.mov as the input (-i input.mov) and saves the result as output.mp4.
🐱 Meow Memo: To convert your video to a different format, just change the output filename to the format you want (e.g.,
output.mkv).
How to Convert Video Formats with FFmpeg in Python
Now let’s look at how to write Python code to convert video formats.
Basic Video Conversion Using ‘subprocess’
The code below uses Python’s subprocess module to run the same FFmpeg command you’d normally type in the terminal, but directly from your Python script:
import subprocess

command = ['ffmpeg', '-i', 'input.mov', 'output.mp4']
subprocess.run(command, check=True)
While using subprocess to run an FFmpeg command in Python may seem simple in the example above, it can quickly become difficult to manage and prone to errors as the complexity of the FFmpeg commands increases. Plus, there’s the risk of running into platform-specific issues, since the command-line syntax differs on Windows, Linux, and macOS.
Basic Conversion Using ‘ffmpeg-python’
On the other hand, using ffmpeg-python is generally cleaner and more maintainable. The code below does the same thing as the earlier one, but using ffmpeg-python:
import ffmpeg

(
  ffmpeg
  .input('input.mov')
  .output('output.mp4')
  .run()
)
This approach is cleaner and easier to read. You can also chain more options, like codec or resolution, without worrying about argument ordering or handling quotation marks.
Advanced FFmpeg Video Conversion: Adjusting Resolution, Codec, Bitrate, and CRF
Converting the video format is just the basic. In many real-world situations, you might also want to adjust things like resolution, codec, or bitrate to better suit different use cases. Here are a few common scenarios:
- Reducing file size for web or mobile apps : To make sure the videos load faster or meet upload limits, especially for users on slower internet.
- Preparing videos for social media: Different platforms, like Instagram, TikTok, or YouTube, have preferred resolutions and codecs for optimal quality.
- Saving storage space: If you’re saving large videos on the cloud or sending them via email, reducing the resolution or bitrate can save storage space.
- Ensuring playback compatibility across devices: Not all devices support formats like
.movor codecs likeprores, so converting to something like.mp4with H.264 ensures wider compatibility. - Standardizing format across a batch of videos: When dealing with videos from multiple sources, standardizing the format, resolution, and codec is good for consistency in editing or streaming.
Let’s go through a few common adjustments with simple examples, so you can see how each one works!
Changing Video Resolution
If you want to downscale a large video for faster streaming or to fit device or platform requirements, you can change the video's size (width and height) and adjust the resolution using the scale filter:
import ffmpeg

(
  ffmpeg
  .input('input.mov')
  .filter('scale', 1280, 720) # Scale video to 1280x720 resolution
  .output('output.mp4')
  .run()
)
.filter('scale', 1280, 720) tells FFmpeg to use the scale filter and resize the video to 1280 px wide and 720 px tall while converting the input video to an MP4 format.
🐱 Meow Memo: If your original video has a different aspect ratio, it might get stretched or squashed to fit the new width and height.
To rescale a video while preserving the original aspect ratio, you can set one dimension explicitly (width or height) and let FFmpeg calculate the other automatically by passing -1 for that dimension.
For example, if you want to scale the width to 1280 px but keep the aspect ratio the same, you set the height to -1:
import ffmpeg

(
	ffmpeg
	.input('input.mov')
	.filter('scale', 1280, -1) # Set width to 1280, height auto-calculated to keep aspect ratio
	.output('output.mp4')
	.run()
)
Same goes the other way around, set the width to -1 if you’re fixing the height:
import ffmpeg

(
	ffmpeg
	.input('input.mov')
	.filter('scale', -1, 720) # Set height to 720, width auto-calculated to keep aspect ratio
	.output('output.mp4')
	.run()
)
Changing Video Codec
The codec defines how your video is compressed and decompressed. Different codecs affect things like file size, video quality, streaming performance, and the video’s compatibility across different devices.
For example, the script below converts a video from MOV format to MP4 format using the H.265 (libx265) codec:
import ffmpeg

(
  ffmpeg
  .input('input.mov')
  .output('output.mp4', vcodec='libx265') # Set video codec to H.265
  .run()
)
By default, FFmpeg will convert videos to MP4 using the H.264 (libx264) codec. If you want to use a different codec to achieve a different file size, quality, etc., you can just specify it explicitly, like in the example above.
Adjusting Bitrate
Bitrate controls the amount of data used per second of video. Lower bitrate means smaller file size, but the quality might drop. Higher bitrate gives better quality, but the file size will be bigger.
Here’s how you can adjust the bitrate when converting a video from one format to another:
import ffmpeg

(
  ffmpeg
  .input('input.mov')
  .output('output.mp4', video_bitrate='64k')
  .run()
)
video_bitrate='64k' sets the video bitrate to 64 kilobits per second. This helps reduce the file size and can be useful if you’re dealing with online streaming or slow internet connections.
🐱 Meow Memo: Keep in mind that setting the bitrate too low may cause noticeable quality loss.
Adjusting CRF (Constant Rate Factor)
While adjusting the bitrate lets you control the video’s size, changing the CRF lets you control the quality. When you adjust the CRF value, the encoder will automatically adjust the bitrate as needed to maintain the quality level you set.
Here’s an example:
import ffmpeg

(
  ffmpeg
  .input('input.mov')
  .output('output.mp4', vcodec='libx264', crf=20)
  .run()
)
The code above converts a MOV video to MP4 with the H.264 (libx264) codec, and sets the CRF to 20 to ensure a high-quality output.
🐱 Meow Memo: The CRF range varies depending on the codec. Generally, the lower the CRF, the better the quality (and bigger the file size), and vice versa.
Conclusion
The ffmpeg-python library makes it much easier to work with FFmpeg in Python for video processing. Your code becomes more readable, manageable, and flexible. In this article, we’ve covered how to convert video formats, but that’s just one of the many things you can do. If you’d like to explore more, feel free to check out these guides:
- A Beginner’s Guide to Using FFmpeg in Python for Video Processing-
- A Beginner’s Guide to FFmpeg-Python: How to Trim Videos
- How to Crop and Resize Videos Using FFmpeg
And if you’re looking for a faster way to automate your video editing workflow without writing all the code yourself, try Clipcat. It gives you a user-friendly interface to design video templates and an API that lets you automate the editing process easily.
🐱 Meow Memo: Want to learn more about Clipcat API? Check out this guide to get started: Getting Started with Clipcat API: A Step-by-Step Guide to Automating Video Creation